Web scraping uses automated software tools or scripts to extract and parse data from websites into structured formats for storage or processing. Many data-driven initiatives—including business intelligence, sentiment analysis, and predictive analytics—rely on web scraping as a method for gathering information.
However, some websites have implemented anti-scraping measures as a precaution against the misuse of content and breaches of privacy. One such measure is IP blocking, where IPs with known bot patterns or activities are automatically blocked. Another tactic is rate limiting, which restricts the volume of requests that a single IP address can make within a specific time frame.
These measures, targeted at IP addresses, can hinder data collection efforts during scraping. The good news is that you can circumvent these measures by generating random IP addresses, which is exactly what we'll teach you how to do in this article.
How to Generate Random IPs for Web Scraping
Before beginning this tutorial, make sure you have Node.js (which ships with npm) installed on your local machine. You'll also need Puppeteer, a Node.js library, for your web scraping setup.
After you've confirmed your Node.js installation, create a new directory and initialize a JavaScript project in it:
npm init esnext
Then, install Puppeteer in the directory like this:
npm install puppeteer
The website httpbin.org shows the IP address of any client that makes a request to it. For that reason, let's make it the target and scrape the /ip endpoint with Puppeteer to get your current IP address.
Create the file scraper.js in your project directory and add the following code:
import puppeteer from 'puppeteer';

(async () => {
  // Launch the browser
  const browser = await puppeteer.launch({
    // Launch in headless mode
    headless: 'new',
  });
  // Open a new blank page
  const page = await browser.newPage();
  // Navigate the page to target URL
  await page.goto('https://httpbin.org/ip');
  // Get body element
  const bodySelector = await page.waitForSelector('body');
  // Get the content of body element
  const textContent = await bodySelector?.evaluate((el) => el.textContent);
  // Print the content
  console.log(textContent);
  // Close browser
  await browser.close();
})();
Run the scraper code using node scraper.js, and you should get a response in the following format:
{
  "origin": "your_public_ip_address"
}
Here, the value of the "origin" key is your public IP.
You'll notice that if you run the code multiple times, you may get a slightly different IP address due to your ISP configuration. Your ISP may dynamically assign public IP addresses to its customers or change the public ID frequently as a security measure.
Methods That Generate Random IP Addresses
There are three main methods to generate random IP addresses: a virtual private network (VPN), a proxy service with rotating proxies, or Tor, a web browser designed to provide anonymity and privacy for users. Let's take a look at each in a little more detail.
VPN
With a VPN, you can hide your IP address and protect your data as it travels over the internet. Proton VPN, in particular, is known for its unlimited bandwidth and strong focus on privacy and security.
To generate a random IP address with Proton VPN, start by installing the free and open source version of the Proton VPN app that's compatible with your OS.
Open the app, create a free account (if you don't have one), and then sign in with your username and password:
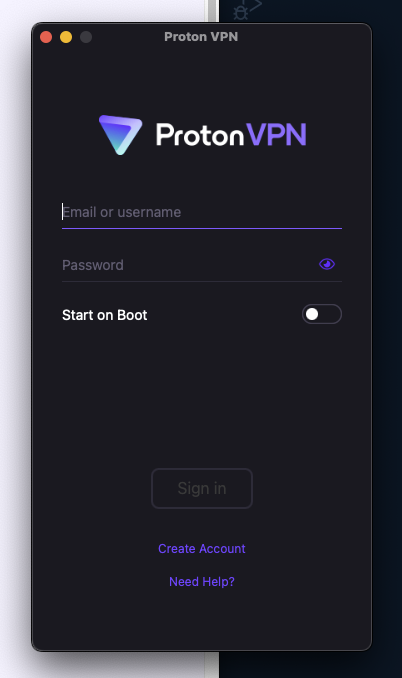
After you've signed in, click on the Quick Connect button and you'll be connected and assigned a new IP address:
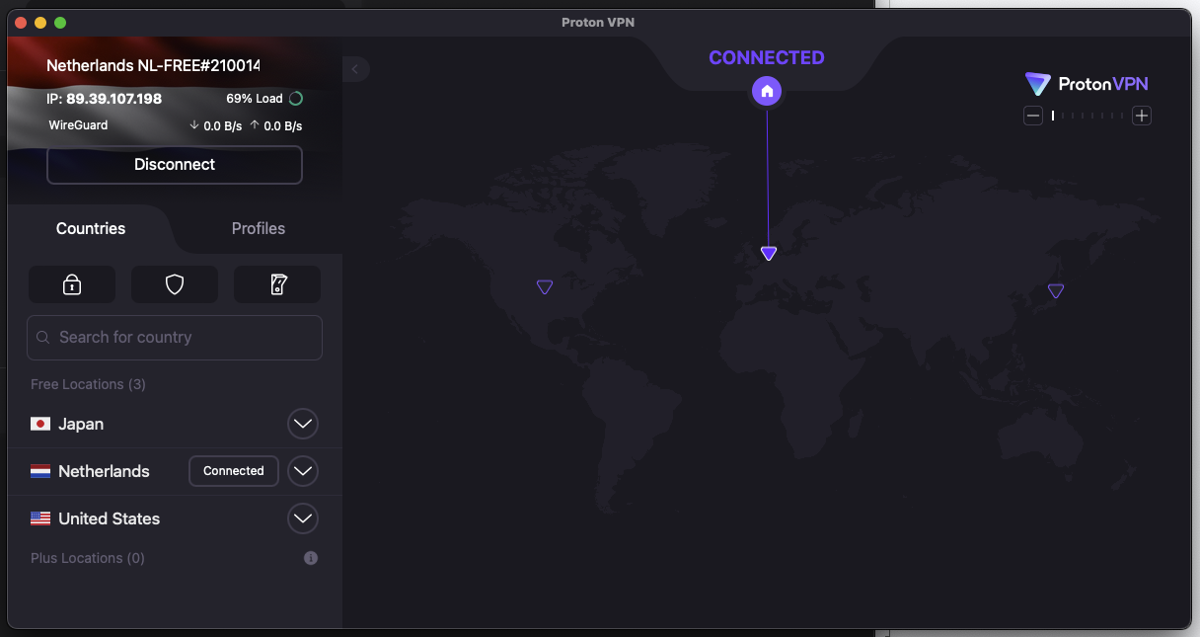
Run the scraper code provided previously, and this time, the assigned IP will be printed as your public IP address:
{
  "origin": "89.39.107.198"
}
The downside to this method is that if you want a different random IP, you'll have to manually reconnect to another server using the default random profile on Proton VPN:
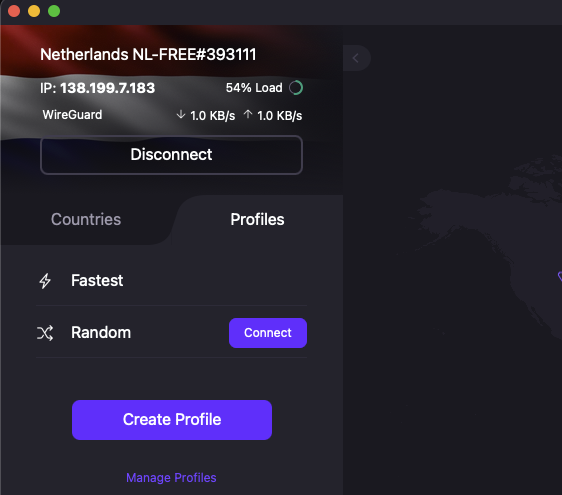
Programmatic reconnection to another server can't be done because Proton VPN, like many other VPN services, operates as a standalone service and does not provide any public API for programmatic control.
Proxy Service
Manually changing your IP address, such as when using a VPN, may not be suitable for your web scraping workflow because it requires user intervention and can be time-consuming and impractical for large-scale automated scraping. A more convenient option is to use a proxy service, which acts as an intermediary between you and your target website. By serving as a gateway, a proxy service routes all data traffic and requests to your target website while masking your IP address in the process.
If you choose to go with a proxy service, you can either opt for rotating proxies or a tool like Tor.
Rotating Proxies
Rotating proxies are a type of proxy service that lets you use a series of different IP addresses to make requests to your target website. These IP addresses can be configured to change on their own at set times, such as every few minutes or when a new request is made. This rotation anonymizes you and helps bypass website restrictions, including IP bans and rate limits.
When it comes to proxies, you have two options: free and premium. Free proxies, as the name implies, are those available at zero cost. However, they come with some downsides, including unreliability, slow speed, and easy bot detection. In comparison, premium proxies are paid and more reliable and offer features that are not present in free proxies, like anti-bot detection and security.
Free proxies do not rotate your IP address frequently. However, if you want to ensure that your scraper constantly rotates its IP address when using free proxies, you can use multiple free proxies and programmatically rotate through them.
To do this, you need to start by assembling a pool of free proxy addresses to use from this free proxy list:
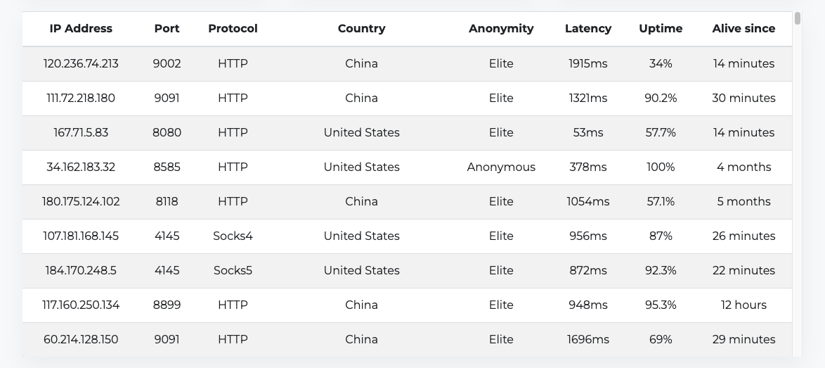
The proxy addresses should have their protocol, IP address, and port in this format:
PROTOCOL://IP_ADDRESS:PORT
Common proxy protocols include HTTP, HTTPS, SOCKS4, and SOCKS5. Kindly note that when selecting free proxies, it's advisable to go with the ones that have a decent uptime, like 90 percent and above, as well as lower latency.
Now, you need to create a separate function that gets a random proxy from your pool of proxies:
const getRandomProxy = () => {
  const proxies = [
      'http://50.174.7.156:80',
      'http://201.182.251.142:999',
      // ...
      'http://200.123.15.250:999'
  ];
  // Return random proxy
  return proxies[Math.floor(Math.random() * proxies.length)];
}
Make sure you change the addresses in the proxies array to the ones you got from the free proxy list as the ones in this code may no longer be active.
When you integrate the getRandomProxy() function into the main scraper code, your code will look like this:
(async () => {
  const randomProxy = getRandomProxy();
  // Launch the browser
  const browser = await puppeteer.launch({
    // Launch in headless mode
    headless: 'new',
    args: [`--proxy-server=${randomProxy}`],
  });
  // Open a new blank page
  const page = await browser.newPage();

  // …

  // Close browser
  await browser.close();
})();
Run the code three times, and you'll get a random IP each time:
{
  "origin": "201.182.251.142"
}

{
  "origin": "50.174.7.156:80"
}

{
  "origin": "50.174.7.156:80"
}
There are a few downsides to using rotating free proxies. For instance, free proxies are not guaranteed to be up every time, and managing the pool of proxies yourself can be difficult, which is why many developers use Tor.
Tor
Tor, short for "The Onion Router," is a system of servers run by volunteers that provides an extra layer of anonymity when you're surfing the web. When you use Tor, your data travels through a network of volunteer-run nodes or relays until it reaches its destination at the exit node. Each node removes one layer of encryption, revealing the address of the next node in the chain. This process conceals your IP address and uses that of the exit node instead, which changes frequently.
To use Tor as a proxy, you'll need a Tor client. It's strongly advised that you run the official client yourself, either locally or remotely. In most cases, installing and running Tor requires only a single command.
On macOS, install Tor with Homebrew using the following:
brew install tor
You can use a fairly recent version of Tor on Debian or Ubuntu by running the following:
apt install tor
Installing Tor on Windows requires downloading the Tor expert bundle (not the browser) and unzipping it. Then, you'll be able to run Tor using ./path/to/unzipped_folder/tor.exe in the terminal.
For more information on installing Tor, check out the community installation guide.
Unlike most VPNs, Tor can be programmatically controlled, and you can leverage that to refresh the session every time you need to change the proxy IP address without needing to manually restart the Tor client.
Tor's control port, which lets Tor listen for local connections, has to be enabled to programmatically control it. You also need to use a hashed password to authenticate with Tor.
You can create the hashed password by running tor –hash-password PASSWORD in your terminal like this:
tor —hash-password rand-ip
This command will print out the hashed password like this:
16:F62E0303D31A6865601124F0179397BDFB93221D3355DA6A96936343F7
A TORRC file is used to configure Tor; with it, you can tell Tor the control port and hashed password to use.
To create a TORRC configuration file in the same directory as your scraper code, add the following:
# The port on which Tor will listen for local connections
ControlPort 9051
# Authenticate with password
HashedControlPassword 16:F62E0303D31A6865601124F0179397BDFB93221D3355DA6A96936343F7
Replace the HashedControlPassword with the one you generated and run the Tor client, specifying TORRC, with this command:
tor -f ./torrc
This will start Tor on its default host, 127.0.0.1, and open a SOCKS proxy on its default port, 9050:
# …
Sep 01 06:00:34.000 [notice] Bootstrapped 90% (ap_handshake_done): Handshake finished with a relay to build circuits
Sep 01 06:00:34.000 [notice] Bootstrapped 95% (circuit_create): Establishing a Tor circuit
Sep 01 06:00:36.000 [notice] Bootstrapped 100% (done): Done
This means that you can now use Tor as a proxy via the address:
socks5://127.0.0.1:9050
To renew the Tor session (that changes your IP address), you'll need the tor-request library to communicate with Tor using JavaScript.
Note: There are libraries for other languages if you aren't using JavaScript, such as
[TorUtils](https://github.com/dapphp/TorUtils)for PHP or[torpy](https://pypi.org/project/torpy/)for Python.
Install the tor-request library with npm:
npm install tor-request
Then, import the library in your scraper code and write a simple function that renews the Tor session:
import puppeteer from 'puppeteer';
import tr from 'tor-request';

const renewTorSession = () => {
  return new Promise((resolve, reject) => {
    // Set the default ControlPort
    tr.TorControlPort.port = 9051;
    // Set the password for authenticating with tor
    tr.TorControlPort.password = 'rand-ip';
    tr.newTorSession((err) => {
      // Log error if session failed to be renewed
      if (err) return reject(err);
      // Session renewed
      console.log('New session renewed');
      resolve();
    });
  });
}
This function returns a promise that will be rejected if an error occurs or will be resolved if the session is renewed.
Let's update your main scraper code to use the renewTorSession() function and the Tor SOCKS proxy:
(async () => {
  // To hold browser instance
  let browser;
  try {
    // Create new tor session (To get a new IP)
    await renewTorSession ();
    // Use Tor as a SOCKS5 proxy (It opens one by default on port 9050)
    // Launch the browser
    browser = await puppeteer.launch({
      // Launch in headless mode
      headless: 'new',
      args: ['--proxy-server=socks5://127.0.0.1:9050'],
    });
    // Open a new blank page
    const page = await browser.newPage();
    // Navigate the page to target URL
    await page.goto('https://httpbin.org/ip');
    // Get body element
    const bodySelector = await page.waitForSelector('body');
    // Get the content of body element
    const textContent = await bodySelector?.evaluate((el) => el.textContent);
    // Print the content
    console.log(textContent);
  } catch (err) {
    console.log('Error: ', err);
  } finally {
    // Close browser
    await browser?.close();
  }
})();
Run the code multiple times, and your IP address will change each time:
{
  "origin": "185.220.100.240"
}

{
  "origin": "79.137.198.213"
}

{
  "origin": "104.244.73.136"
}
// …
While changing your IP address with Tor works, there are potential drawbacks to consider with this method as well. Since Tor only encrypts traffic between nodes, malicious exit nodes may monitor or tamper with unencrypted traffic. Additionally, Tor's high level of anonymity is not foolproof, and there may be IP address leaks. Moreover, congestion on the Tor network can degrade connection speeds, and some websites are able to block access from Tor exit nodes.
In addition, in the context of web scraping, changing your IP address only protects you from IP bans. There are a lot of other challenges that you'll likely encounter during web scraping, like CAPTCHAs, user-agent detection, browser fingerprinting, honeypot traps, rate limiting, and required logins.
The best solution to avoid all these issues is to use a dedicated web scraping service.
Web Scraping Service
Web scraping services provide individuals and businesses with access to the necessary tools, infrastructure, and resources they need to make web scraping a simple and efficient process.
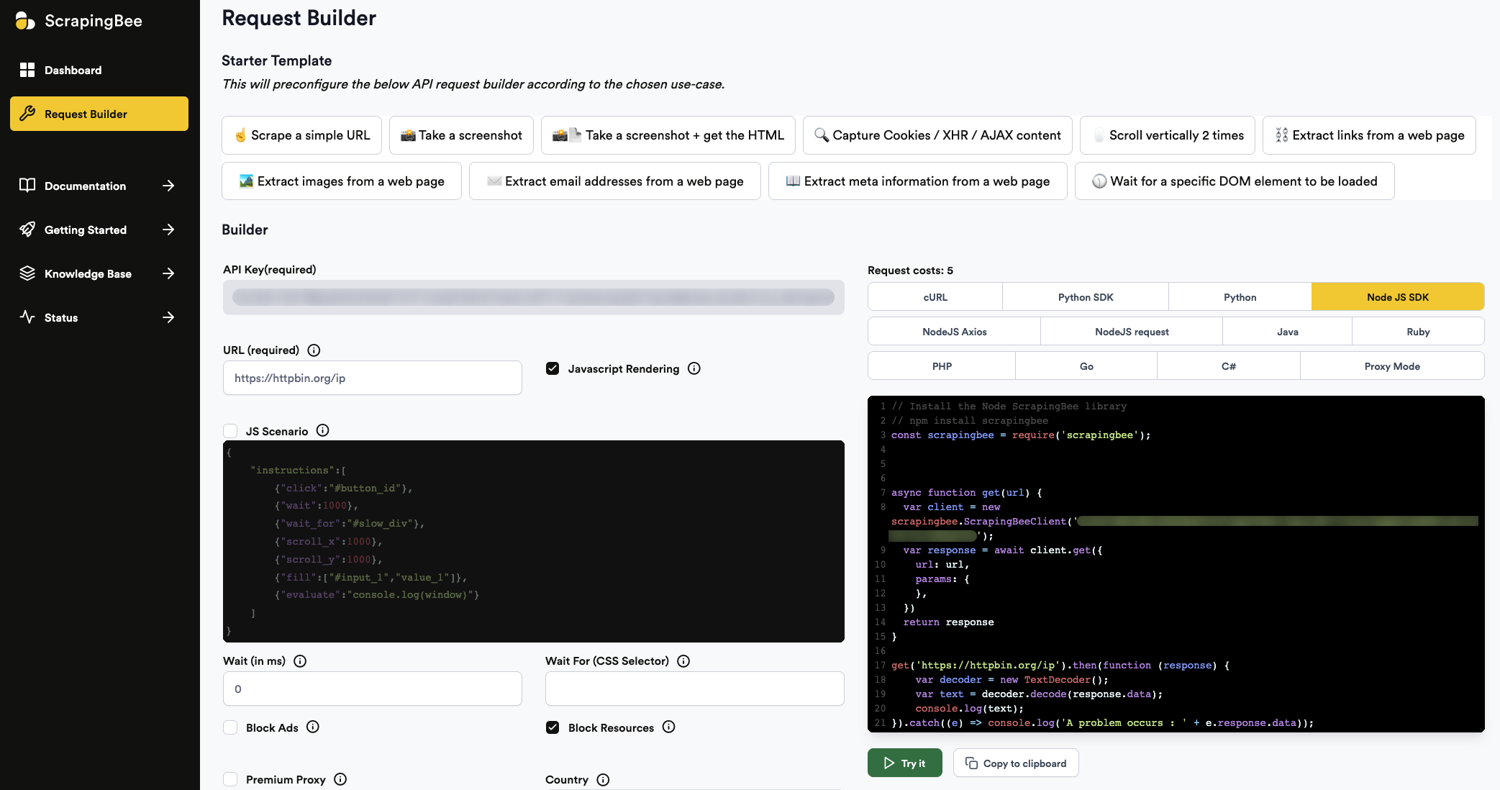
ScrapingBee provides an easy-to-use API and a user-friendly interface for configuring web scraping tasks. IP rotation, headless browser control, proxy management, and anti-measures are provided out of the box for a smooth scraping experience.
To get started using ScrapingBee to change your IP address, you'll need an account. Once you're logged in, you'll have access to some free API credits and the request builder, where you'll see your API key:
Install the Node.js ScrapingBee library:
npm install scrapingbee
And update your scraper code:
import scrapingbee from 'scrapingbee';

(async () => {
  try {
    const client = new scrapingbee.ScrapingBeeClient('<YOUR_SCRAPINGBEE_API_KEY>');
    const response = await client.get({
      url: 'https://httpbin.org/ip',
    })
    const decoder = new TextDecoder();
    const textContent = decoder.decode(response.data);
    console.log(textContent);
  } catch (error) {
    console.log('Error: ', error);
  }
})();
Then, update <YOUR_SCRAPINGBEE_API_KEY> with your API key from your request builder and run the code multiple times. Each time, you'll get a different IP address:
{
  "origin": "77.83.233.117"
}

{
  "origin": "38.170.8.53"
}

{
  "origin": "66.146.238.60"
}
Aside from using the ScrapingBee package, you can directly use the API or the proxy frontend, which makes integration with third-party tools easier.
You can find all the code used in this article in this GitHub repo.
Conclusion
The ability to dynamically change IP addresses is a valuable tool to enhance anonymity, bypass IP bans, distribute scraping requests, and access geo-restricted content. After reading this article, you now know how to generate IPs using methods such as VPNs and free proxies. You also know that the best method is to use a web scraping service like ScrapingBee.
ScrapingBee is capable of managing rotating proxies and headless browsers using the latest Chrome version. It provides everything you need for a smooth web scraping experience so you can focus on extracting the data you need.
If you prefer not to have to deal with rate limits, proxies, user agents, and browser fingerprints, please check out our no-code web scraping API. Did you know the first 1,000 calls are on us?
Before you go, check out these related reads: