Taking the time to read through target pages is usually not the best idea. It's too time-consuming and it's easy to miss important changes when you're scrolling through hundreds of pages. Therefore, learning how to perform updates automatically without the need for coding skills is crucial.
In this tutorial, we will scrape jobs from indeed.com, one of the most popular job aggregator websites. Web scraping is an excellent tool for finding valuable information from a job listing database.
There is no doubt that the website is loaded regularly with data. With Indeed and ScrapingBee, you can search for millions of jobs, CVs, company reviews and more online. You can curate city-specific or industry-specific listings that only display jobs from a particular city or industry.
Here's what we'll do:
- Search for Customer Service-related jobs posted to a number of cities on indeed.com.
- Implement a ScrapingBee function on Make (formerly Integromat) to retrieve job listings, details and other relevant information
- Store all extracted data in a spreadsheet for further cleaning and analysis
- Send these job details via email or newsletter campaign
- Create an alert for new job listings
- Schedule the scenario to run at least once a day

Why Scrape Product Data from job listing sites?
In case you are wondering why you even need to scrape data from Indeed, let’s take a look at what you can do with Indeed data.
There are a number of reasons why you might want to extract data from job listing sites:
- You own a job board or newsletter
- You're on the job market and are on the hunt for a new and interesting job
- You want to find out which companies are hiring, what roles are in demand, and how much the average salaries are
- You’re interested in job statistics to find the next step in your career
A web scraping tool can help you gather all the product data from a specific category, and export scraped data as visual formats like spreadsheets, CSVs, or databases. You can use ScrapingBee to collect job posting information and parse it out for you in a nice tidy format!
If you’re new to no-code web scraping, we have an article exploring the many aspects of no-code web scraping for coders and no-coders.
Now let’s get into gathering and parsing information from Indeed’s pages very easily using our scraper API!
Getting started
We have a clear picture of what we need to do and how web scraping can help. Let's start putting these ideas into action.
ScrapingBee is a Web Scraping API that handles proxies and Headless browsers for you, so you can focus on extracting the data you want, and nothing else.
The API also allows you to:
- Extract complex structured information from any website with CSS selectors
- Run JavaScript scenario
- Take a screenshot of the website, the full page, a part of the screen
First, get your ScrapingBee account if you haven't already got one. For this tutorial, you’d also need a Make (formerly Integromat) account.
Extract data from CSS selectors
To use ScrapingBee to pull visible content from a series of Indeed pages, it will be helpful to analyze the URL and page structure. All of the information on the page is coded with HTML (HyperText Markup Language) tags.
When using ScrapingBee to load a specific CSS element, you must pass the CSS selector from Indeed.com's page link.
If you don't know how CSS selectors work, check out our No Code Competitor Monitoring tutorial about how to do it. It doesn't require any coding knowledge, and it's very easy to put into practice.
The URL of the page we want to scrape in this tutorial is https://uk.indeed.com/jobs?q=Customer%20Service.
We will start by extracting the following information for the purpose of this tutorial:
- Job title
- Link
- Company name
- Company location
- Salary
Depending on your requirements, you can add more to these. You can choose to pull the job summary details or rating. The general syntax for extract rules is:
{ "key_name" : "css_selector" }
Extraction rules can be quite complex for those not familiar with CSS. You may be interested in reading the documentation for more details about how it works.
By adding extraction rules to your API call, we are able to extract data from pages without parsing the HTML on your end. We pass multiple variables, along with the CSS selector to populate the variable.
The HTML structure of each listing is basically identical, so we can run our scenario on all of them and get all the details quickly.
If you want to get all elements matching the selector, you should use the list type option. Since we want all job listings on the page and not just one, we use the type list.
{
	"results": {
		"selector": "a.tapItem.fs-unmask.result.resultWithShelf.sponTapItem.desktop",
		"type": "list",
		"output": {
			"link": {
				"selector": "a.tapItem.fs-unmask.result.resultWithShelf.sponTapItem.desktop",
				"output": "@href"
			},
			"title": "h2.jobTitle>span",
			"name": "span.companyName",
			"location": "div.companyLocation",
			"salary": "div.salary-snippet"
		}
	}
}
This will return a list of all elements matching the selector. The information extracted by the above rules would be:
"link": "/rc/clk?jk=0d5c8c0dfe43c3d5&fccid=057e594637329eab&vjs=3",
"title": "Customer Service Advisor",
"name": "City of Westminster Council",
"location": "Westminster",
"salary": "£27,009 - £30,063 a year"
You can also discover this feature using our Postman collection covering every ScrapingBee's features.
Test your API Call on ScrapingBee
Let’s use the ScrapingBee Dashboard to test our API calls and quickly see how each of these settings works. To get started, you just need to create an account here.
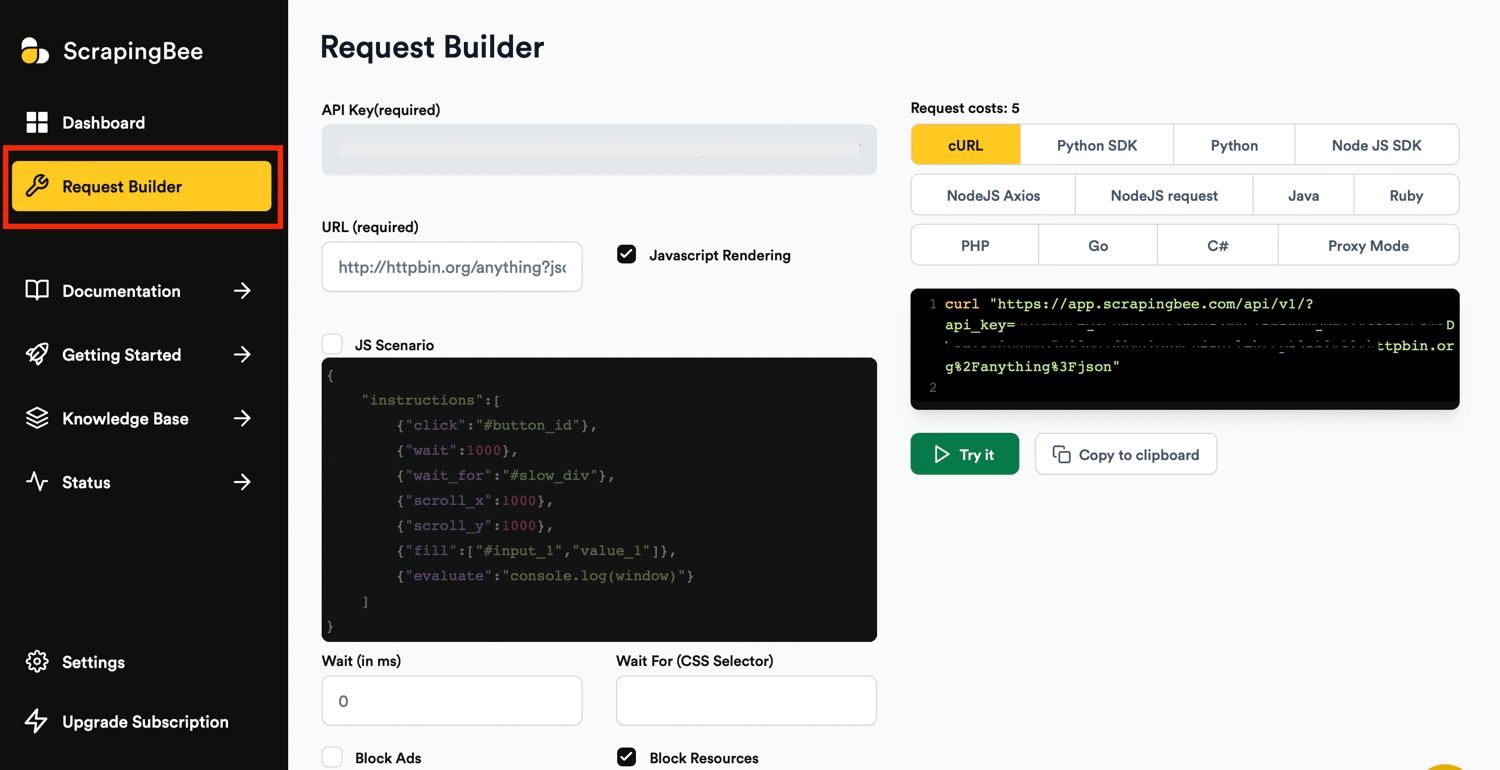
You can set up each action you want to perform using the respective fields in the Request Builder:
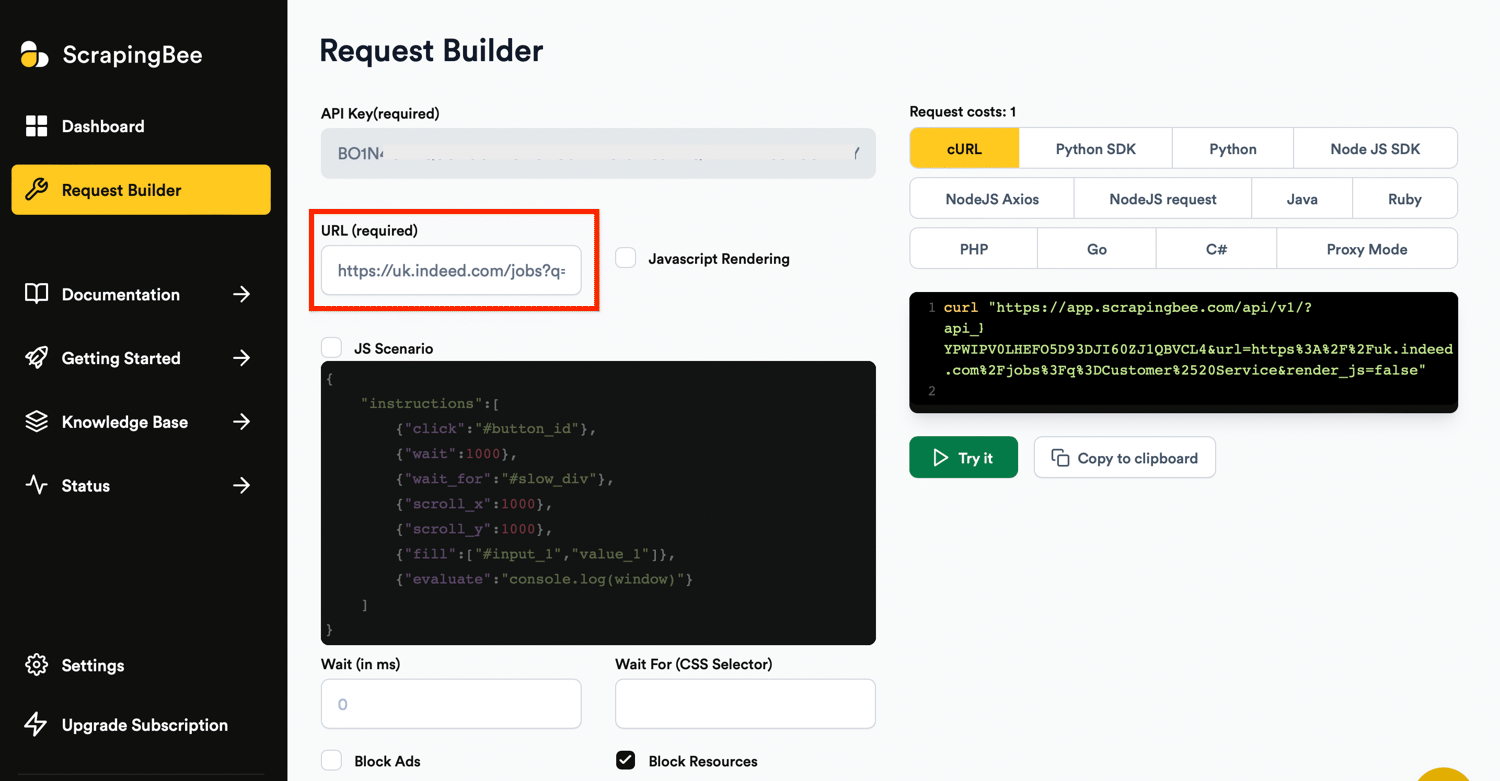
Input the link in the URL field and uncheck the Javascript Rendering. Rendering the JavaScript on the page with a headless browser cost 5 credits/request:
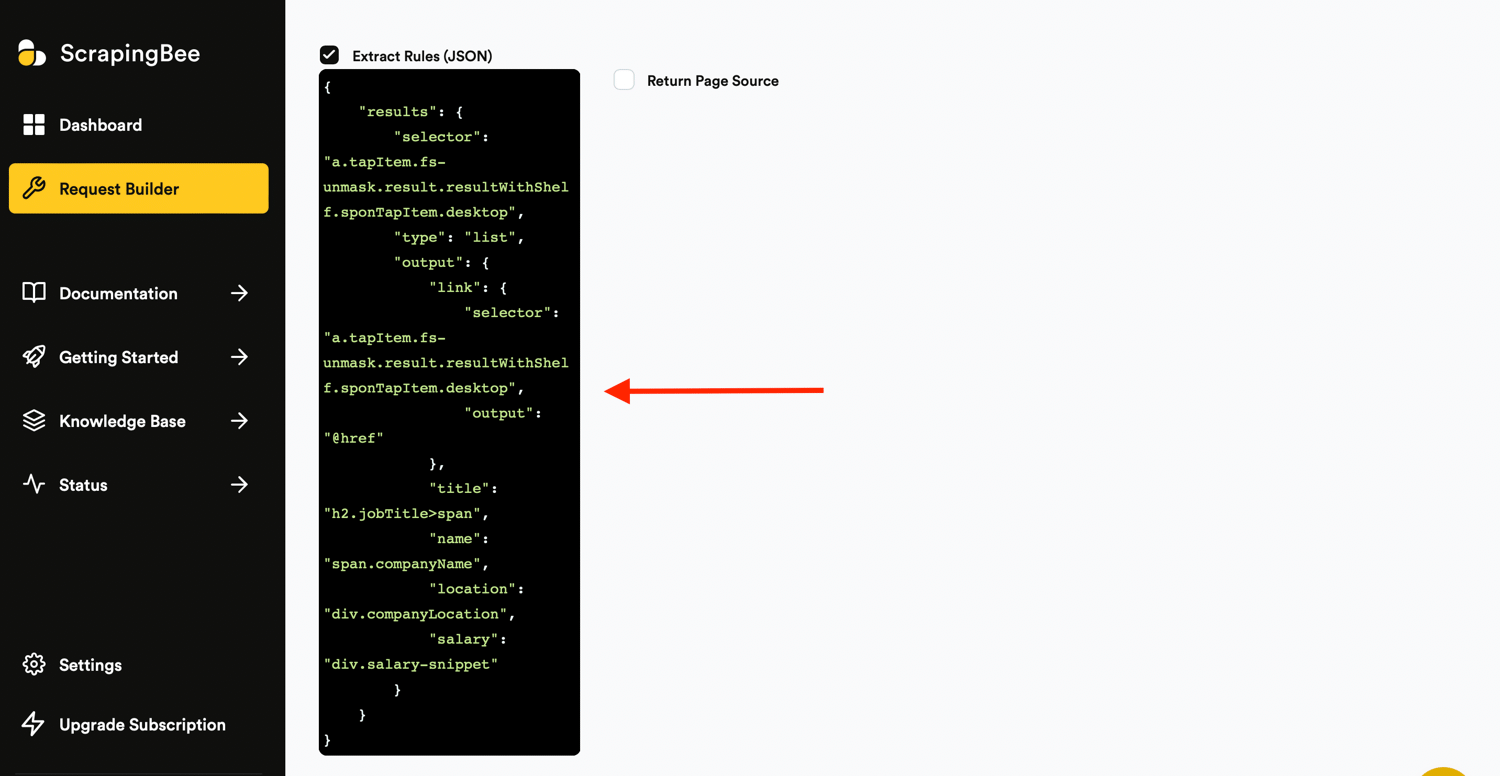
Next, check the “extract rules” box and input the code in your ScrapingBee request builder:
Click the ‘Try it’ button on the right-hand side of your dashboard to preview the results.
Now let’s get on to automating this process with Make.
Get your ScrapingBee API Key
In order to add a connection on Make.com, you’d need your ScrapingBee API key. Your API key can be gotten from the ScrapingBee dashboard:
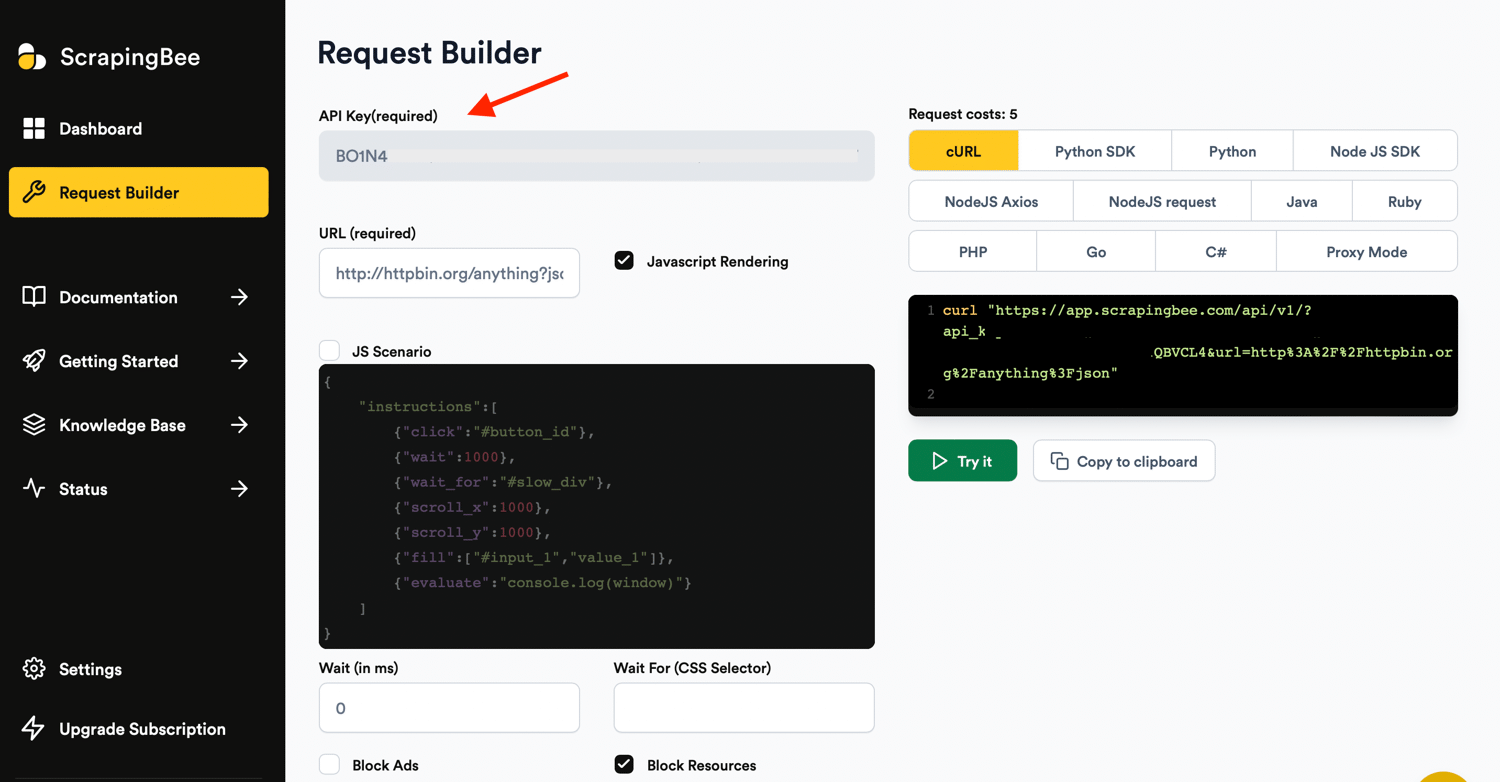
Copy the API key to your clipboard for later.
Create a new Make (formerly Integromat) Scenario
With Make, you can connect different modules and create scenarios to define what happens when content is updated and which pages should load. There are numerous apps you can use with Make, and you can combine different apps to run automated tasks.
To get started, create a new Make account or log into your existing account:
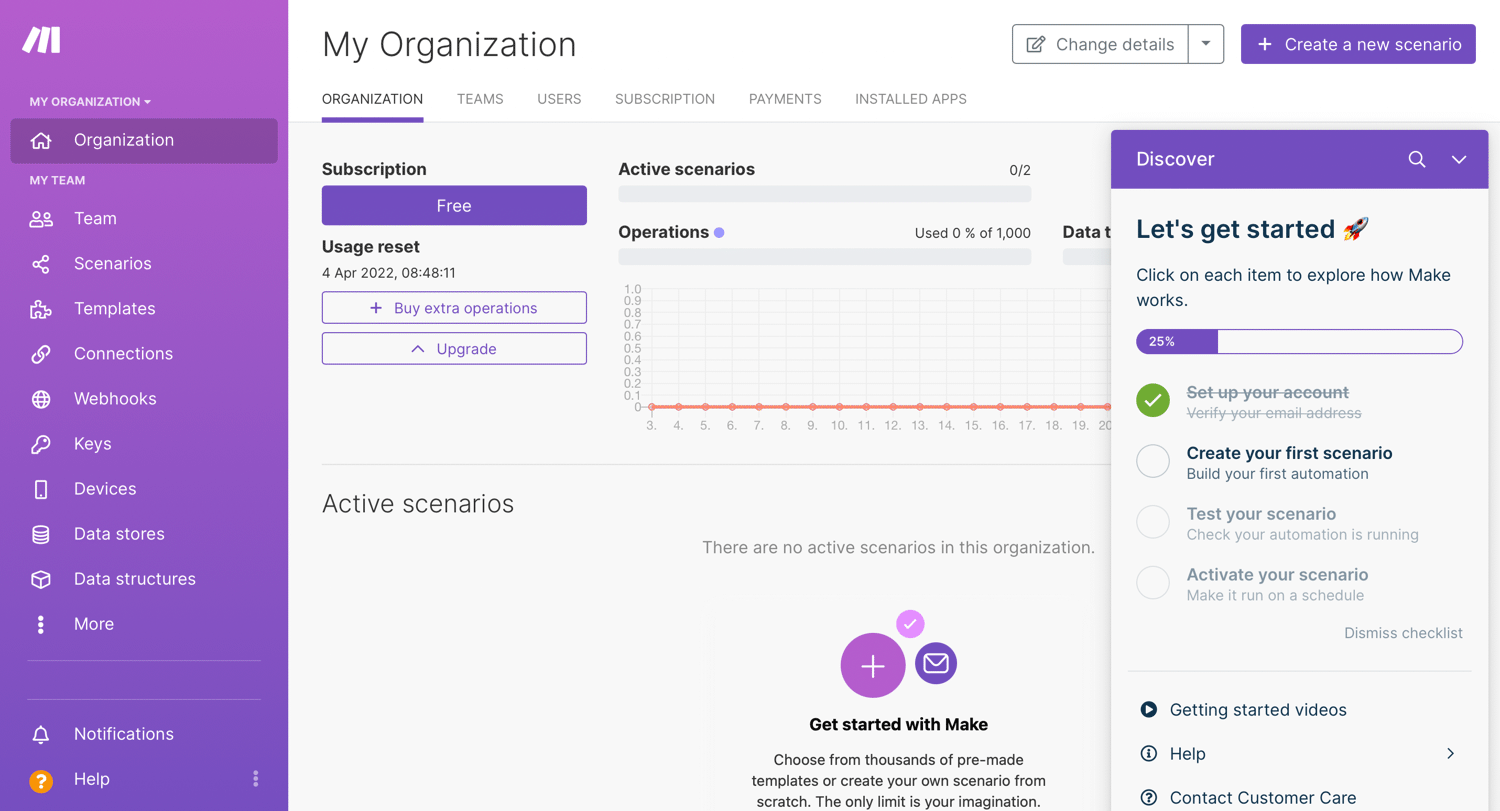
Now you need to create a module to load the code in your scenario. Go to Scenarios and create a new scenario.
From the account homepage, create a new scenario. A Make scenario is comprised of a series of modules that indicate how data should be transferred and transformed between apps/services:

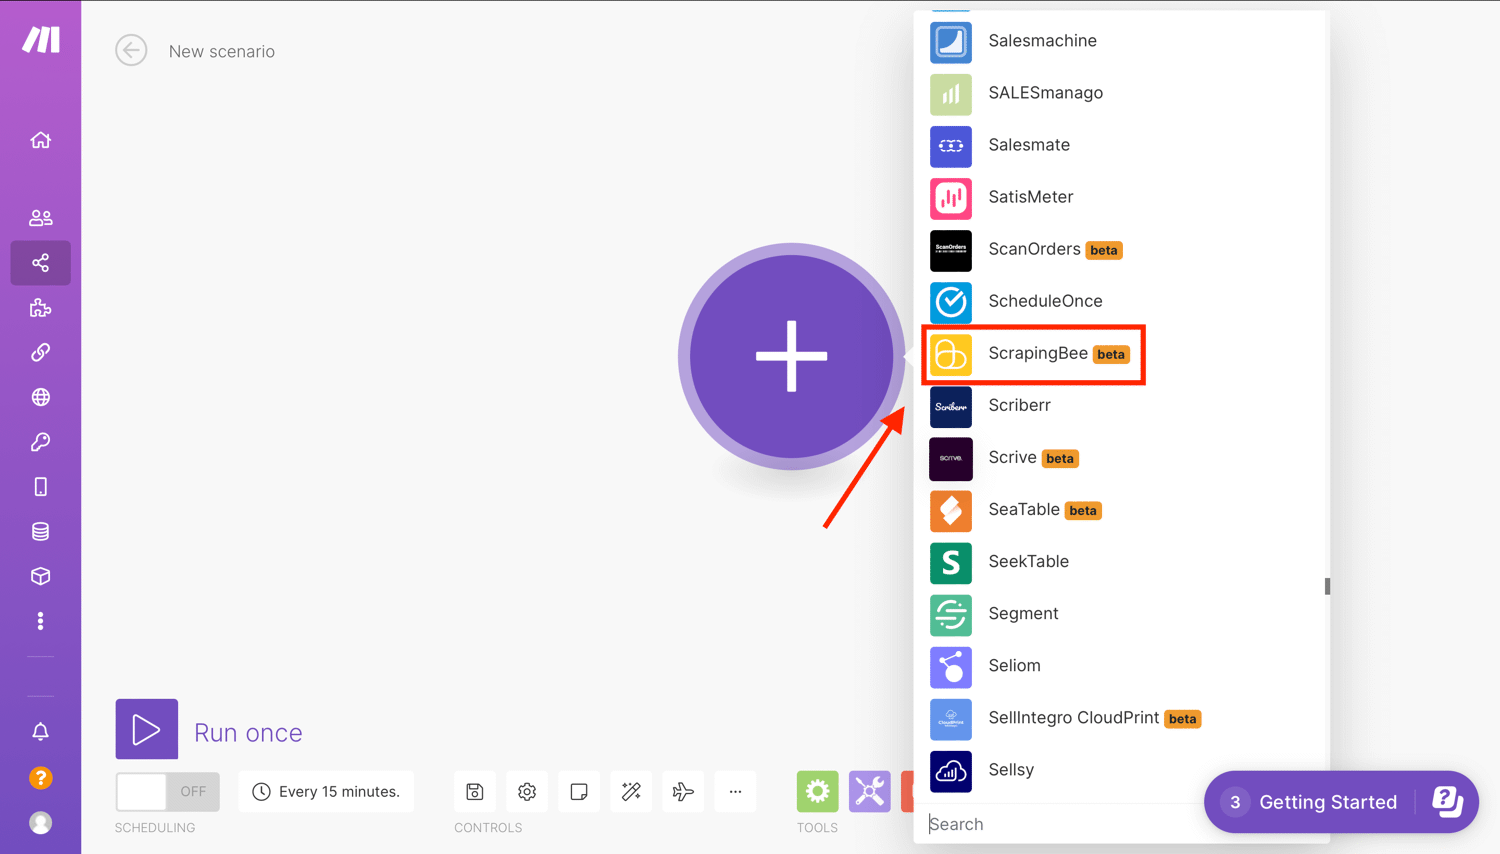
Select the app that will trigger your scenario. Click the first “+” sign and select ScrapingBee:
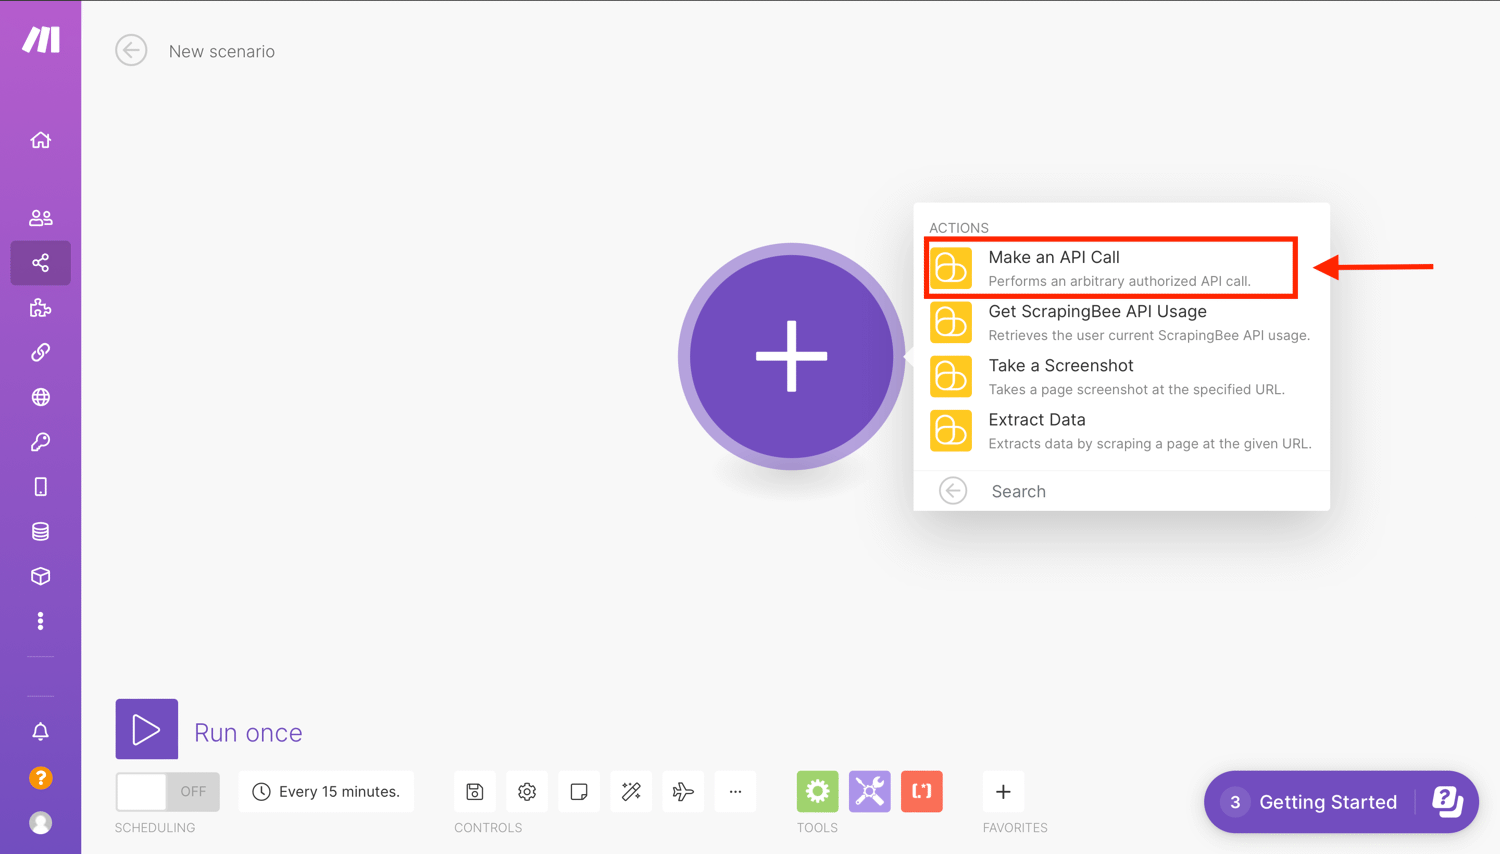
Now choose one of the actions from the list. In this case, select the Make an API call action:
Next, you will need to create a connection or select one of your previously configured connections for the module.
Create a ScrapingBee connection
Make uses connections to link to different services that require authentication. For example, to perform a scrape, we need to connect to ScrapingBee using our API key.
If you have a connection set up, click the dropdown menu to select your connected account:
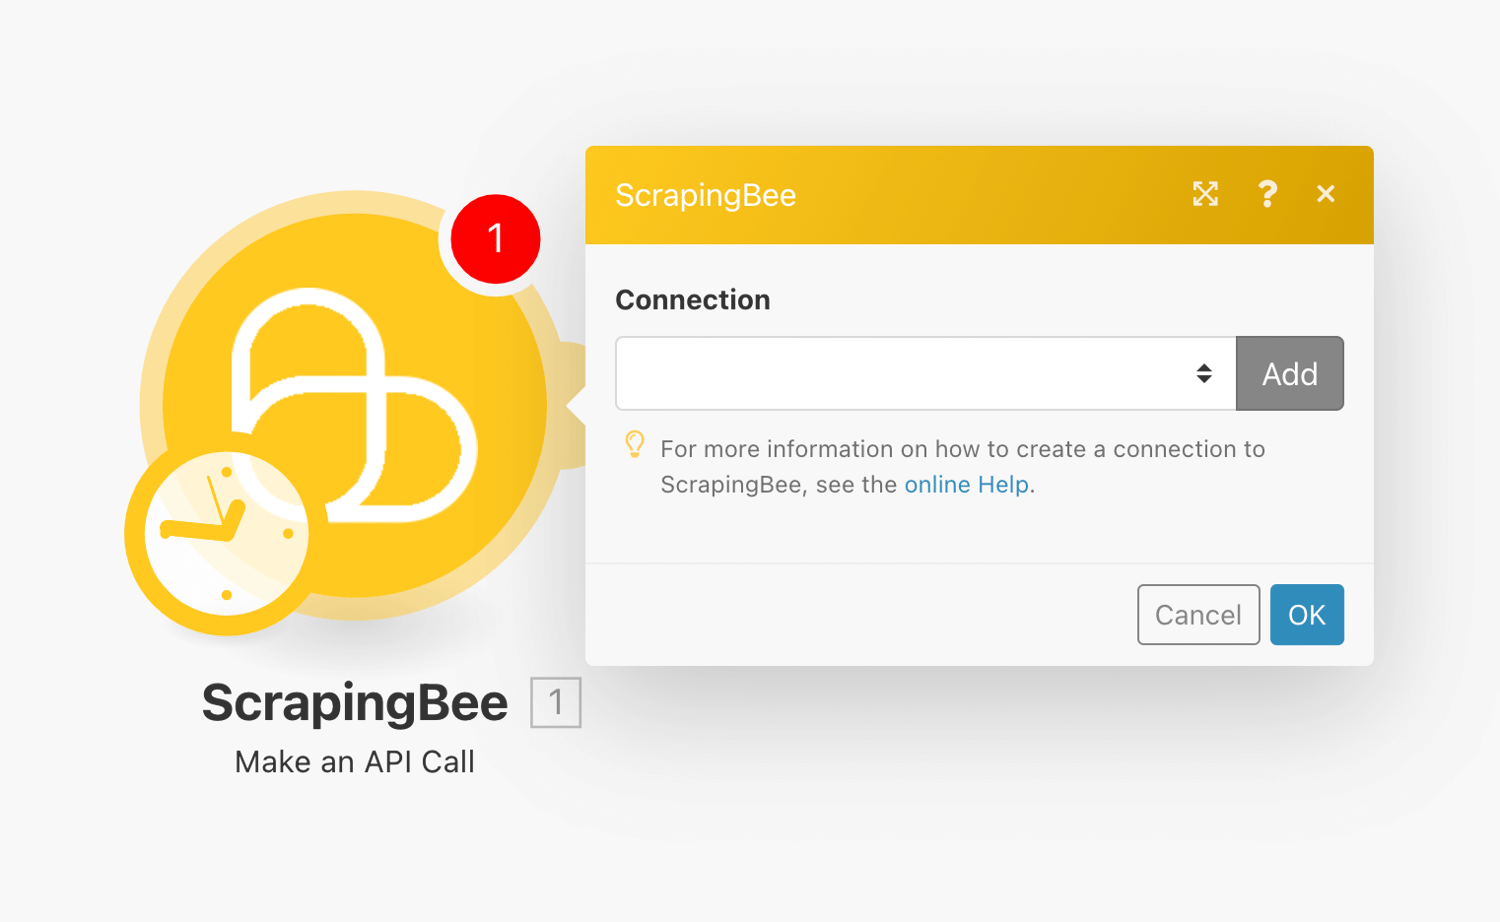
Alternatively to add a new connection, click on “Add” and then enter your ScrapingBee API key gotten from the ScrapingBee dashboard:
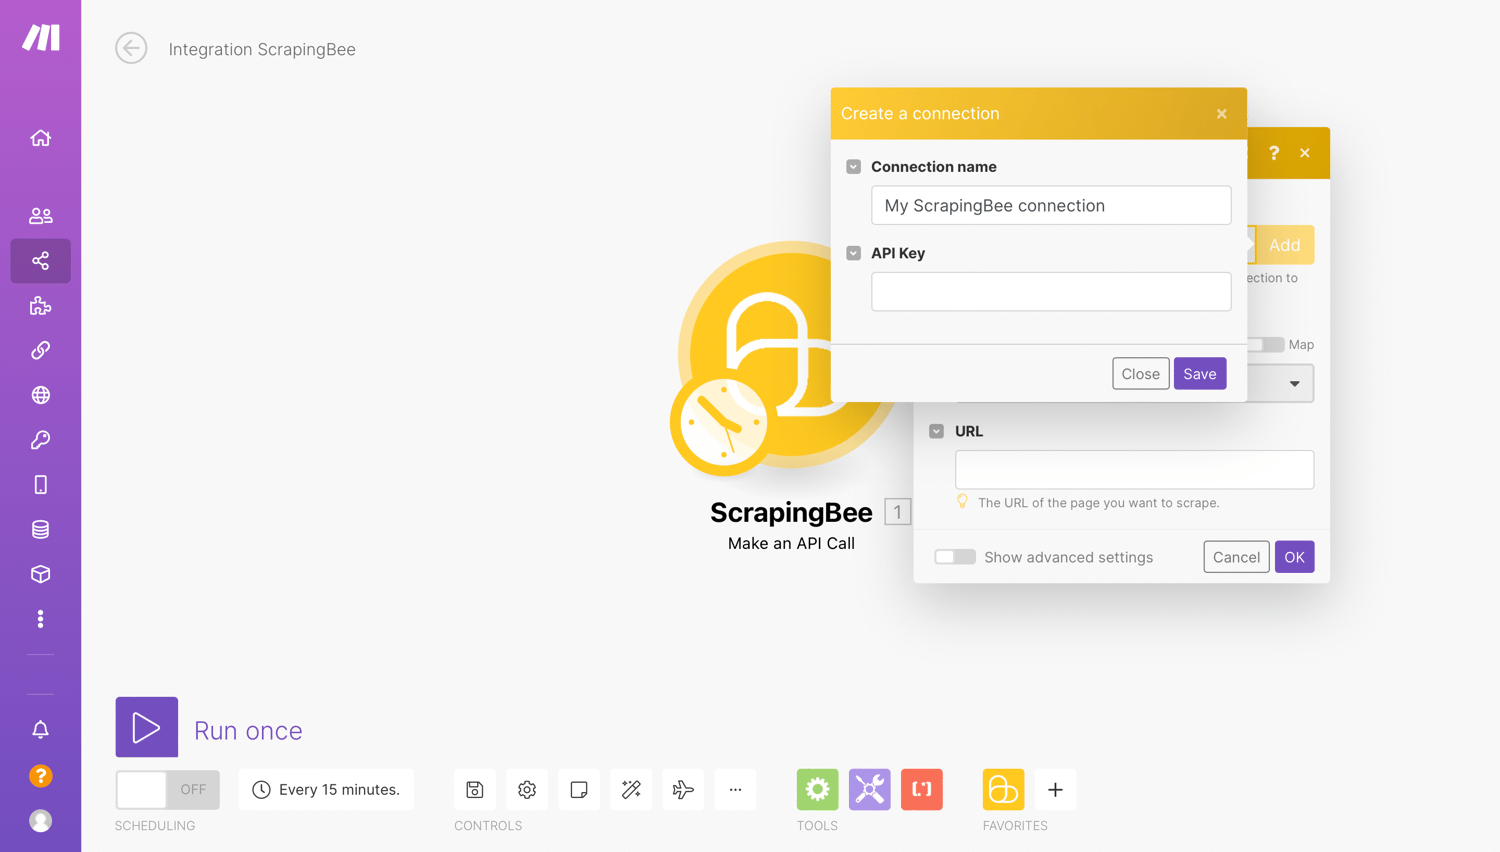
Once the connection is set up, we will now configure the action.
Configure Action to make an API call
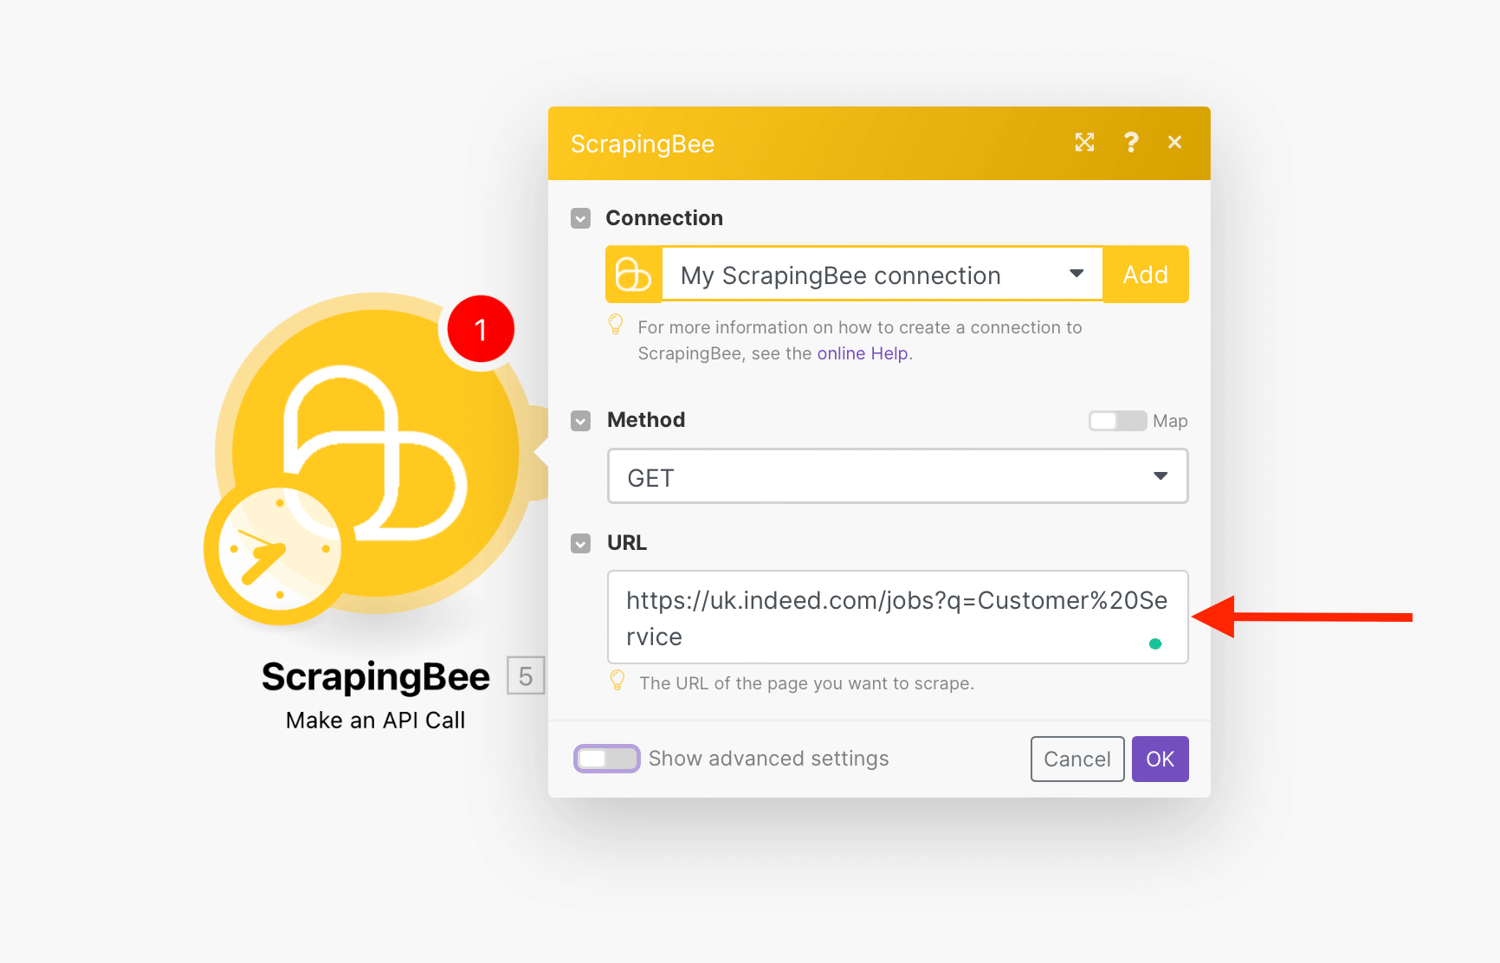
Set method to GET. This is the default method and is what browsers use to display pages. POST is used to submit forms, but we have no need for that here.
Enter the URL of the Indeed job listing that you want to watch in the URL field. The URL field is the link we want to scrape:
Toggle the box “Show advanced settings”. This is where we enter the data extraction rules that allow ScrapingBee to return the data in a nicely formatted way.
{
	"results": {
		"selector": "a.tapItem.fs-unmask.result.resultWithShelf.sponTapItem.desktop",
		"type": "list",
		"output": {
			"link": {
				"selector": "a.tapItem.fs-unmask.result.resultWithShelf.sponTapItem.desktop",
				"output": "@href"
			},
			"title": "h2.jobTitle>span",
			"name": "span.companyName",
			"location": "div.companyLocation",
			"salary": "div.salary-snippet"
		}
	}
}
Scroll to “Extract Rules (JSON)” and enter the code to extract all the details:
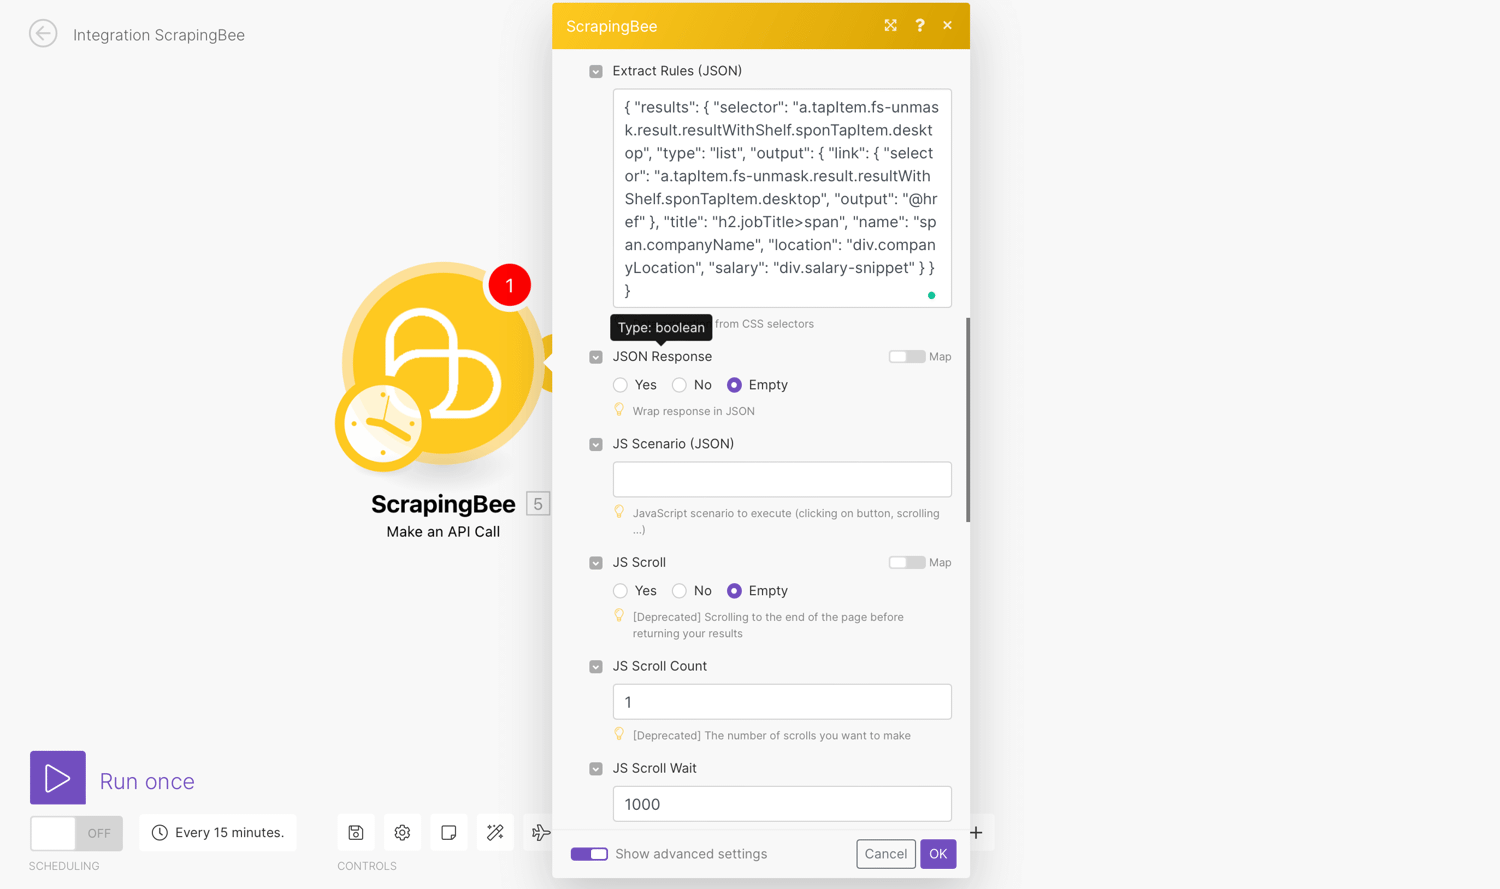
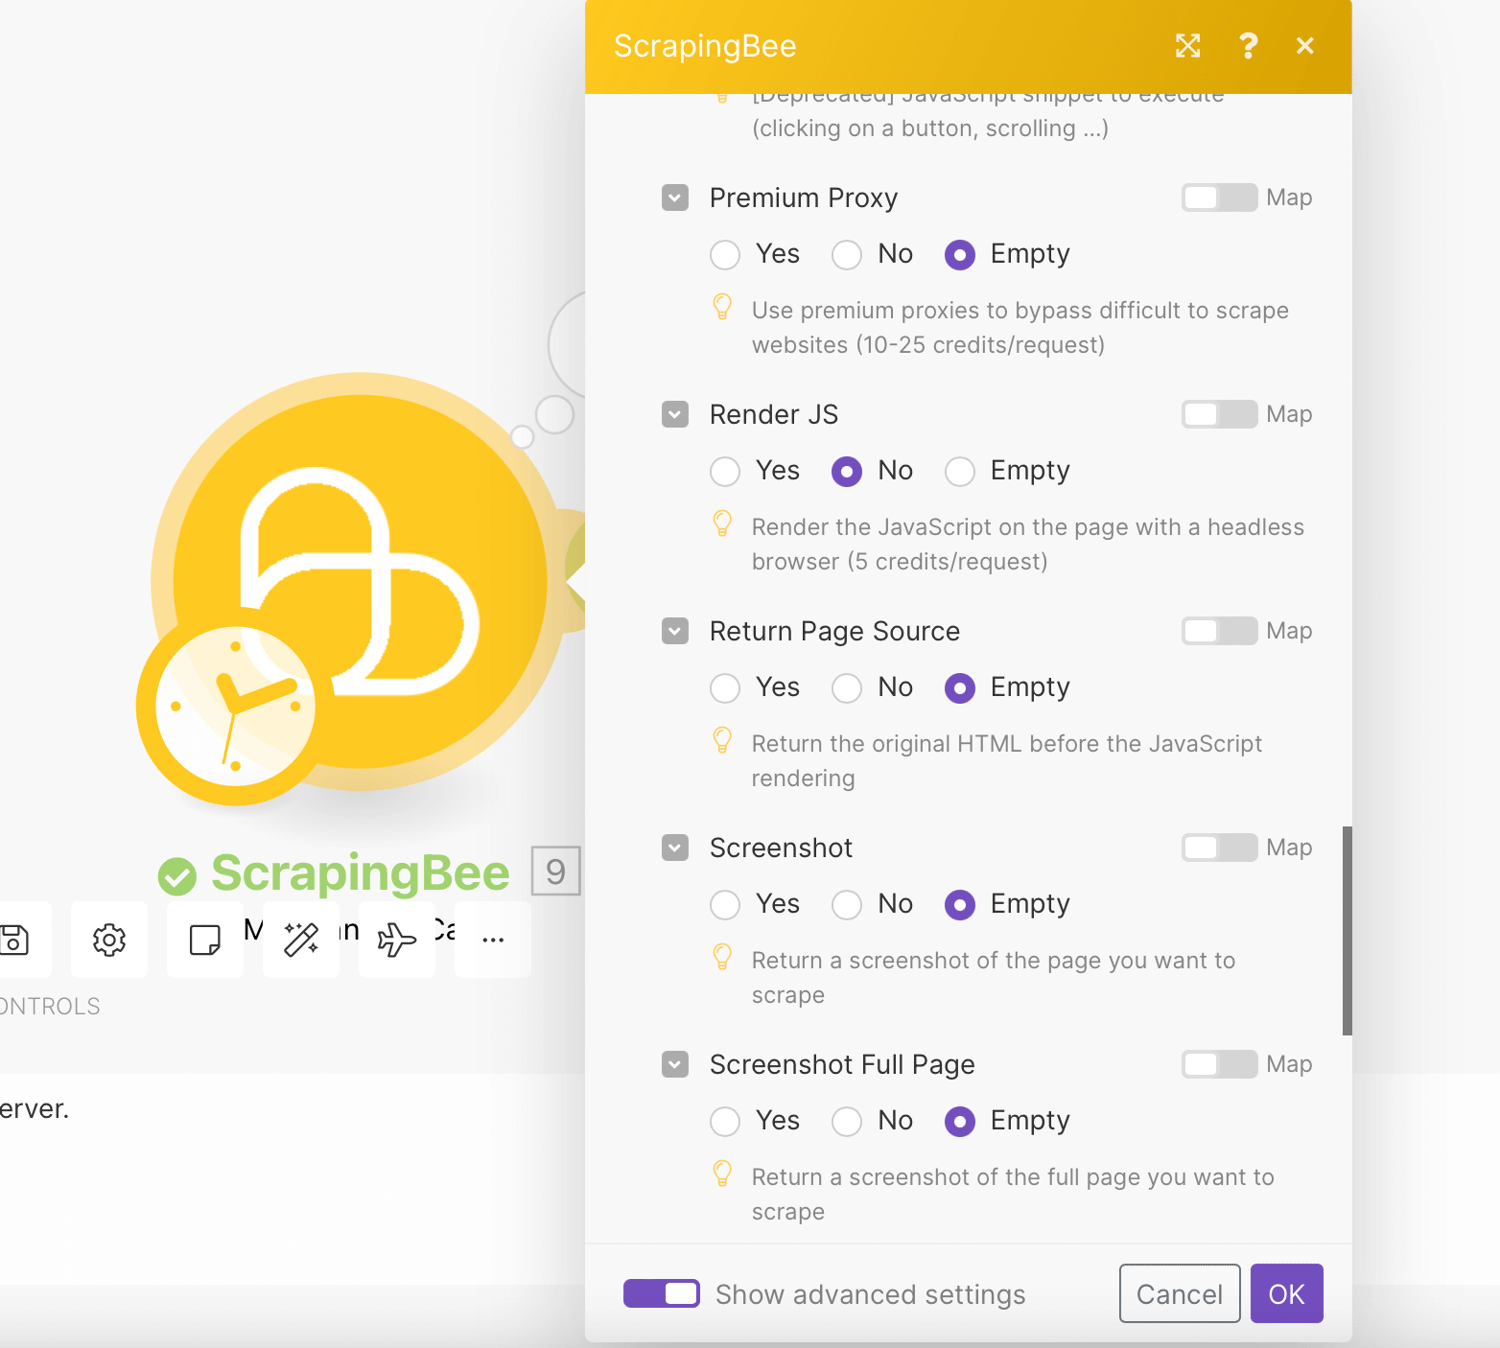
Optionally, you should mark “Render JS” as No. This is not a feature required for this scraping job and costs extra credits.
Test Connection
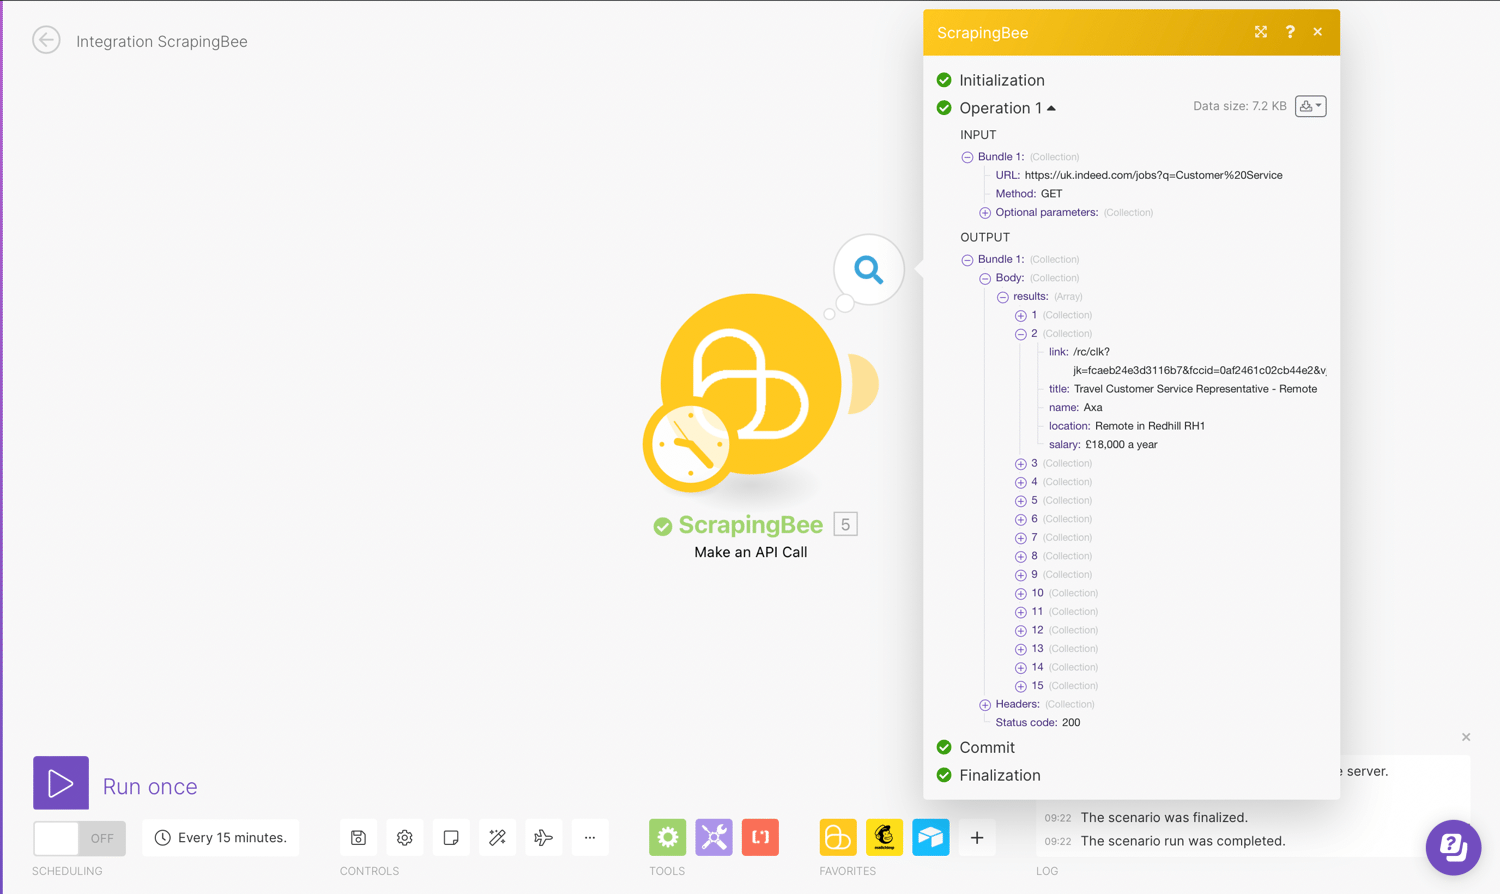
You can now test run the scrape job using the “Run Once” button at the bottom of the page
Control workflow with Iterator
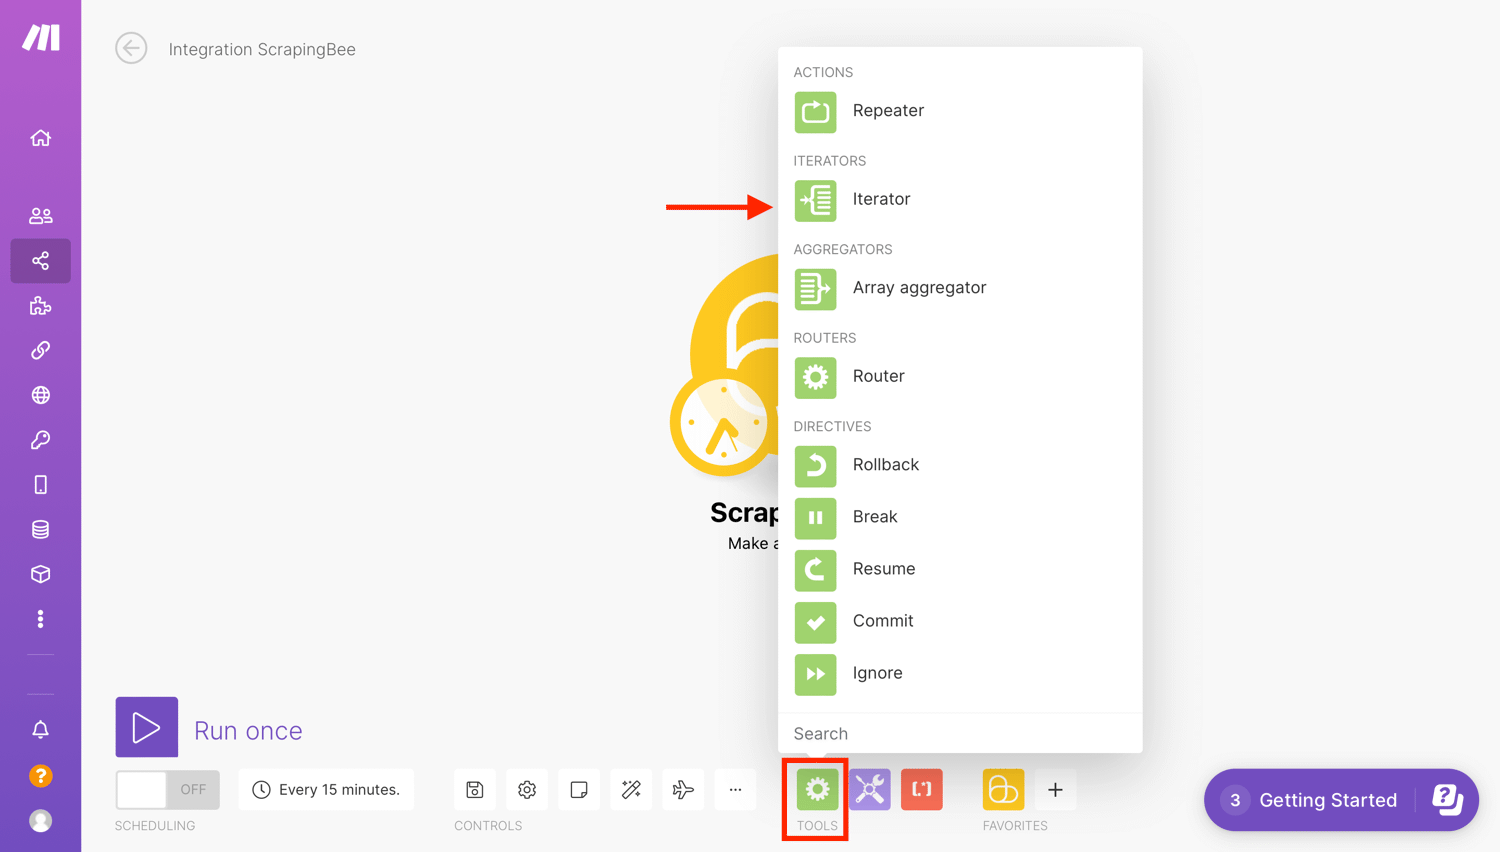
For the next step in the scenario, we will select “Flow Control” and pick “Iterator”. Iterators are a separate tool that can be found under the Flow section of tools.
Iterator is a special type of module that allows you to split a large bundle of data into multiple smaller bundles. The Iterator module sends each of our database records to ScrapingBee, one at a time, so it can load our pages.
Each array item will be outputted as a separate bundle. This allows us to make the rest of the scenario run for each value in the result set. This is because (as we will see later) we want to add a row in our spreadsheet for each scraped post.
To configure the Iterator, we will select “Body → Results”. This makes it loop over the scraped data and will perform any subsequent action for each item:
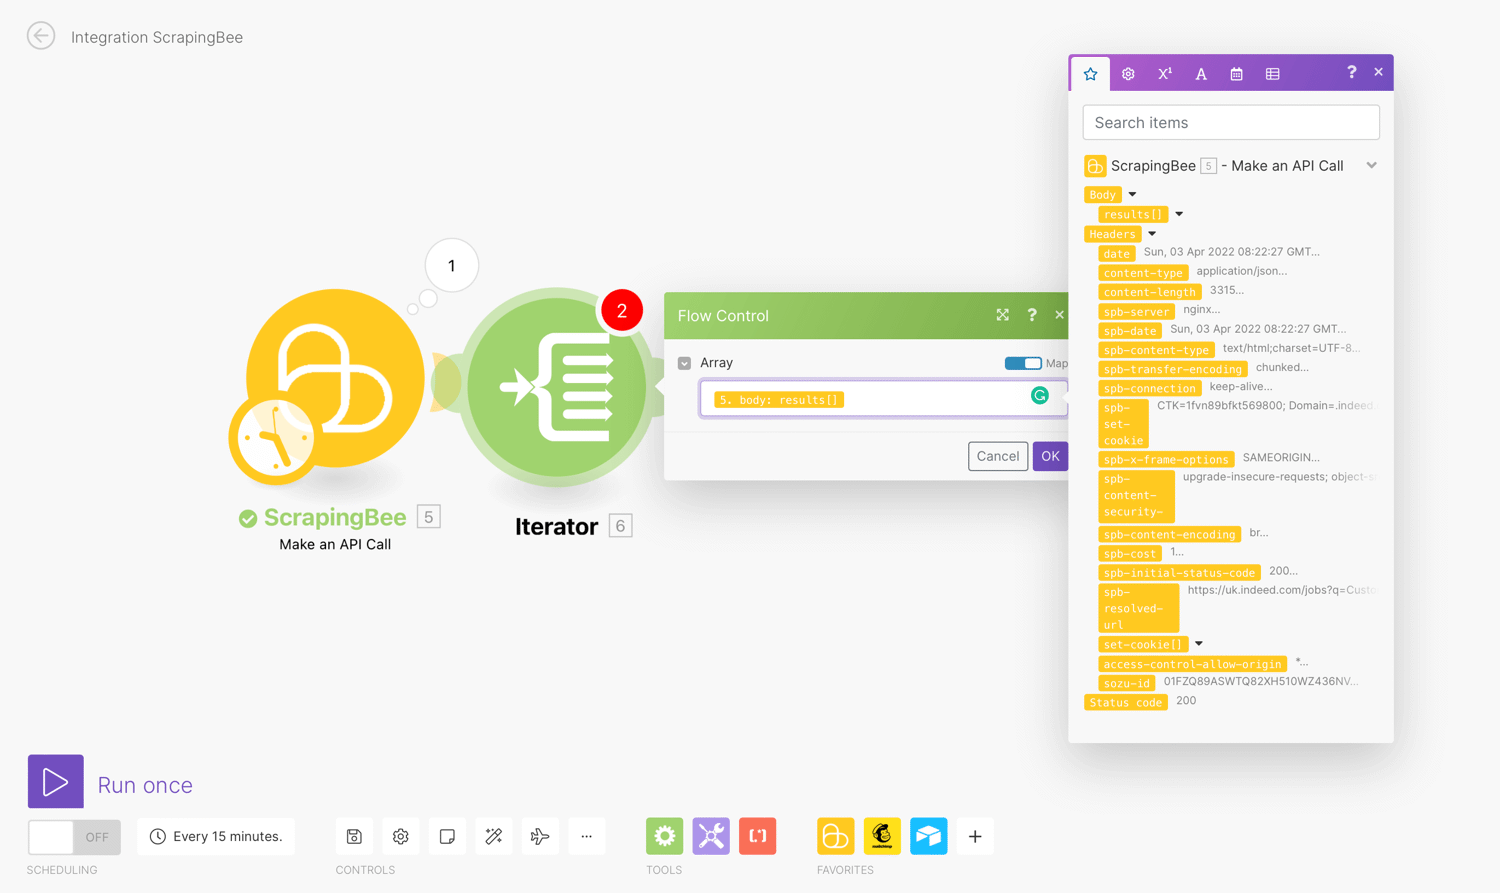
Click ‘Ok’ then Run once to preview the results.
The results returned are then passed on one after another to subsequent modules. This way you can deal with each smaller bundle as separate bundles.
Now, you will have to create a connection to the corresponding service.
Configure Data store Module
During scenario synchronization, you can use a data store to store new data from scenarios and transfer data between scenario runs and individual scenarios. This is similar to databases or simple tables. Data Store modules allow you to add, replace, update, retrieve, delete, search, and count records from various sources.
In order to use the Data store module, it is necessary to create a data store in your Make.com account. Now let’s select or add the data store where you want to create a record.
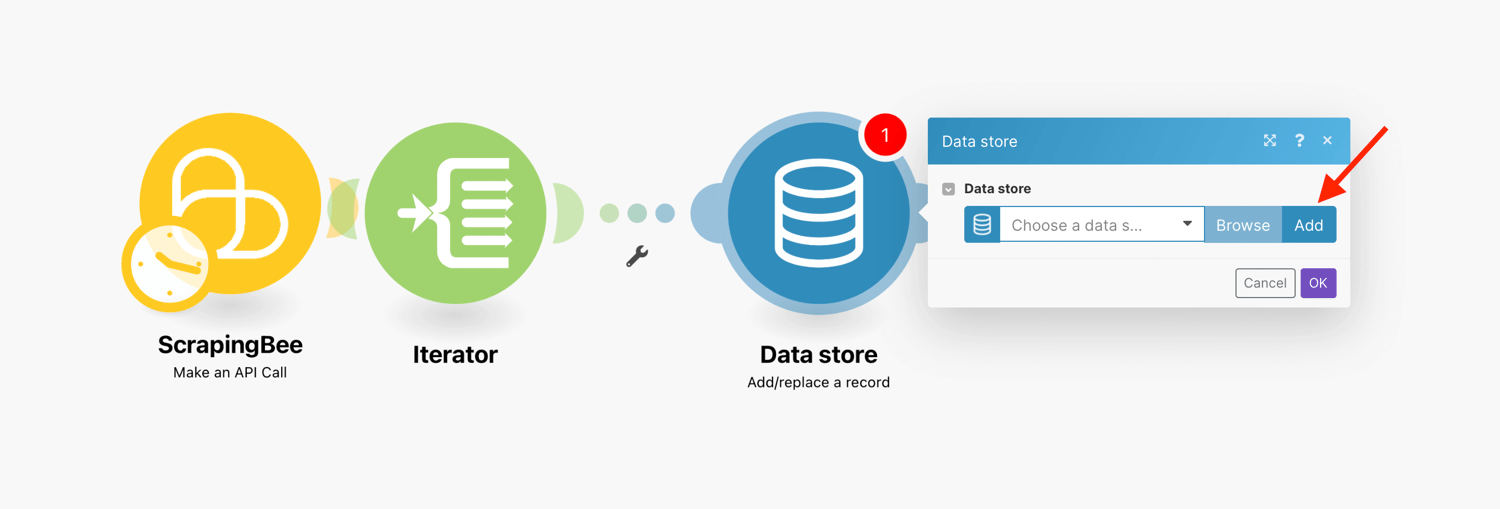
Just like with the ScrapingBee integration, we first need to add a connection. Click the plus (+) sign and add a Data store module:
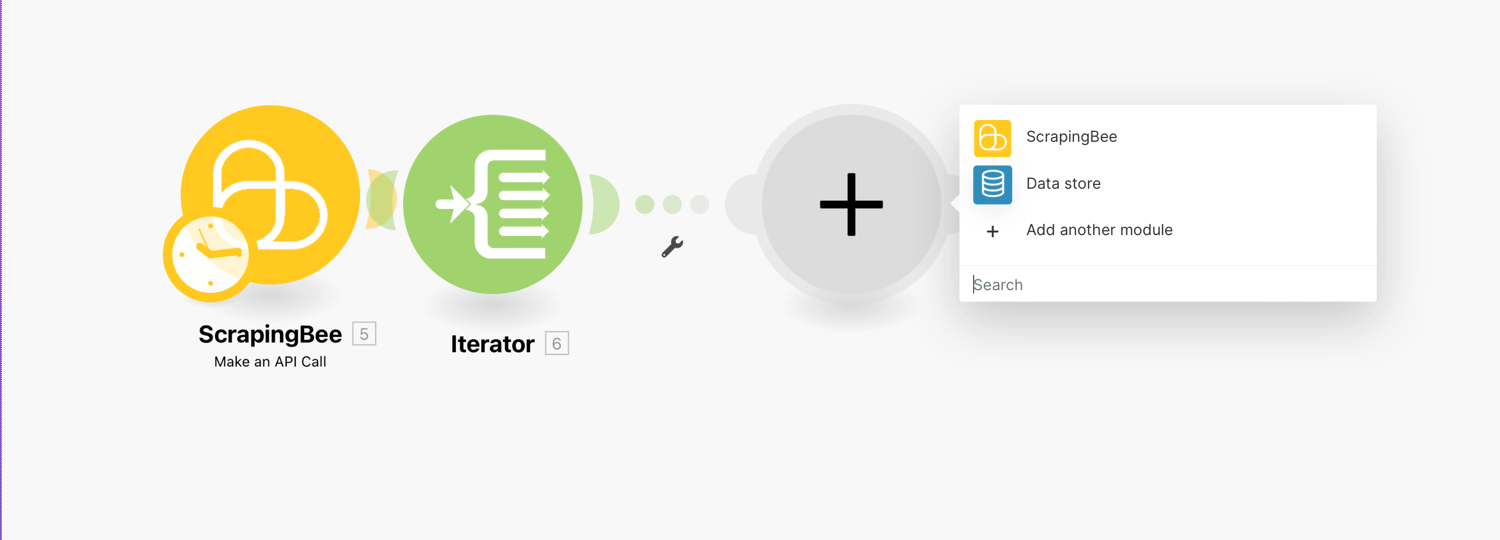
Choose the Add/replace a record action.
Create a Data store
Next, we will create a data store if you don’t have an existing data store set up.
Click the Add data store button:
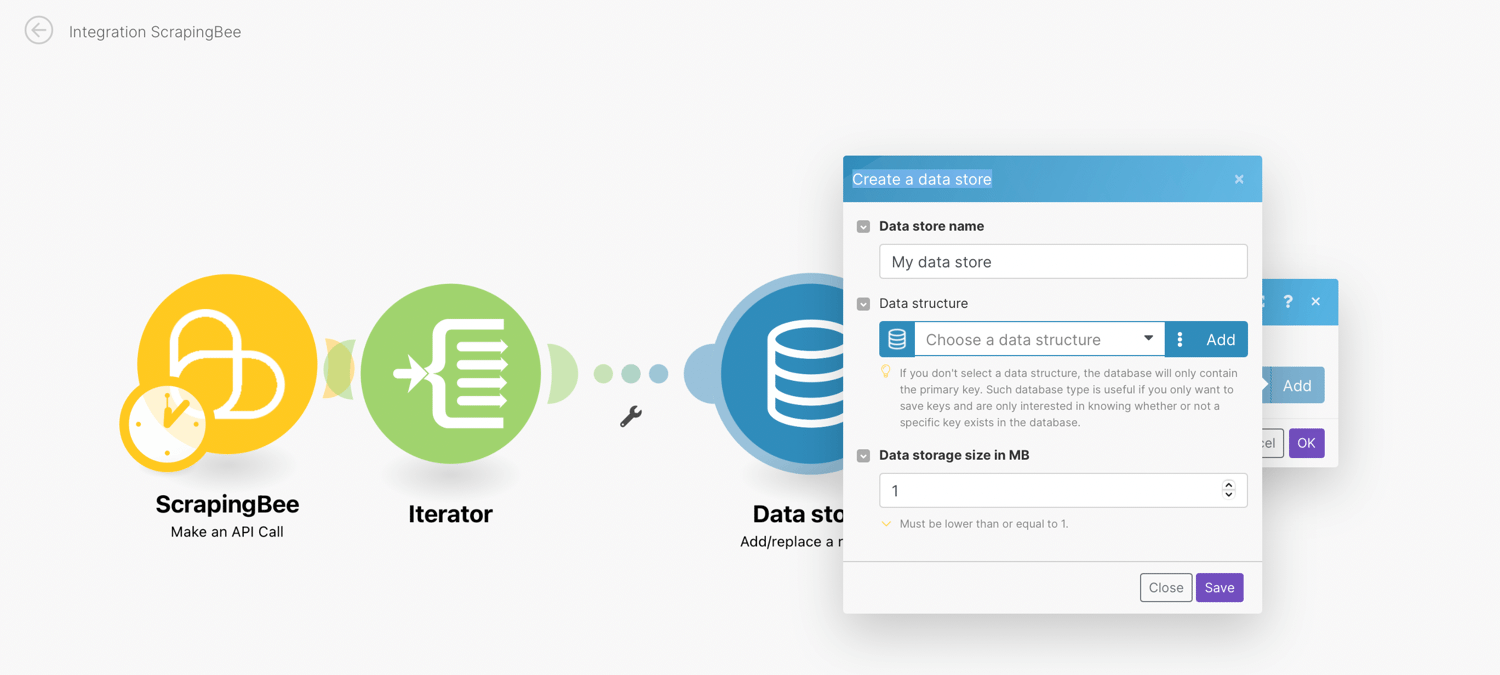
Enter settings for the new data store:
- Data store name - Enter the name for the data store. E.g. Indeed jobs
- Data Structure - A data structure is a list of the columns for a table that indicates the column name and data type. Select the data structure that has been already created or click the Add button to create a new data structure. Optionally, if you leave the field empty without selecting a data structure, the database will only contain the primary key.
- Data storage size in MB - Allocate the size for the data store from your total Internal data storage. The reserved amount can be changed at any time later on.
Set up Data structure
A data structure is a document that describes in detail the format of the data being transferred to Make.
If you have a data structure set up already, then select this from the dropdown menu.
You can alternatively create a data structure by clicking the Add button in the settings of the module that requires data structure specification or by clicking the Create a new data structure button in the Data structure overview section.
- Data structure name - Enter the name for the data structure you are going to create
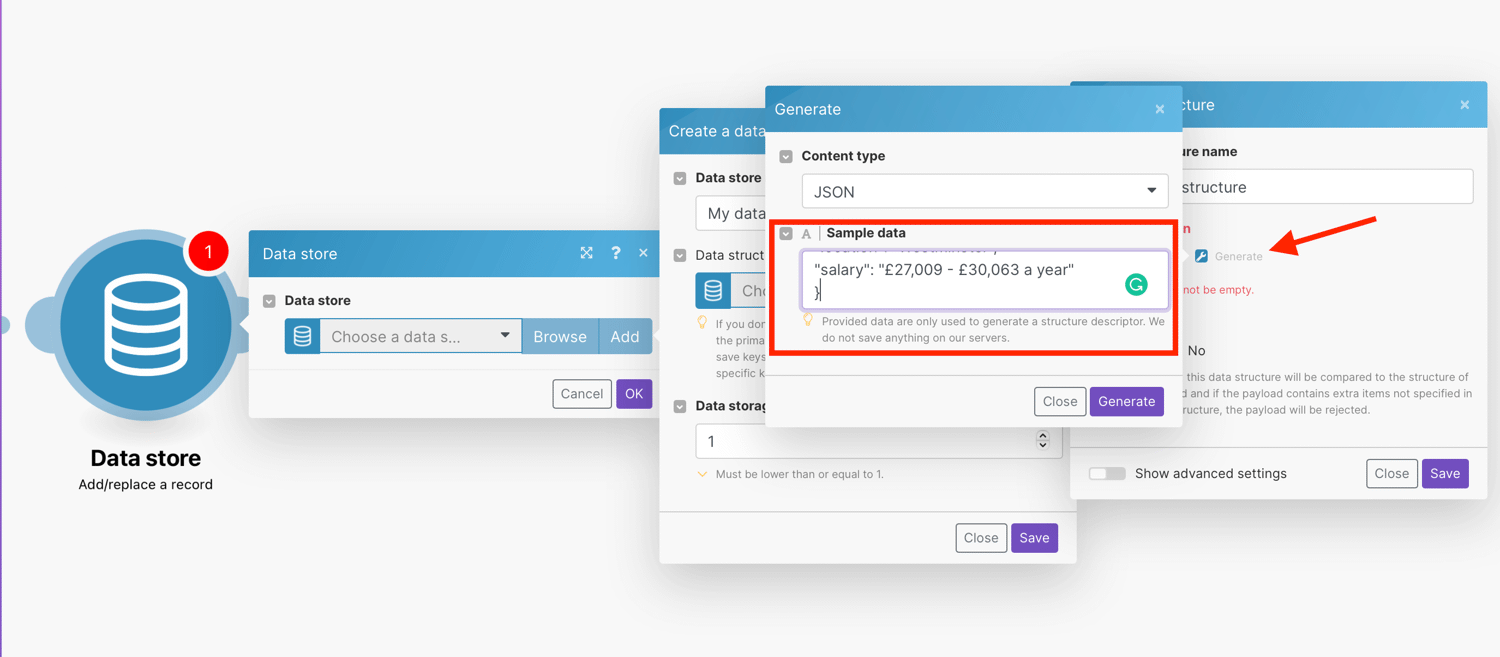
- Specification - Click the Add item button to specify the properties of one column manually, then enter the Name and Type for the data store column and define corresponding properties. Alternatively, use the Generator button to determine the columns from the sample data you provide.
For this tutorial, we will create five columns with the Generator button by inputting the JSON sample data:
{
"link": "/rc/clk?jk=0d5c8c0dfe43c3d5&fccid=057e594637329eab&vjs=3",
"title": "Customer Service Advisor",
"name": "City of Westminster Council",
"location": "Westminster",
"salary": "£27,009 - £30,063 a year"
}
By providing a data sample, the generator will automatically create a data structure based on the data sample you entered. The created data structure can then be manually modified.
Click Save when the data store is set up.
Add/Replace a Record
Now that we have selected or added the data store where you want to create a record, we will continue to set up an action to add or replace a record in the data store.
- Key - Enter the unique key. The key can be used later to retrieve the record. If you leave this field blank, the key will be generated.
- Overwrite an existing record - Enable this option to overwrite the record. The record you want to overwrite must be specified in the Key field above.
- Record - Enter the desired values to the record's fields.
The module throws an error when you try to add the record which is already in the data store under the same name and the Overwrite an existing record option is disabled.
Map the Title, Link, Name, Salary and Location to the record from the Iterator results:
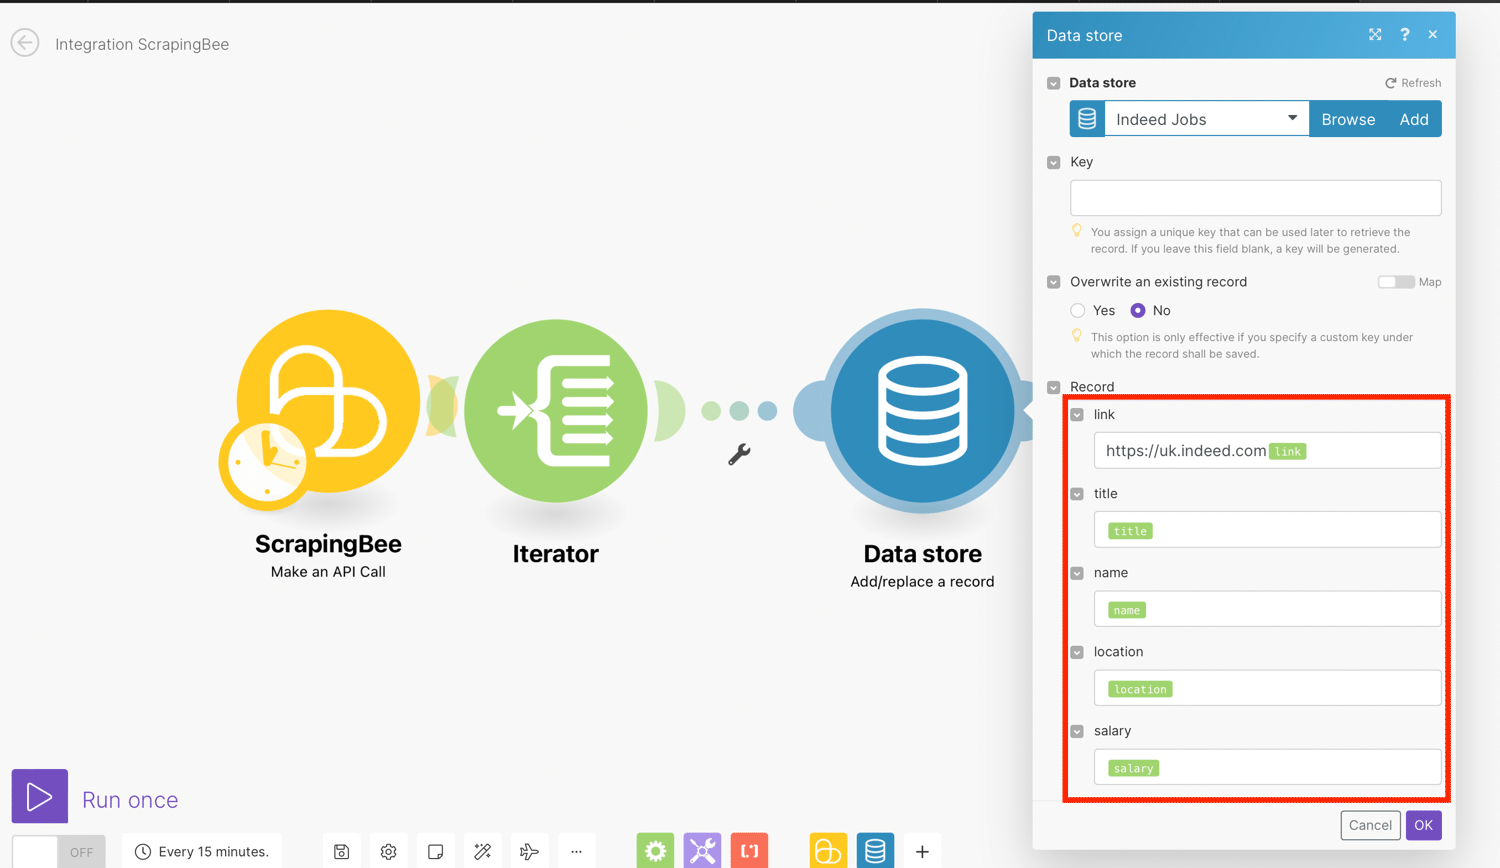
Note: It is important that you add https://uk.indeed.com with no spaces or forward slash before the link field. This will ensure that the URL is correctly formatted.
Click ‘Ok’. Run the integration again.
Expand the results:
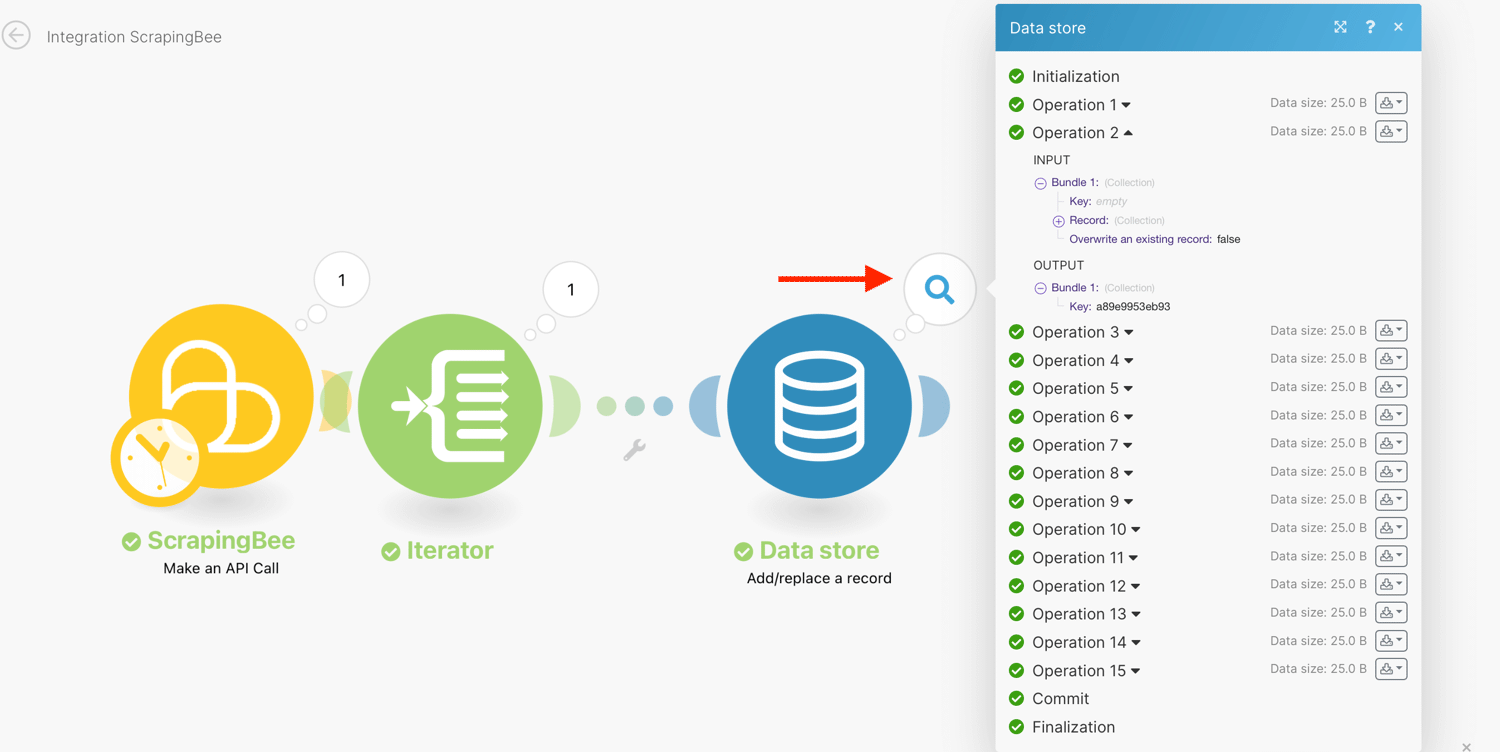
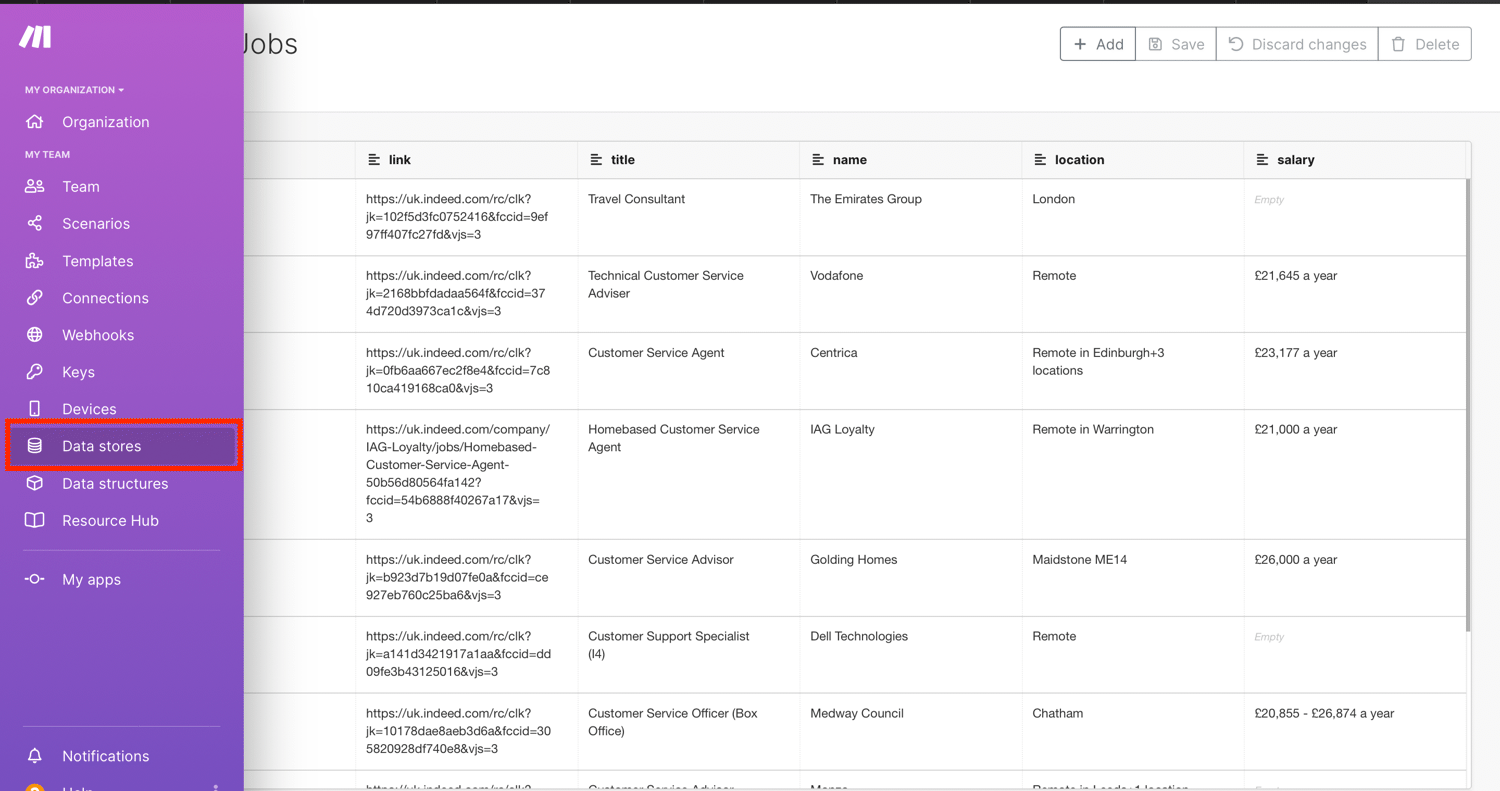
You can also go to your Make.com data store to view, edit or delete the records created:
Push the extracted data to another module
Now that the data is stored on Make.com, you have several options to explore. You can choose to:
- set up slack notifications
- filter the results by those that have salary input
- send the results via email
- set up a new email marketing campaign
- create a new CMS item and more
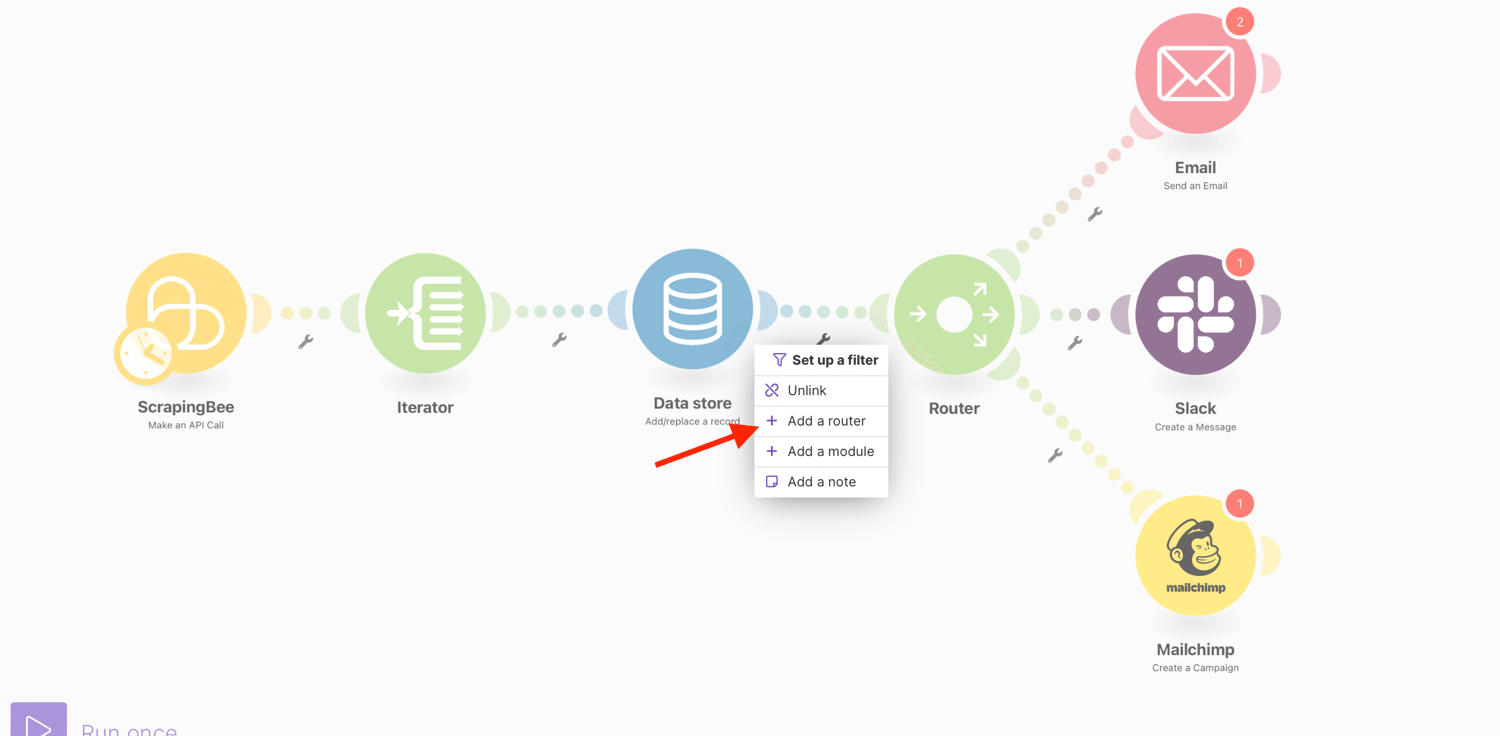
All you have to do is add a router and forward the data to other modules. Make.com’s built-in router makes it easy to duplicate processed data, due to the way it divides scenarios into multiple routes and can process each route differently.
Additionally, you can filter your data as it passes through the routes. You can specify the filter conditions to define which files are permitted to pass through a specific module.

Schedule a Make Scenario
You can specify when and how frequently an activated scenario runs. To do so, go to the scenario detail page and locate the Schedule tab.
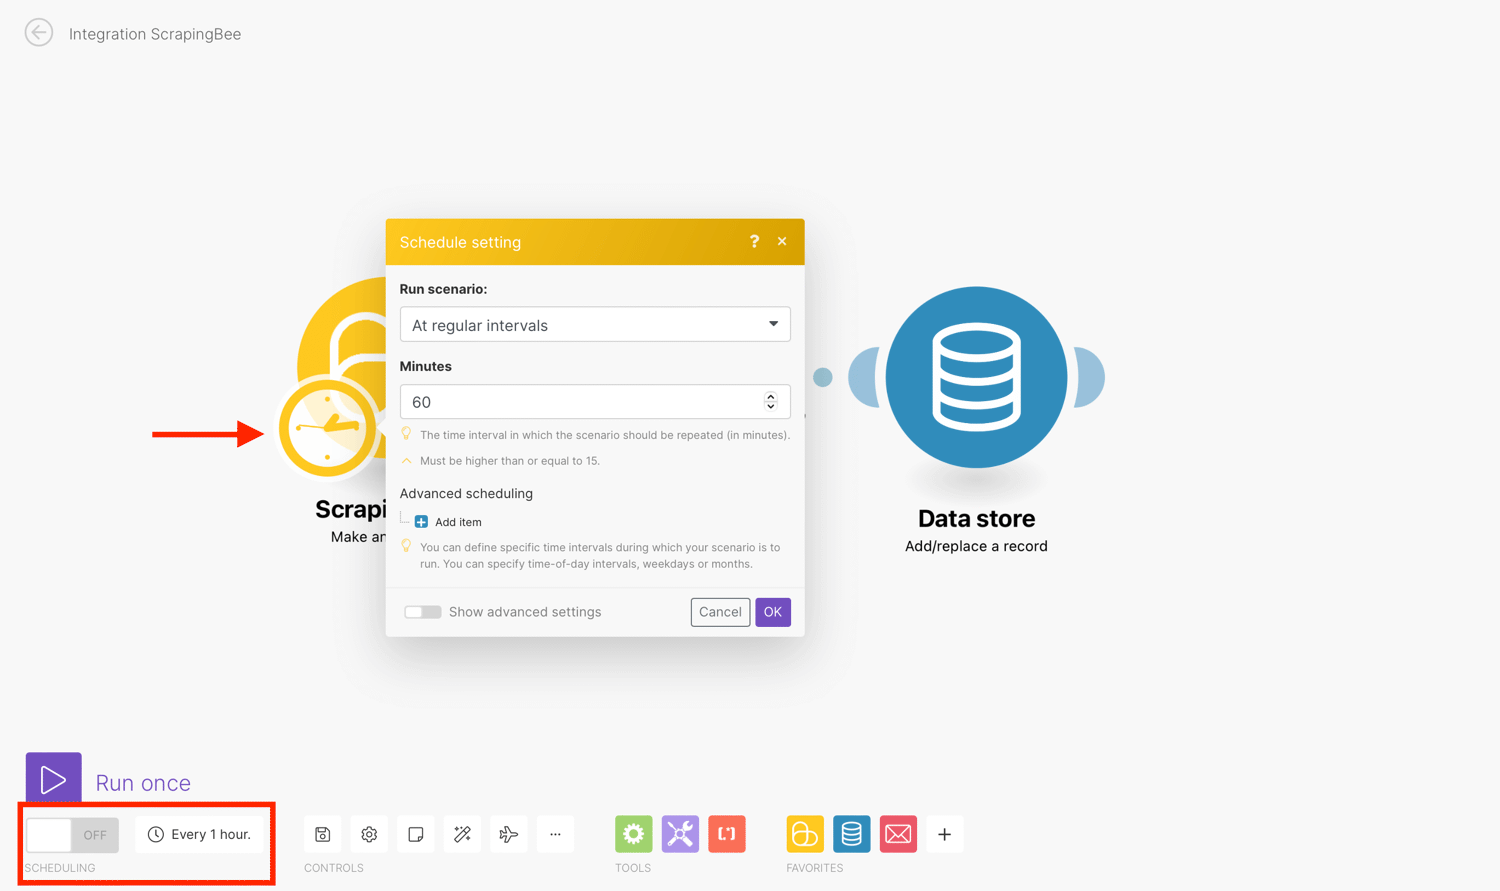
To set the schedule, click the clock icon overlaying the ScrapingBee module and change the Run Scenario. Also, set the time when it should run:
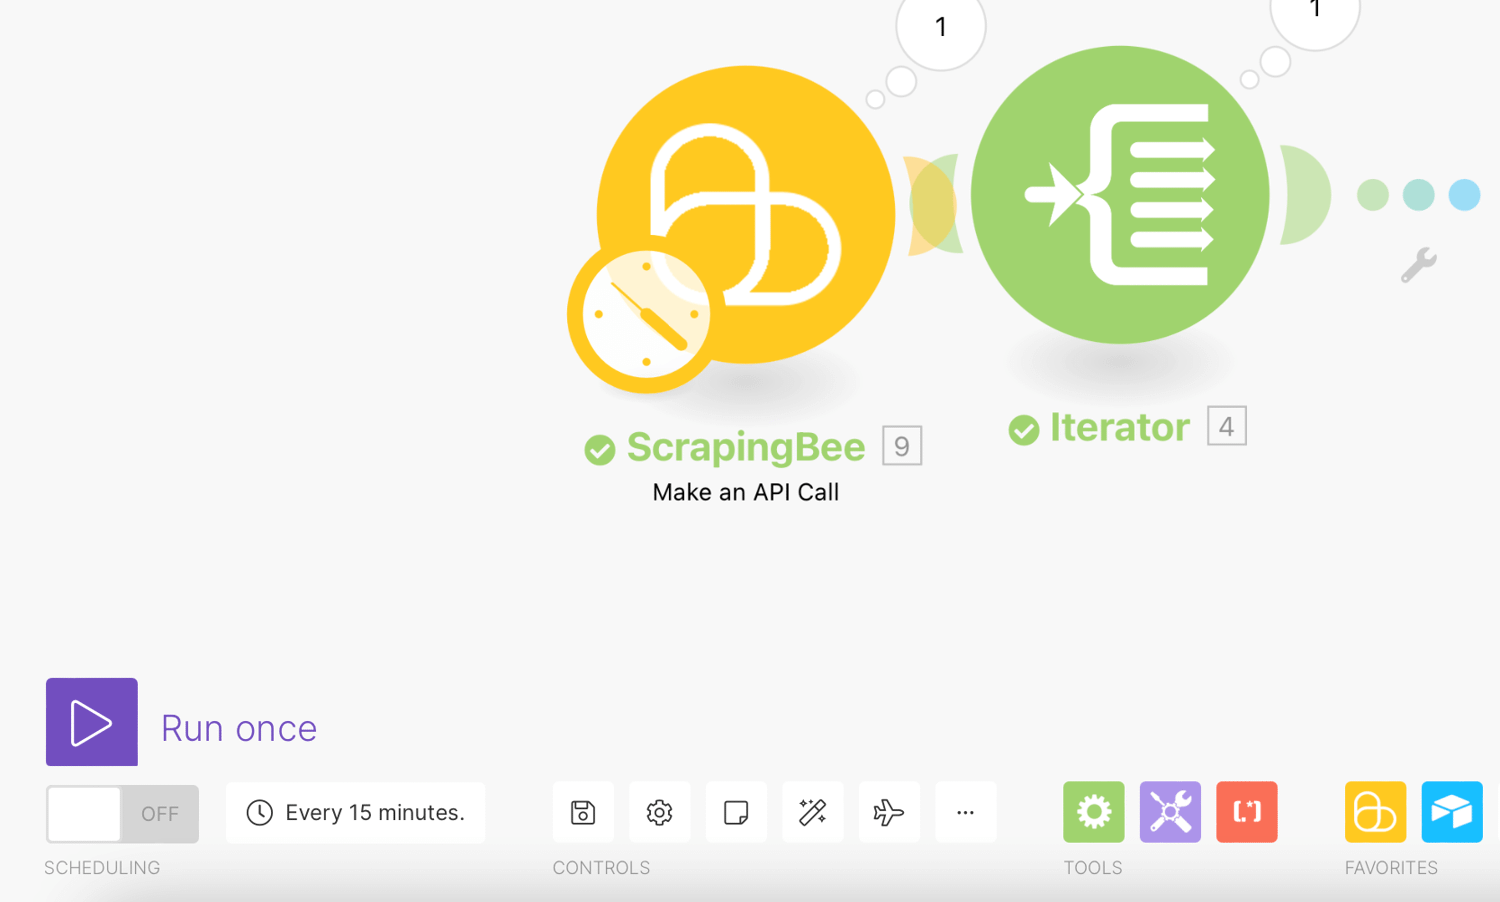
For this tutorial, we will set the time interval in which the scenario should be repeated to 60 minutes (every hour):
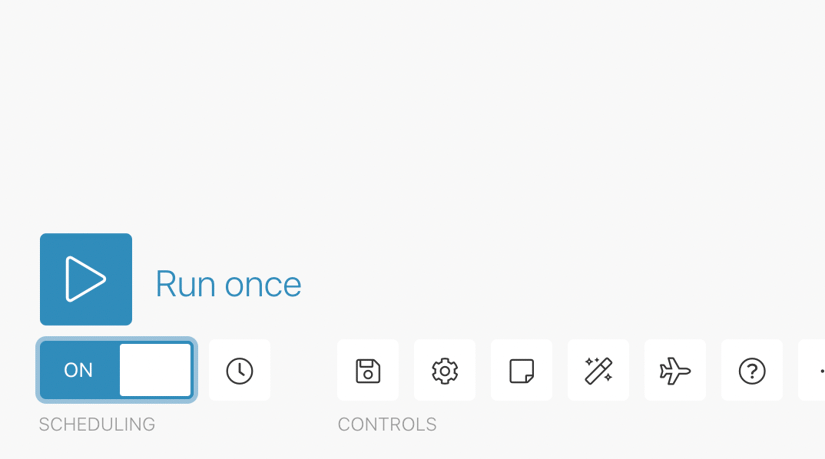
Finally, turn on Scheduling for the scenario. Without turning it on, the scenario will not be run automatically regardless of the scheduling settings.
🤖 Want more No-Code Web Scraping? Check out our guide on N8N Web Scraping
Conclusion
There you go. So that demonstrates the use of the ScrapingBee > Scrape job details from Indeed in a scenario.
With thousands of jobs across several niches posted daily on Indeed.com, you can get real-time information without the constant manual effort.
Here’s a quick recap. The scenario consists of the following modules:
- ScrapingBee > Make an API call
- Iterator
- Data store > Add/replace a record
- Router to Slack, Mailchimp and Email
That concludes this tutorial on scraping job listings from Indeed.
Happy Scraping!
Before you go, check out these related reads: