It's safe to assume that many of us had bookmarked Amazon product pages from several retailers for a similar product to easily compare pricing.
This article will guide you through scraping product information from Amazon.com so you never miss a great deal on a product. You will monitor similar ******product pages and compare the prices.
This tutorial is designed so that you can follow along smoothly if you already know the basic concepts. Here's what we'll do:
- Get link(s) for the products in your wishlist, as well as the price
- Implement a ScrapingBee function on Make (formerly Integromat) to retrieve product prices and other information
- Store all product information containing product URLs in an Airtable database and compare the price of each product
- Schedule the scenario to run at least once a day
- Create an alert for new products and their price updates

Why Scrape Product Data from e-commerce websites?
With a wide variety of products sold on Amazon, these are some reasons why you would want to scrape product data:
- Build the best marketing strategies by monitoring your competitors
- Watch and improve product quality, pricing, promotional activities, and customer feedback
- Keep track of the varied price list of an item on your wishlist
- Analyze and compare data about pricing, branding, images, and packaging
Getting started
A web scraping tool can help you gather all the product data from a specific category, and export scraped data as visual formats like spreadsheets, CSVs, or databases.
ScrapingBee is a Web Scraping API that handles proxies and Headless browsers for you, so you can focus on extracting the data you want, and nothing else.
First, get a ScrapingBee account if you haven't already got one. For this tutorial, you’d also need an account with both Make and Airtable.
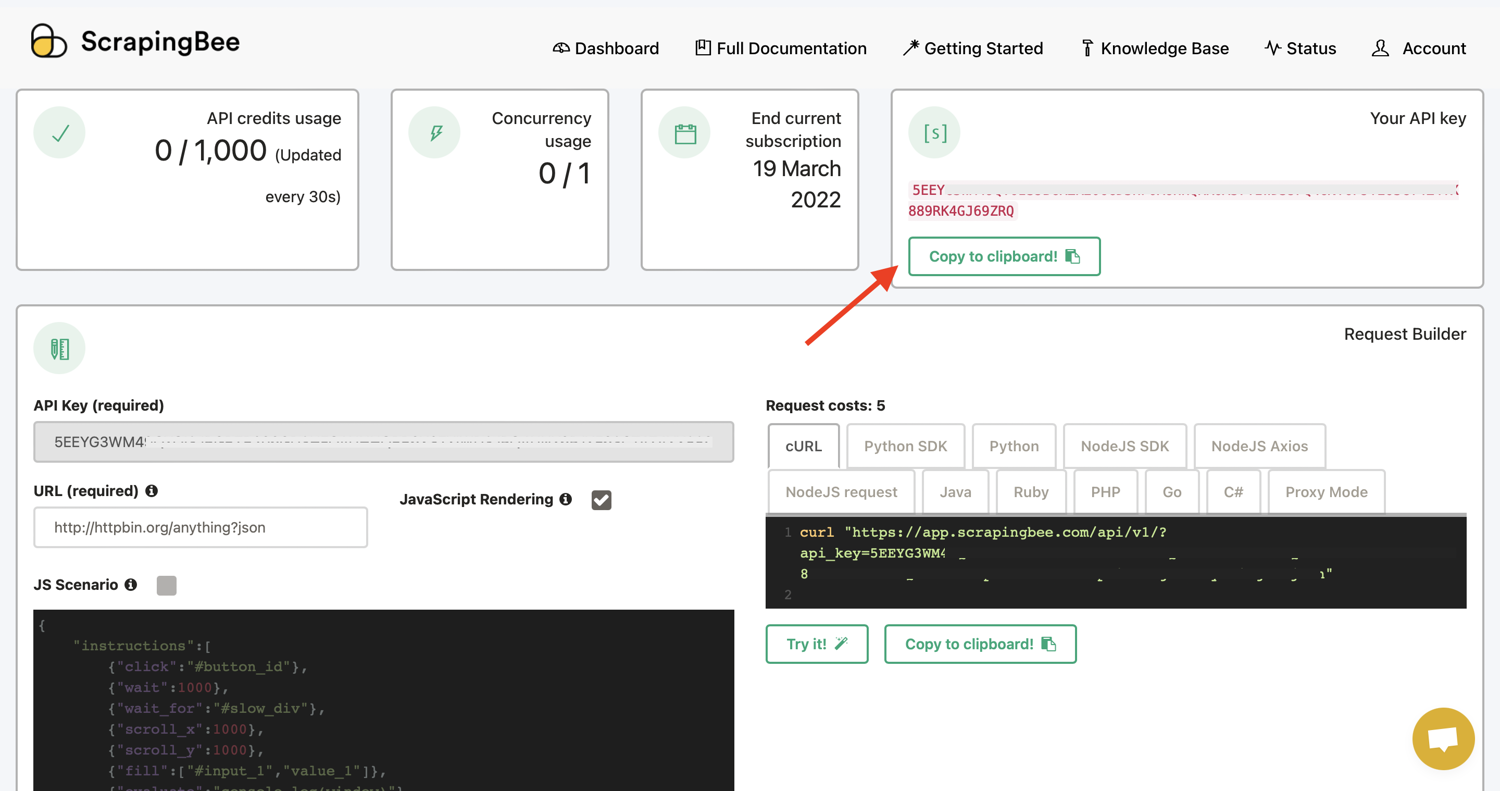
Get your ScrapingBee API Key
In order to add a connection, you’d need your ScrapingBee API key. To get your API Key, you just need to create an account here. Your API key can be gotten from the ScrapingBee dashboard:
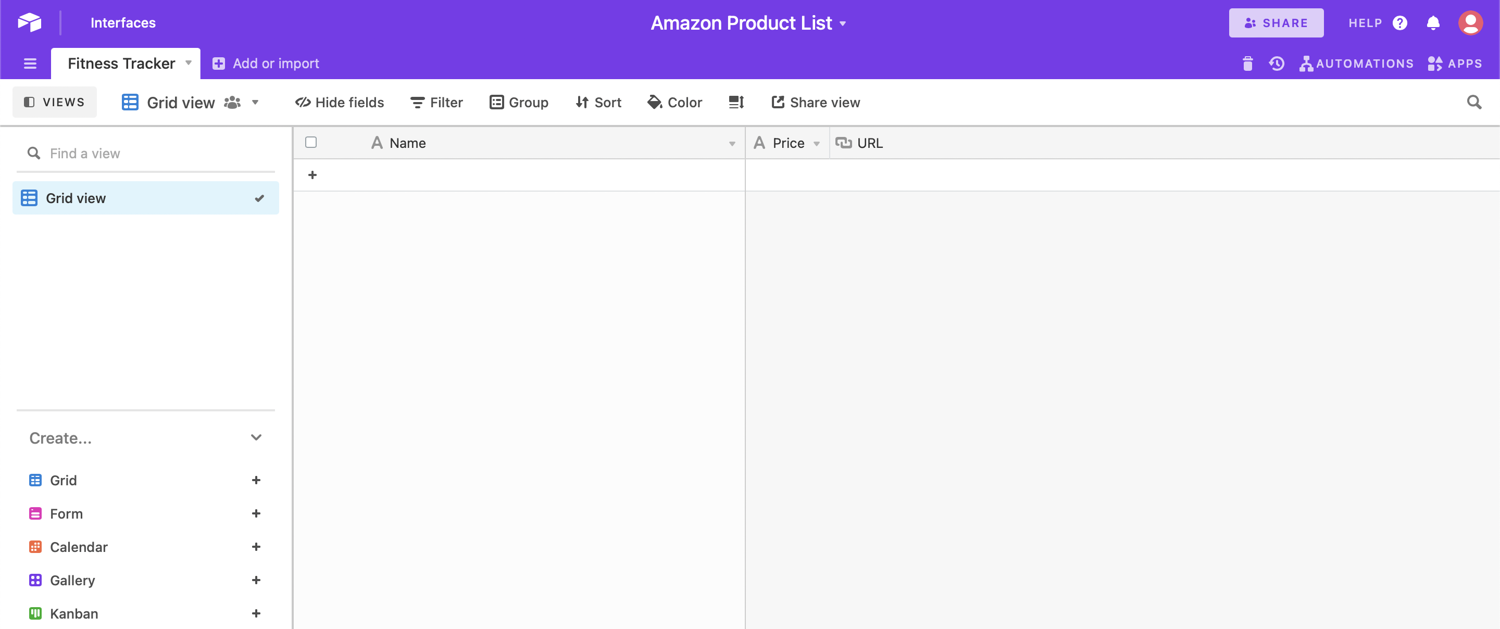
Create an Airtable Base
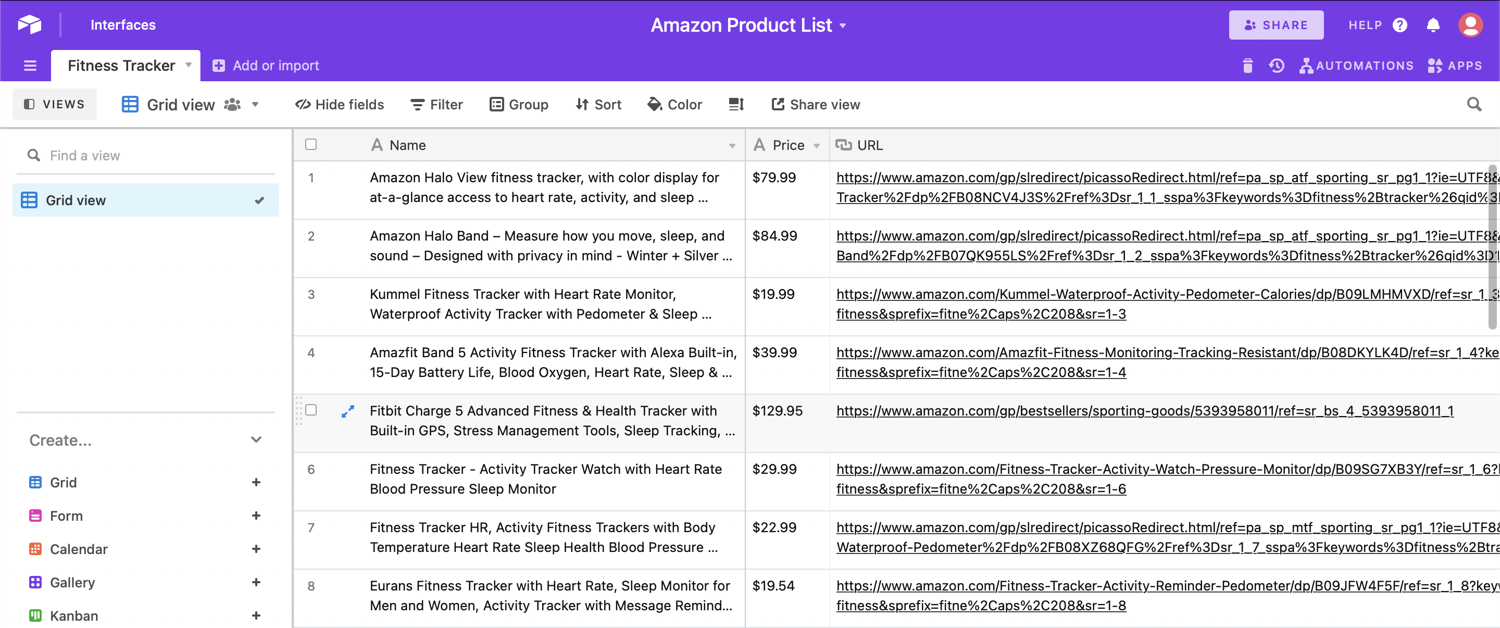
Next, create a spreadsheet in Airtable with the header row containing a name, price and link.
To get started, you will need a spreadsheet to collect the details for the products you want to compare*.* This spreadsheet will contain the product details we scrape from the URL:
Get Airtable API Token
To find your API key, navigate to your account page. On your account overview page, under the API heading, there's a button that says "Generate API key.".
Once you've generated a key, you have the option of regenerating your key or deleting your key:
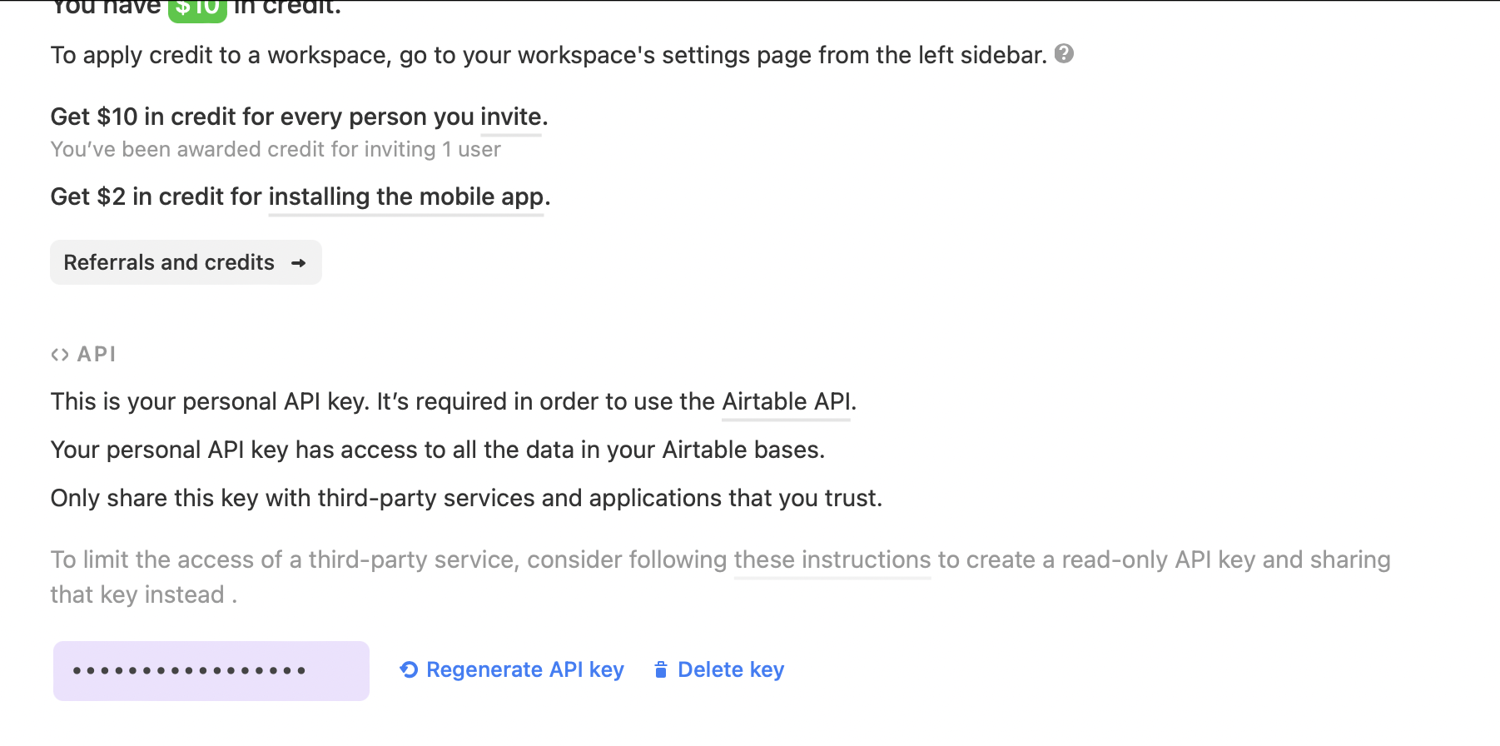
It's important not to share your API key because it functions as a password that allows access to all your bases. If you accidentally disclose your API key, you should regenerate it as soon as possible at https://airtable.com/account
Create a new Make Scenario
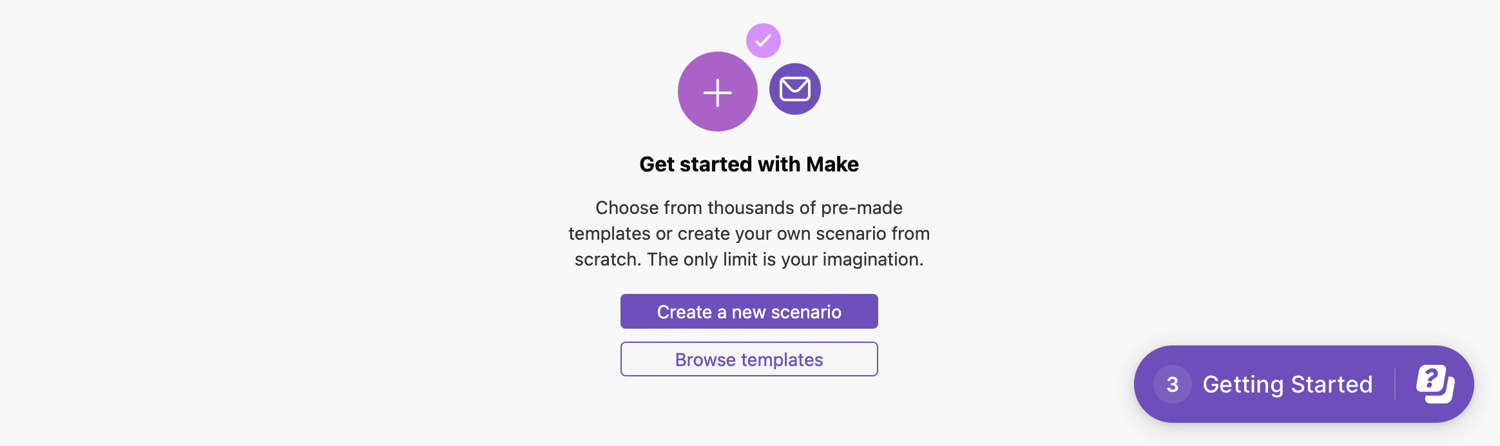
To get started, create a new Make (formerly Integromat) account or log into your existing account:

From the account homepage, create a new scenario. A Make scenario is comprised of a series of modules that indicate how data should be transferred and transformed between apps/services:
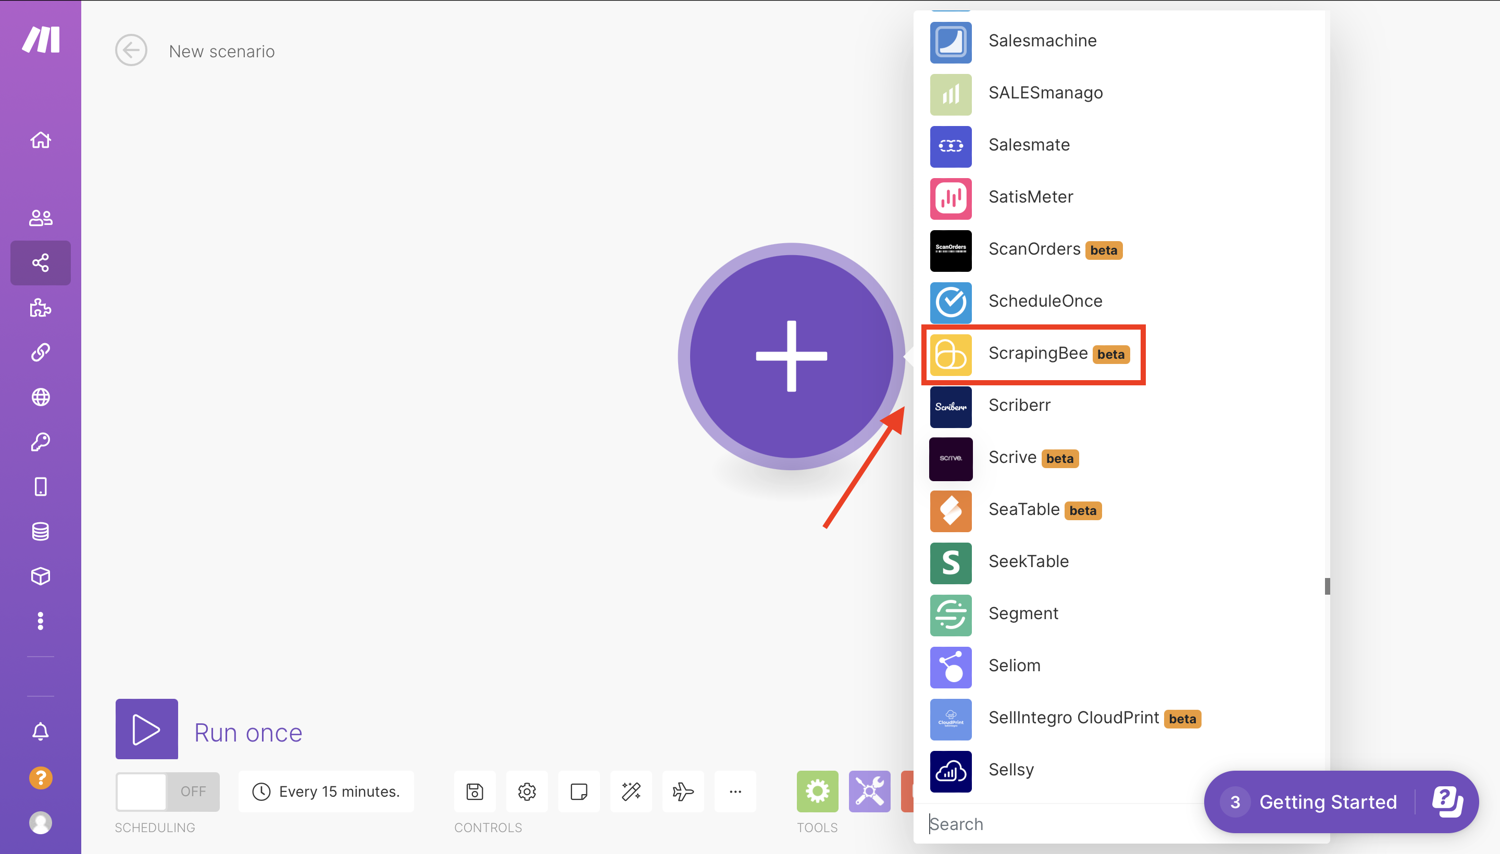
Select the app that will trigger your scenario. Click the first “+” sign and select ScrapingBee:
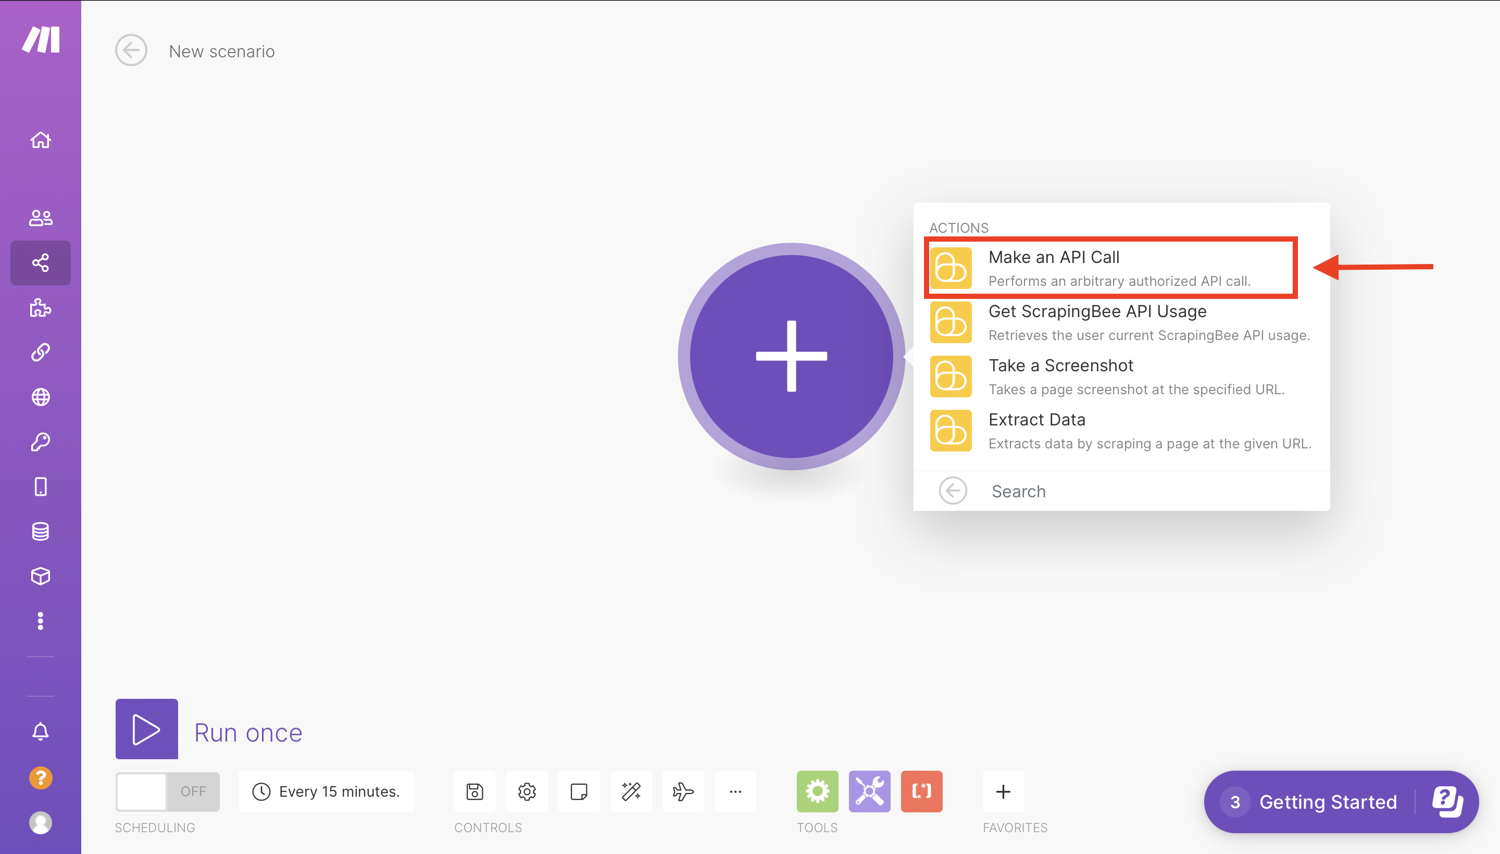
Now choose one of the modules from the list. In this case, select the “Make an API call” ******module:
Next, you will need to create a connection or select one of your previously configured connections for the module.
Create a ScrapingBee connection
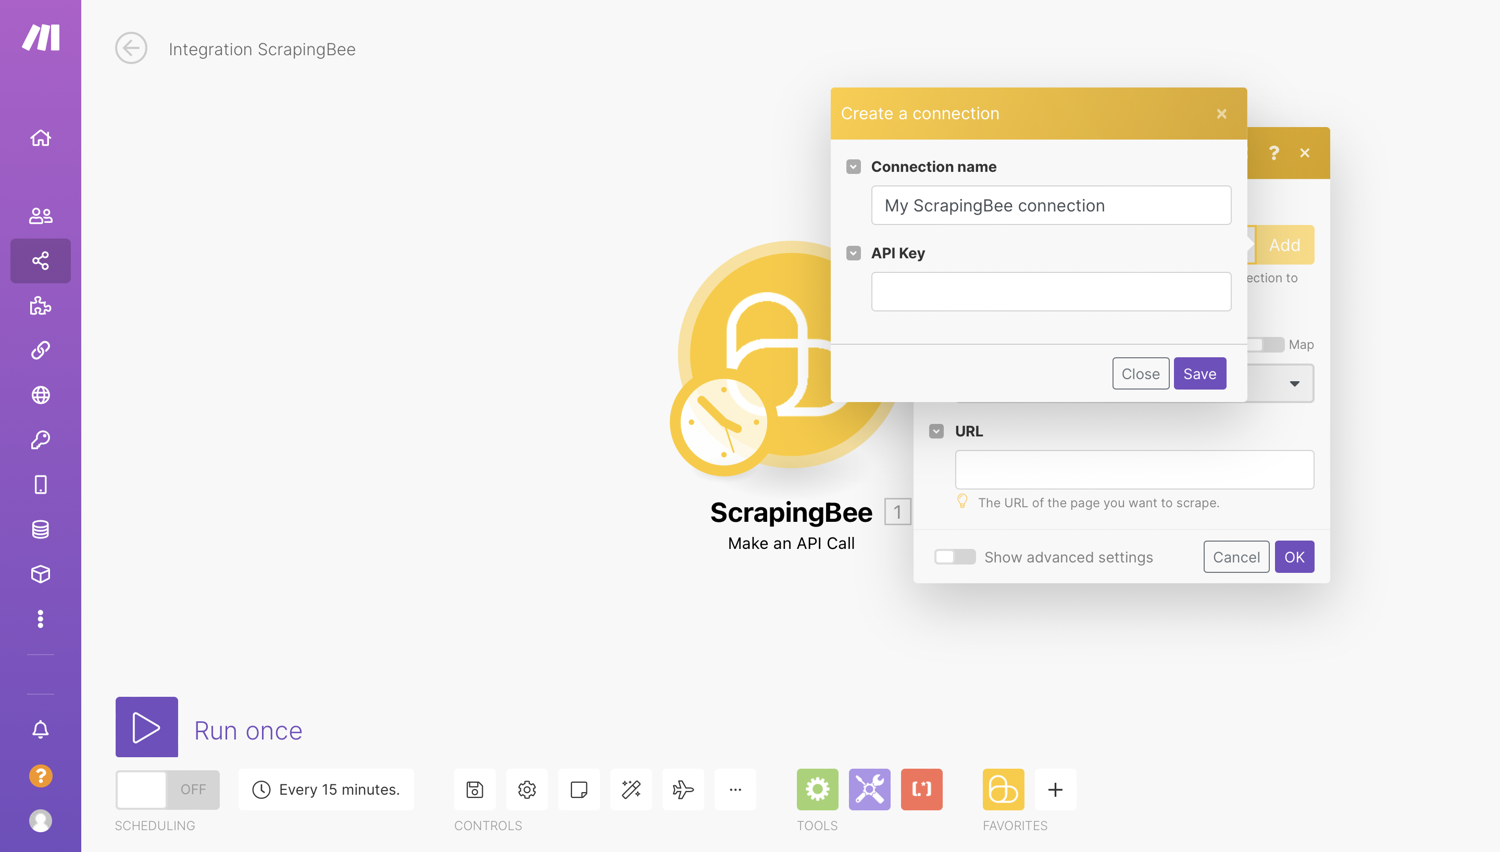
Make uses connections to connect to different services that require authentication. For example, to perform a scrape, we need to connect to ScrapingBee using our API key:

To add a connection, click on “Add” and then enter your ScrapingBee API key gotten from the ScrapingBee dashboard:
Once the connection is set up, we will now configure the action.
Configure Action
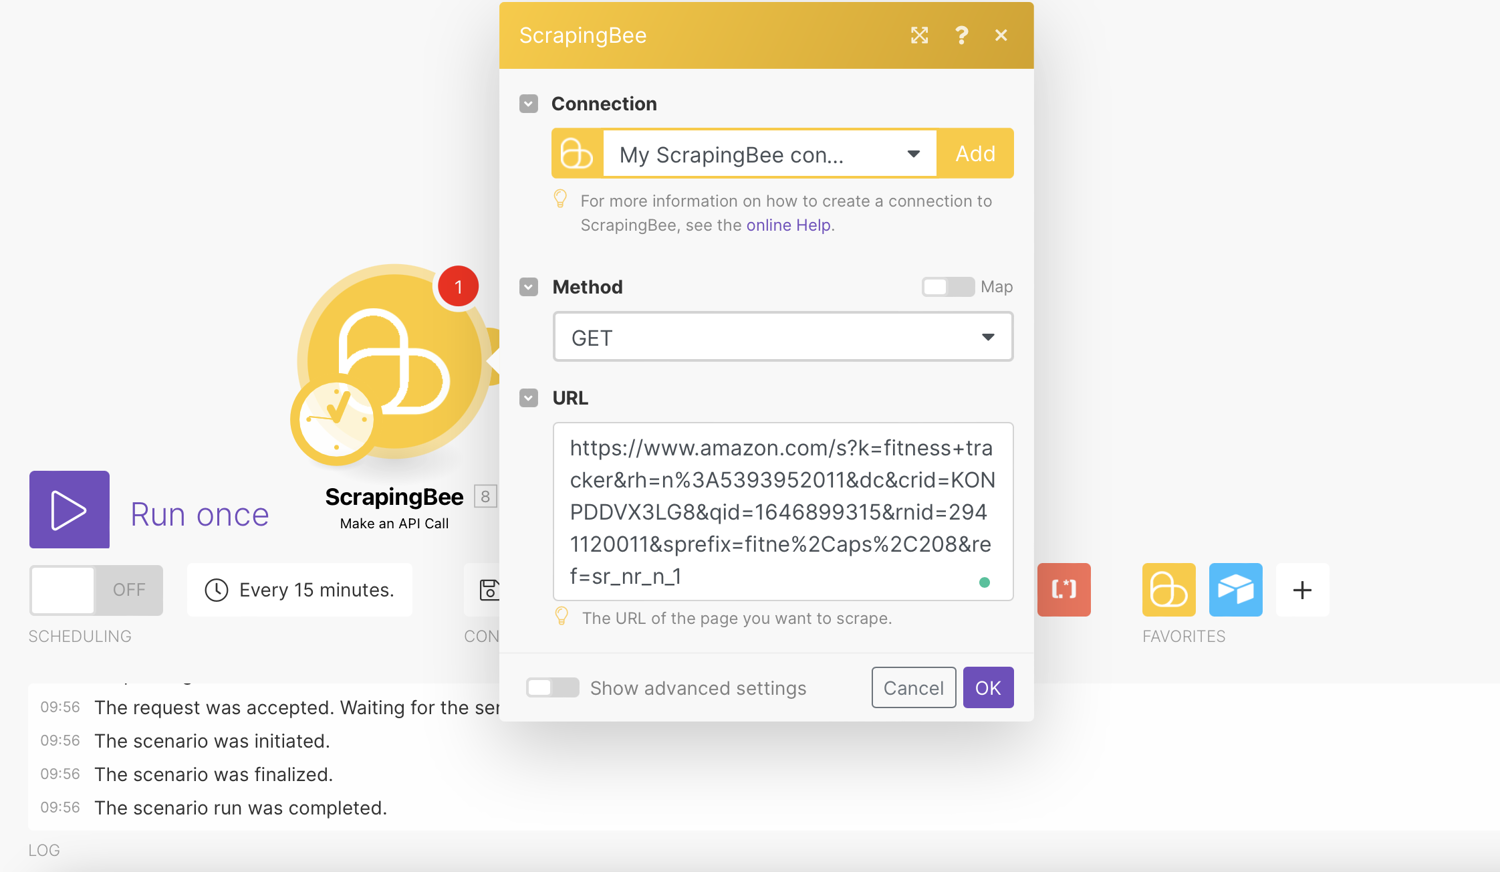
Set method to GET. This is the default method and is what browsers use to display pages. POST is used to submit forms, but we have no need for that here.
For this tutorial, we will scrape fitness trackers, and the URL we will use for that is:
Enter the URL of products that you want to watch in the URL field. The URL field is the link we want to scrape:
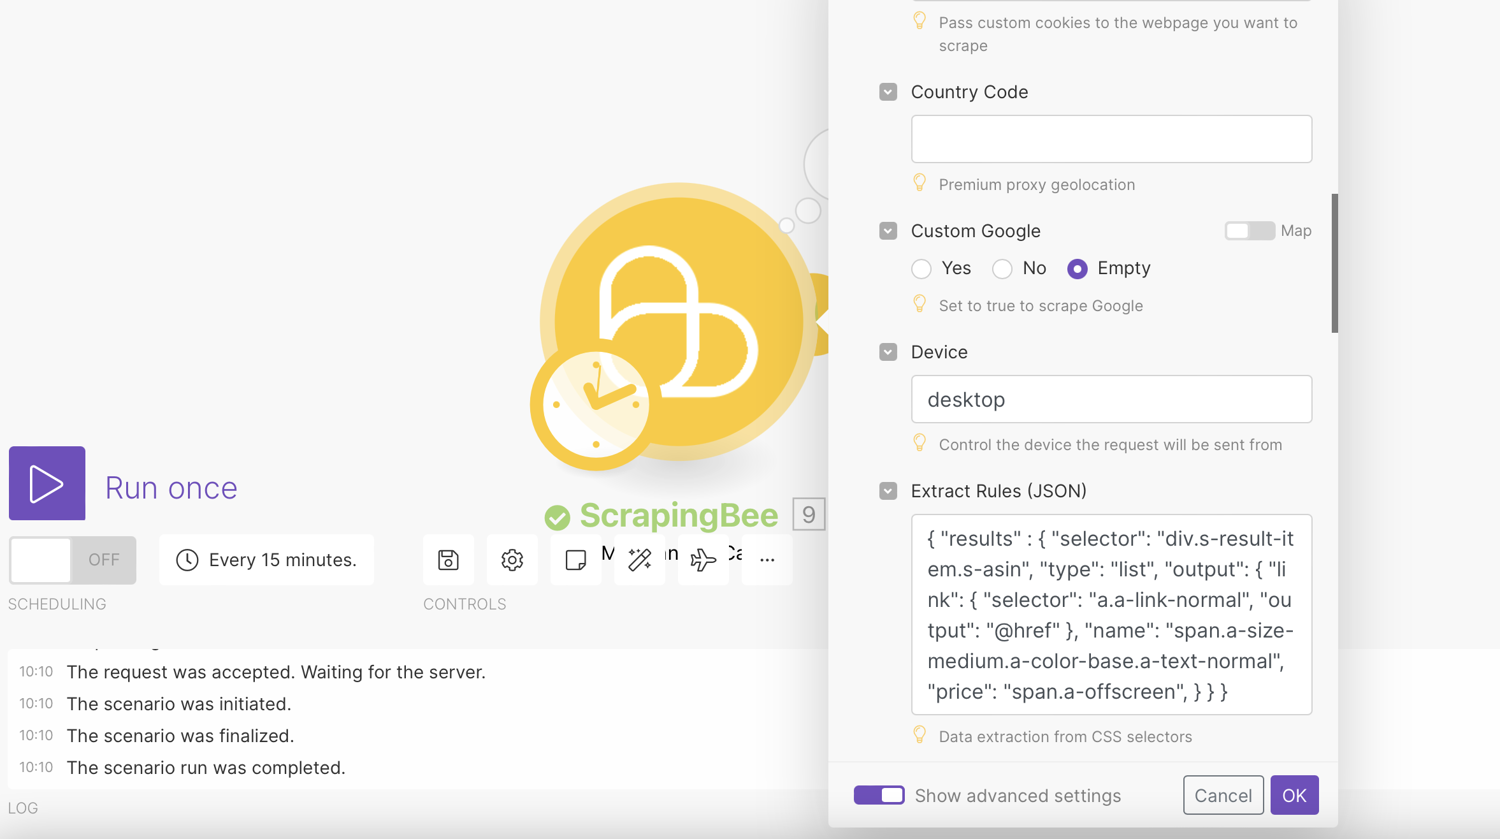
Toggle the box “Show advanced settings”. This is where we enter the data extraction rules that allow ScrapingBee to return the data in a nicely formatted way.
Scroll to “Extract Rules (JSON)” and enter the following to extract all the URLs of detail pages:
{
  "results" : {
    "selector": "div.s-result-item.s-asin",
    "type": "list",
    "output": {
      "link": {
        "selector": "a.a-link-normal",
        "output": "@href"
      },
      "name": "span.a-size-medium.a-color-base.a-text-normal",
      "price": "span.a-offscreen",
    }
  }
}
For this article, we’ve decided to scrape the name, price and link. Depending on your requirements, you can add more to these.
The HTML structure of each Amazon store is basically identical, so we can run our scenario on all of them and get all the prices quickly.
Extraction rules can be quite complex for those not familiar with CSS. You may be interested in reading the documentation for more details about how it works.
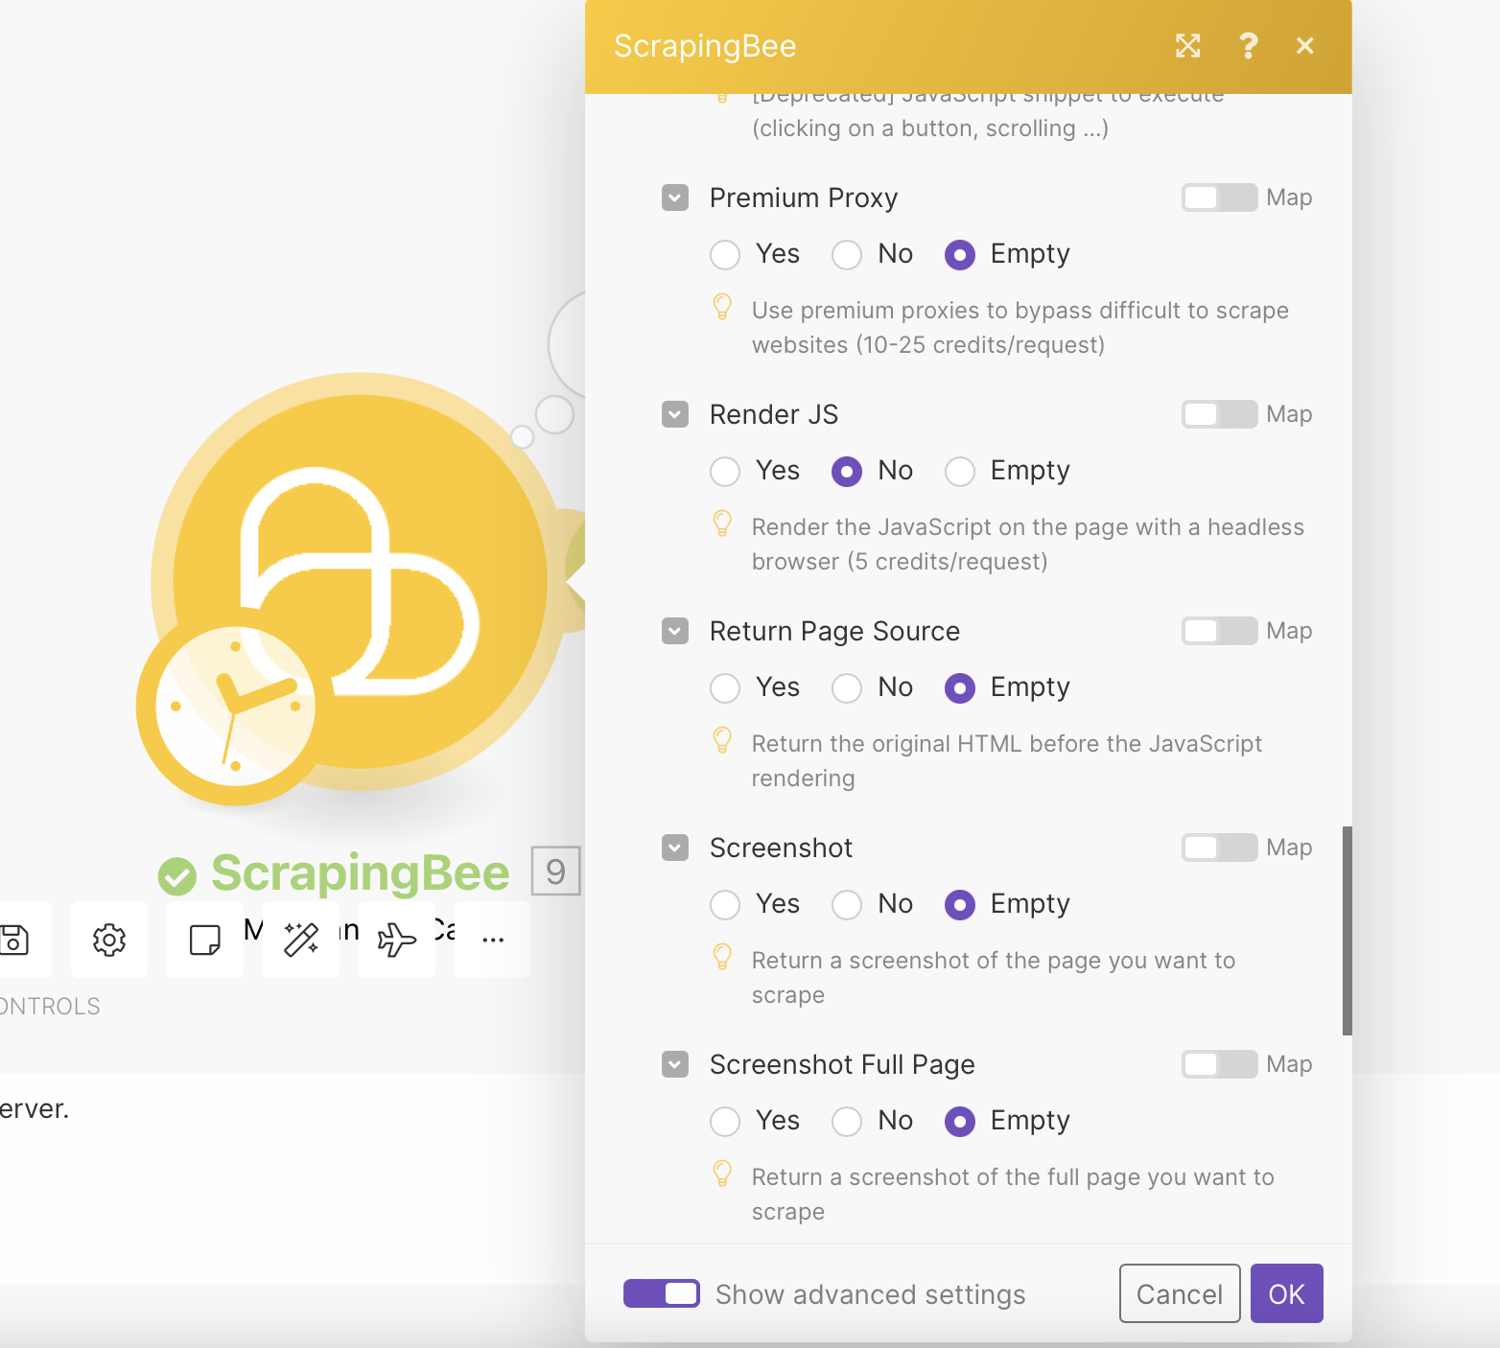
Optionally, you should mark “Render JS” as No. This is not a feature required for this scraping job and costs extra credits.
Test Connection
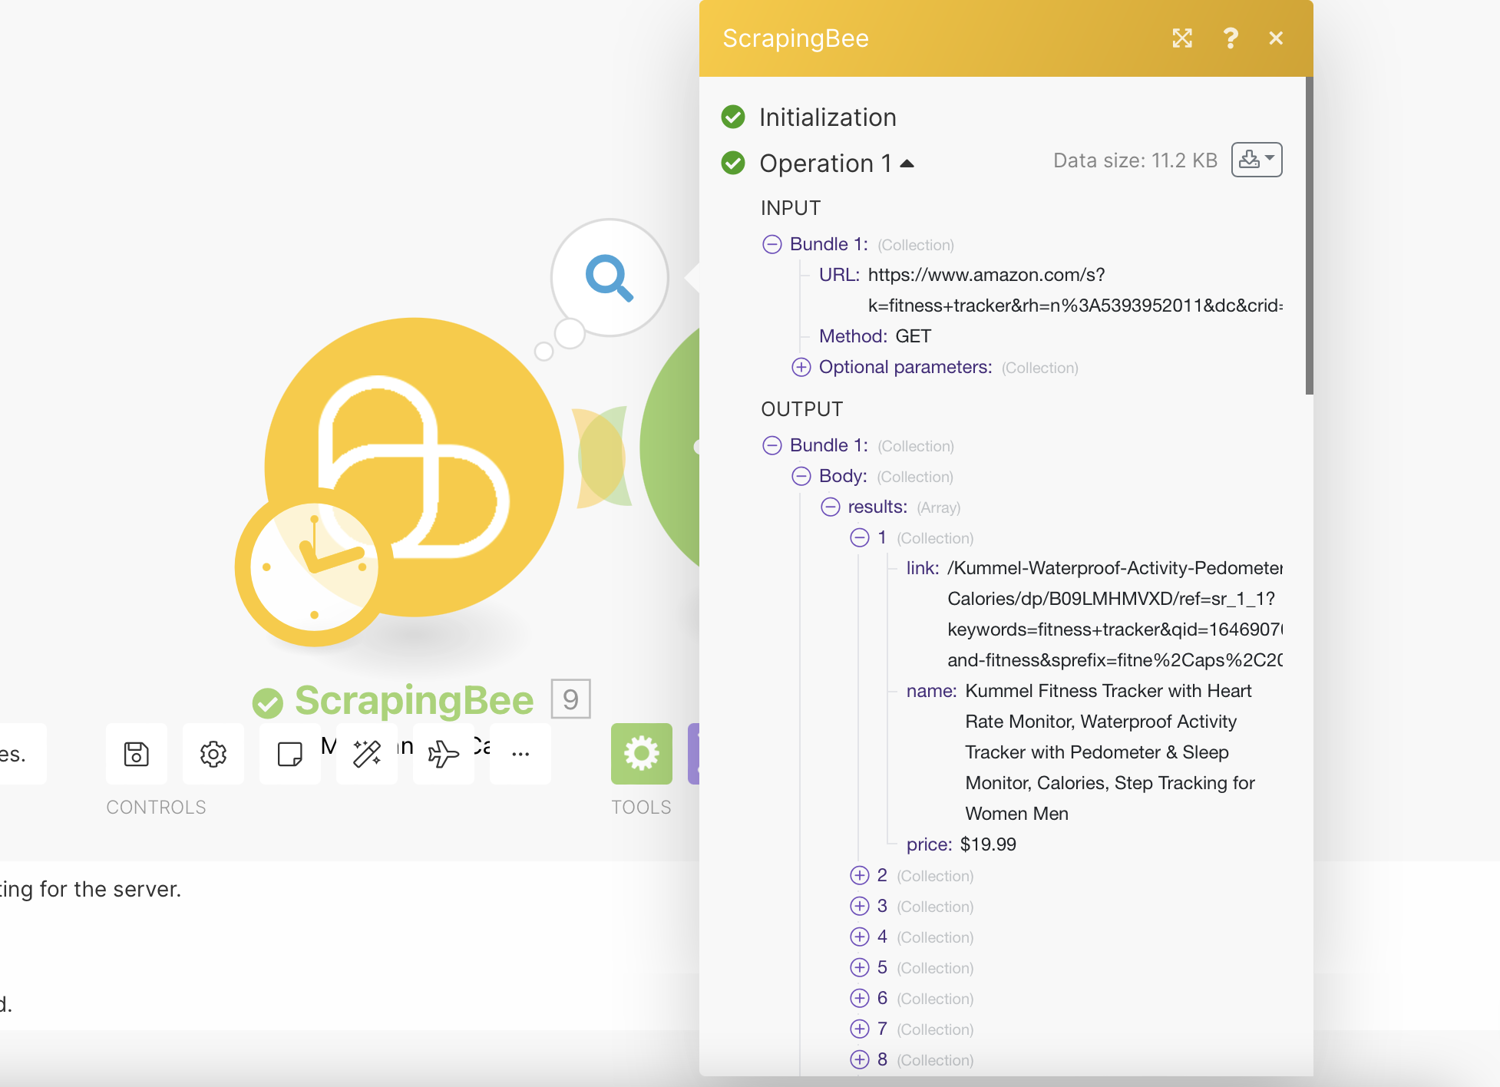
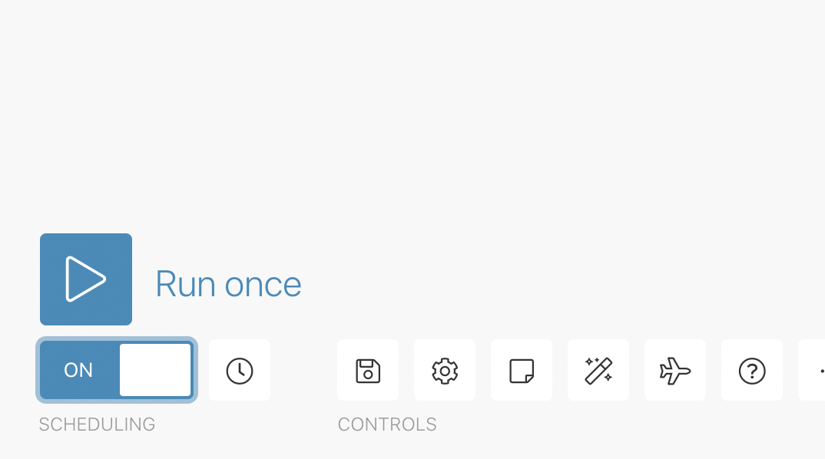
You can now test run the scrape job using the “Run Once” button at the bottom of the page
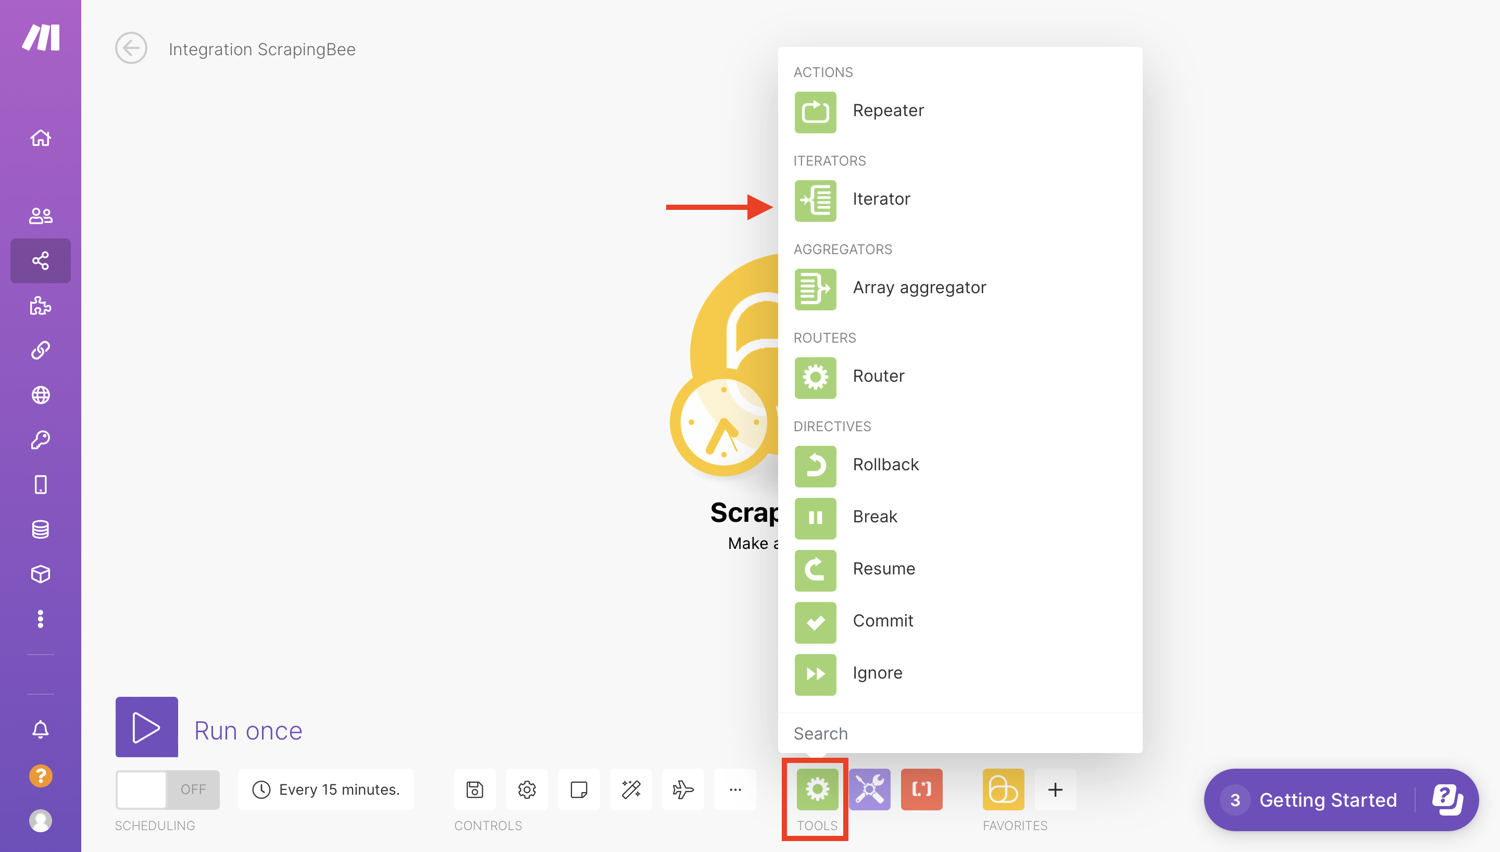
Control workflow with Iterator
For the next step in the scenario, we will select “Flow Control” and pick “Iterator”. Iterators are a separate tool that can be found under the Flow section of tools.
Iterator is a special type of module that allows you to split a large bundle of data into multiple smaller bundles.
Each array item will be outputted as a separate bundle. This allows us to make the rest of the scenario run for each value in the result set. This is because (as we will see later) we one to add a row in our spreadsheet for each scraped post.
To configure the Iterator, we will select “Body → Results”. This makes it loop over the scraped product data and will perform any subsequent action for each item:
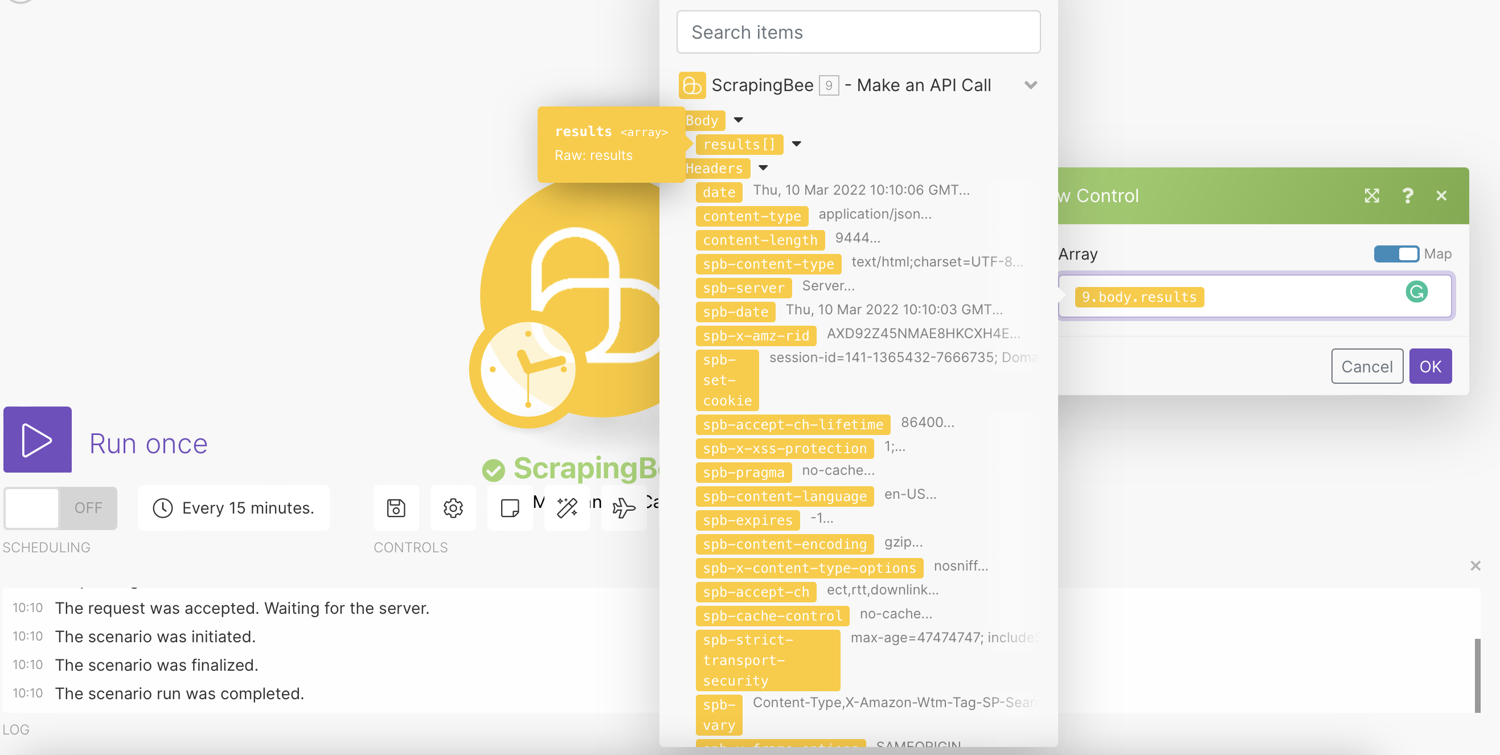
Click ‘Ok’. The results returned are then passed on one after another to subsequent modules. This way you can deal with each smaller bundle as separate bundles.
Now, you will have to create a connection to the corresponding service.
Configure Airtable Module
Just like with the ScrapingBee integration, we need to add a connection. This will redirect you to Airtable to give Make access to some parts of your account.
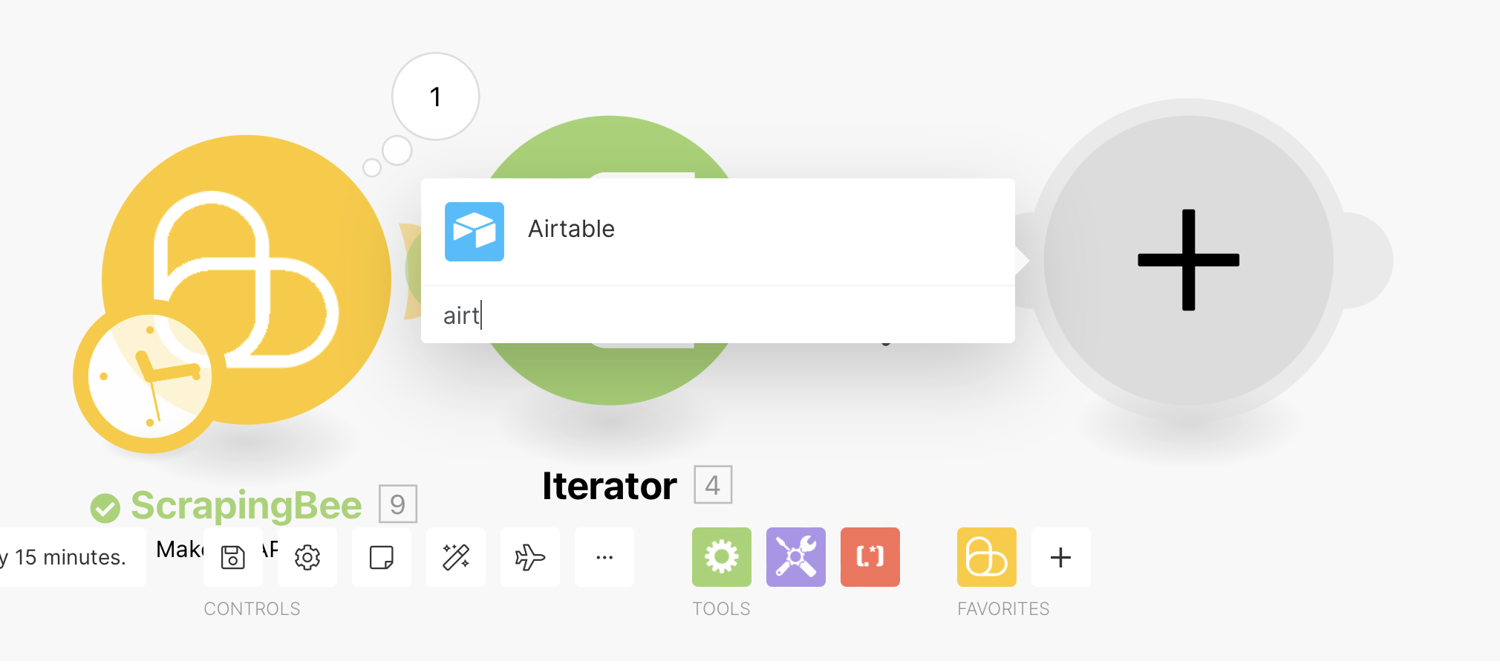
Click the plus (+) sign and add an Airtable module:
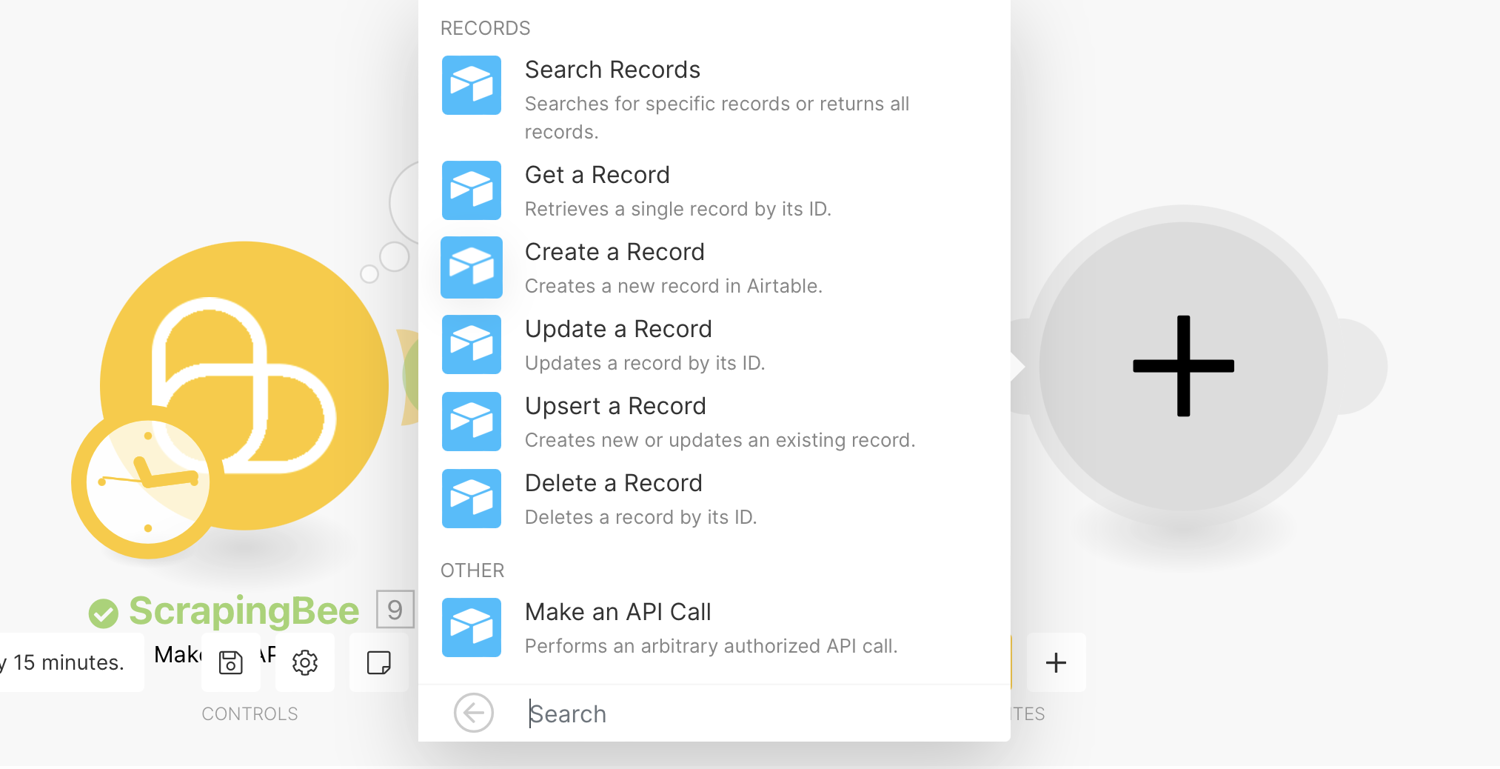
From the list of actions, select “Create a Record”. Since this comes after the Iterator, it will Create a Record for EACH product, which is what we want:
The step-by-step description of creating a connection for the given service/app is displayed after clicking the question mark in the top-right corner of the module settings dialog.
Enter your API Token:
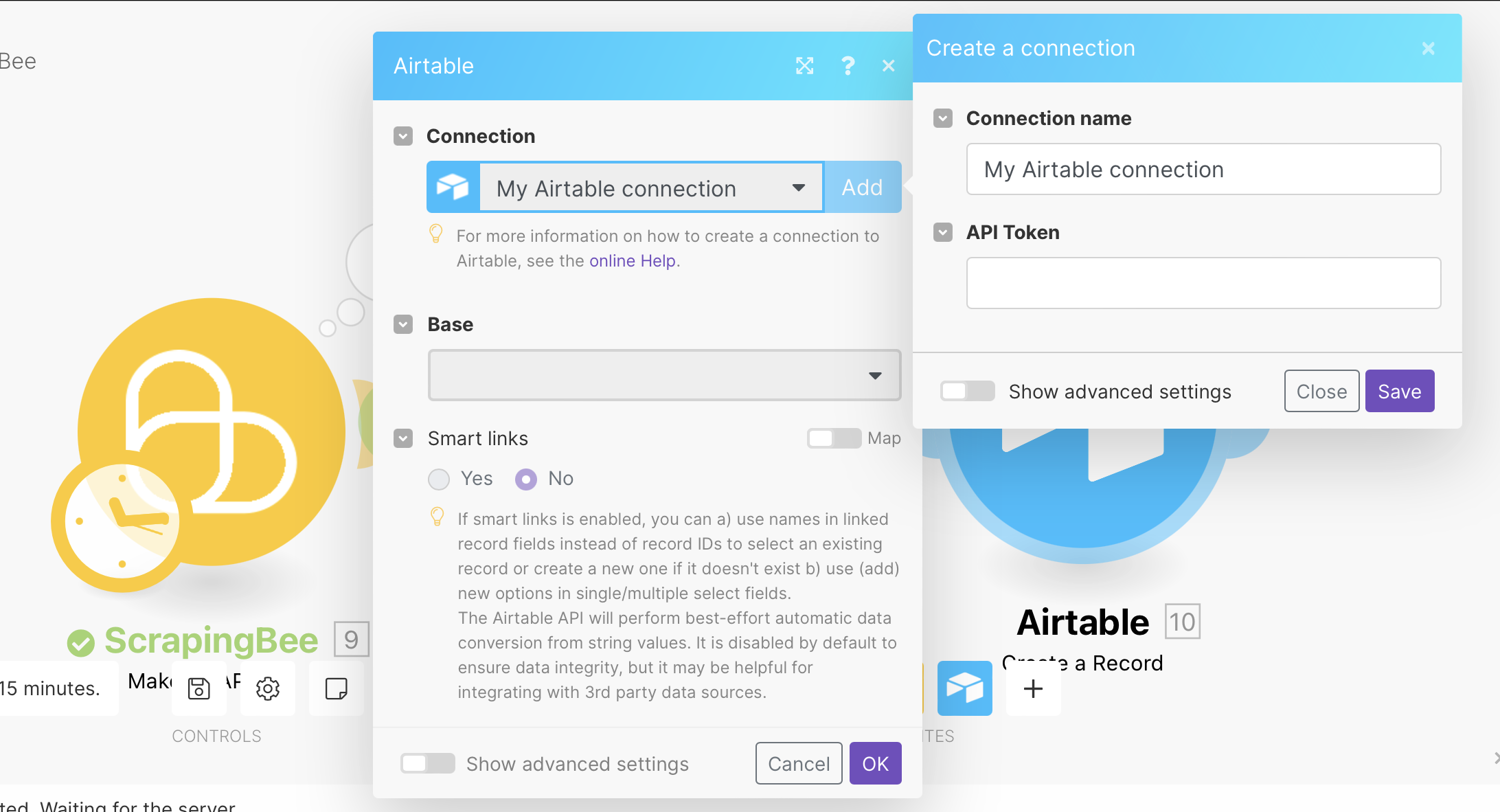
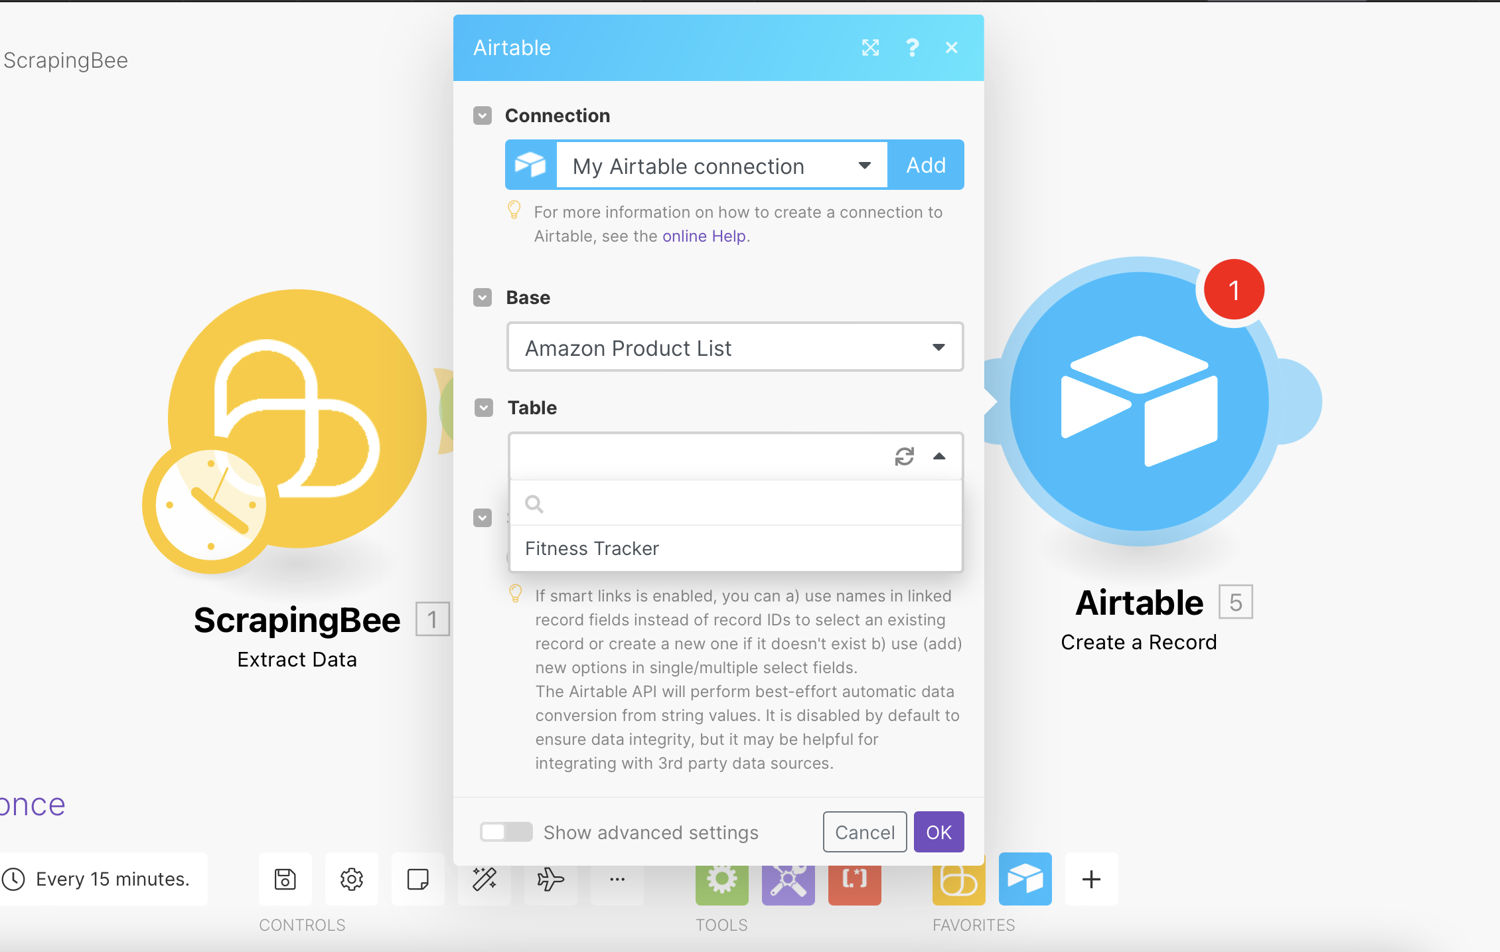
Click ‘Save’ to pull up your details. Select your base and table from the dropdown list:
Map the Name, Link and Price to the record from the Iterator results:
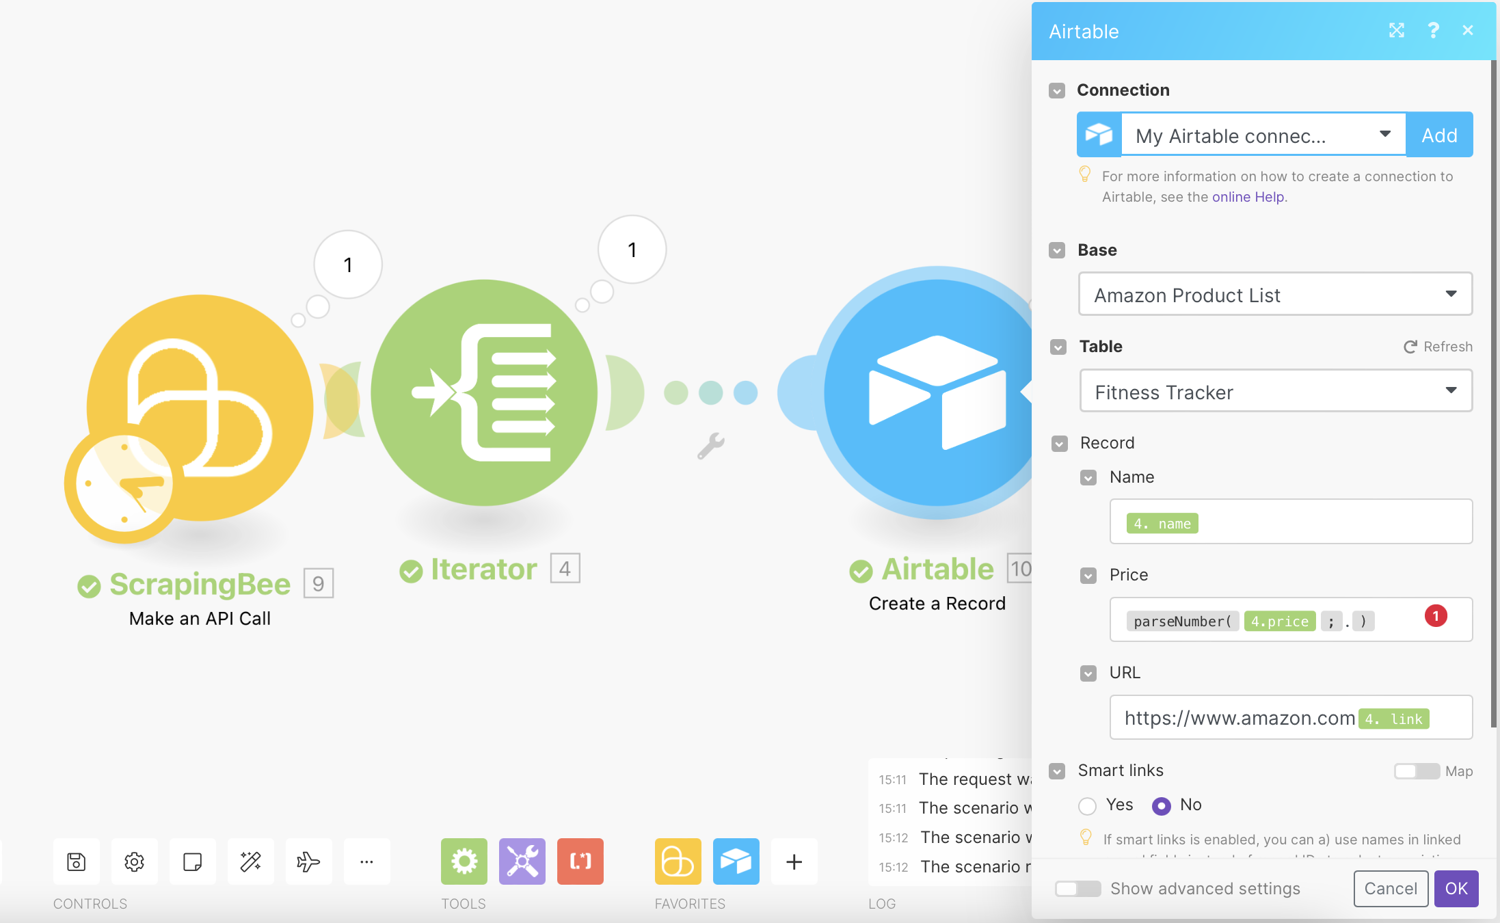
Note:
parseNumber(4.price; ".")parses a string with a number and returns the number without the $ currency.- It is important that you add
https://www.amazon.comwith no spaces before the link. This will ensure that the URL is correctly formatted.
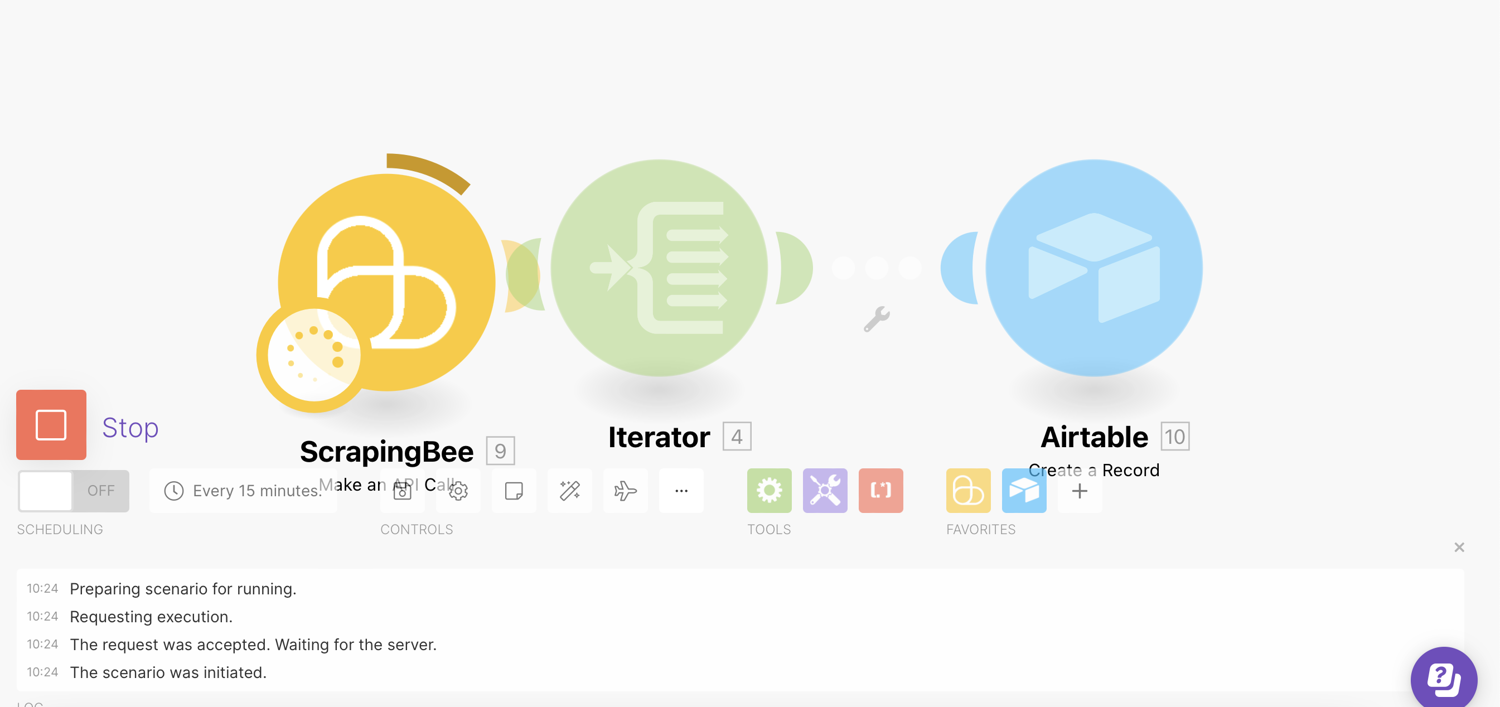
Click ‘Ok’. Run the integration again:
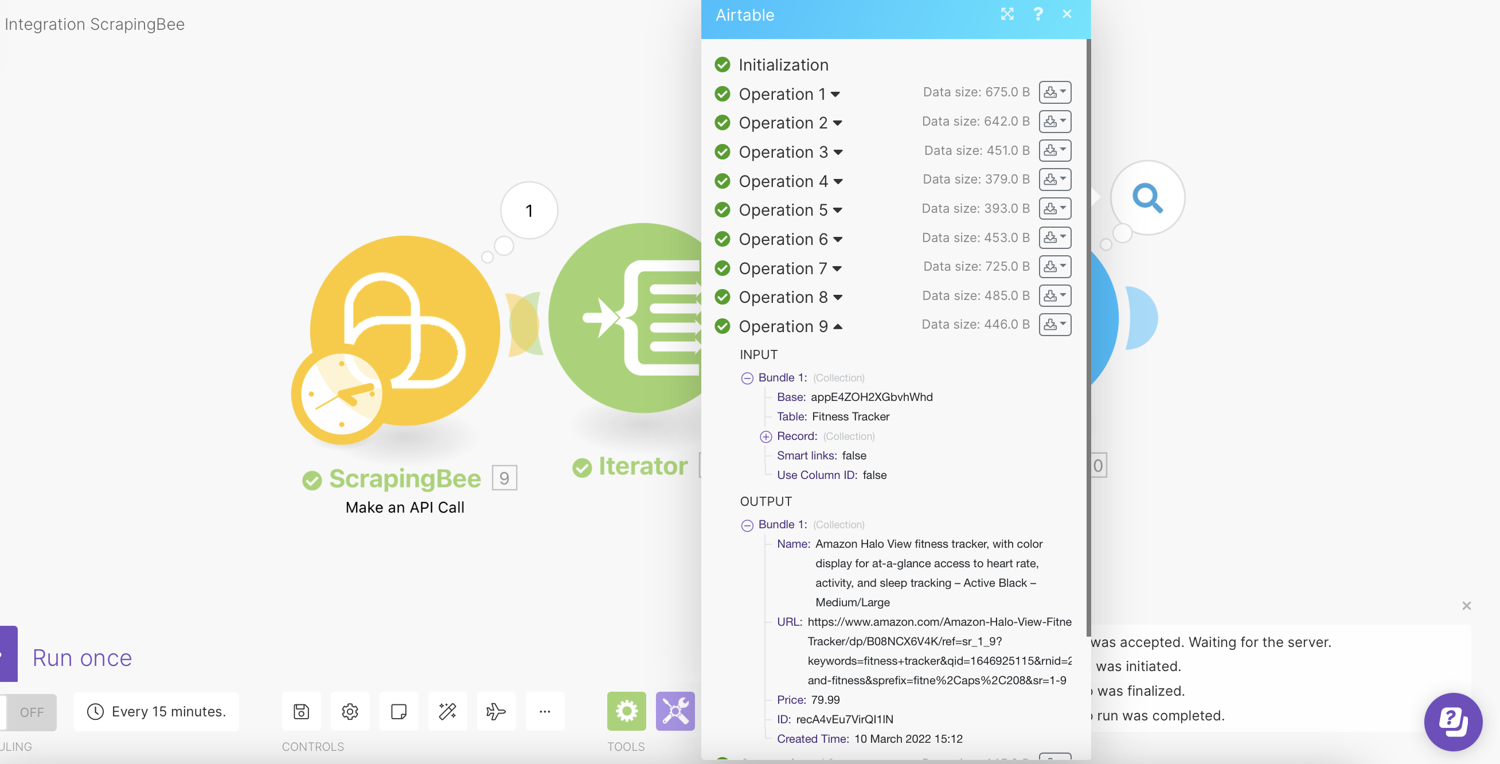
Expand the results:
Sort Airtable Field
You should be able to see the values in the spreadsheet:
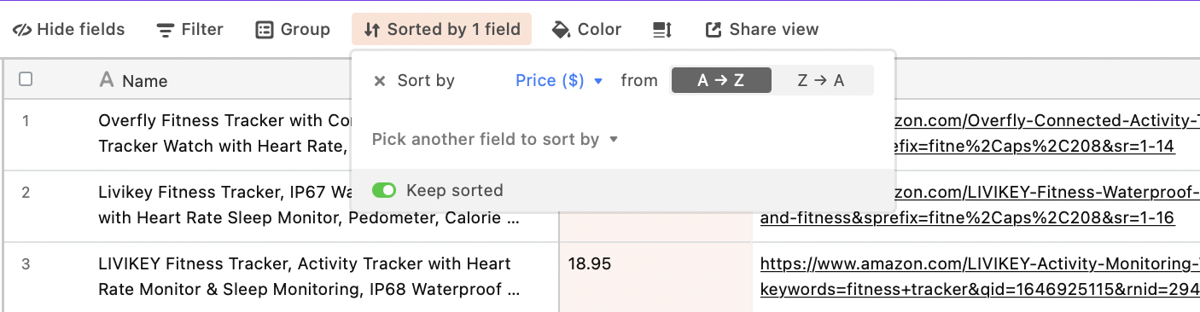
Next, you want to sort the table from low to high so you can keep track of the prices of the products:
Schedule a Make Scenario
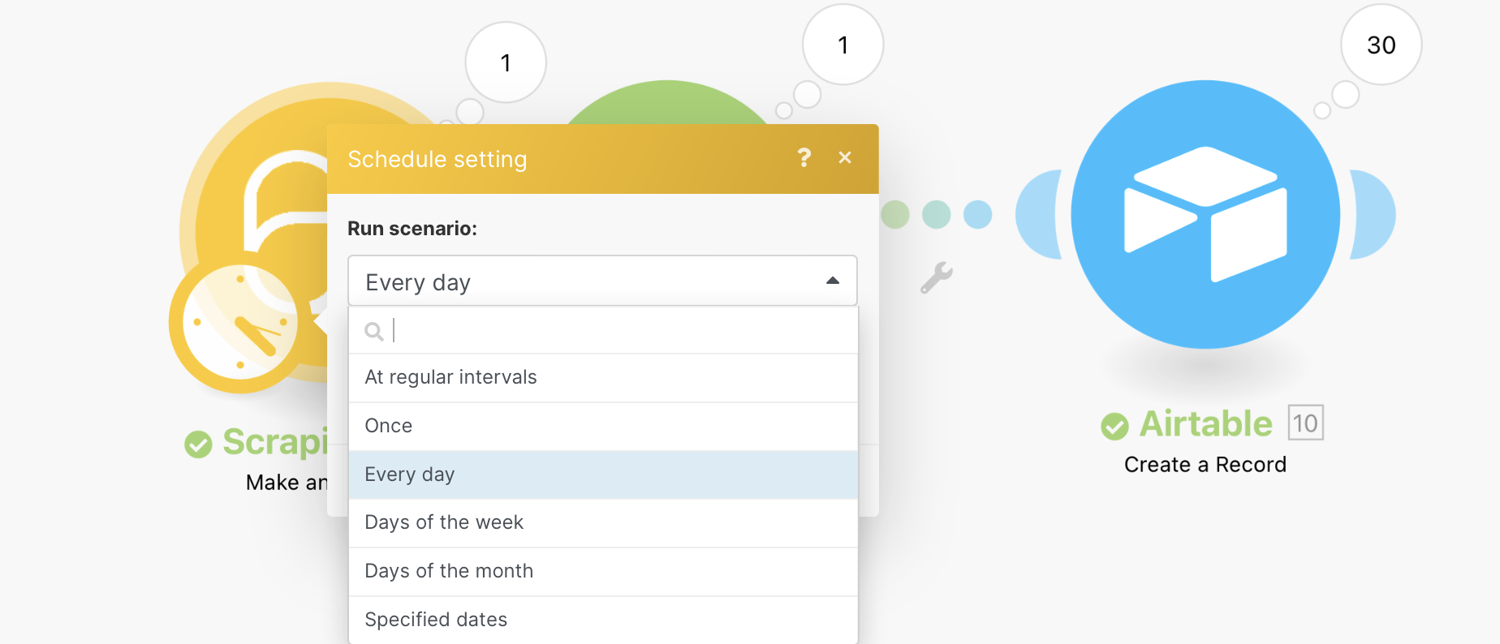
You can specify when and how frequently an activated scenario runs. To do so, go to the scenario detail page and locate the Schedule tab under the Options tab. From there, choose Scheduling:
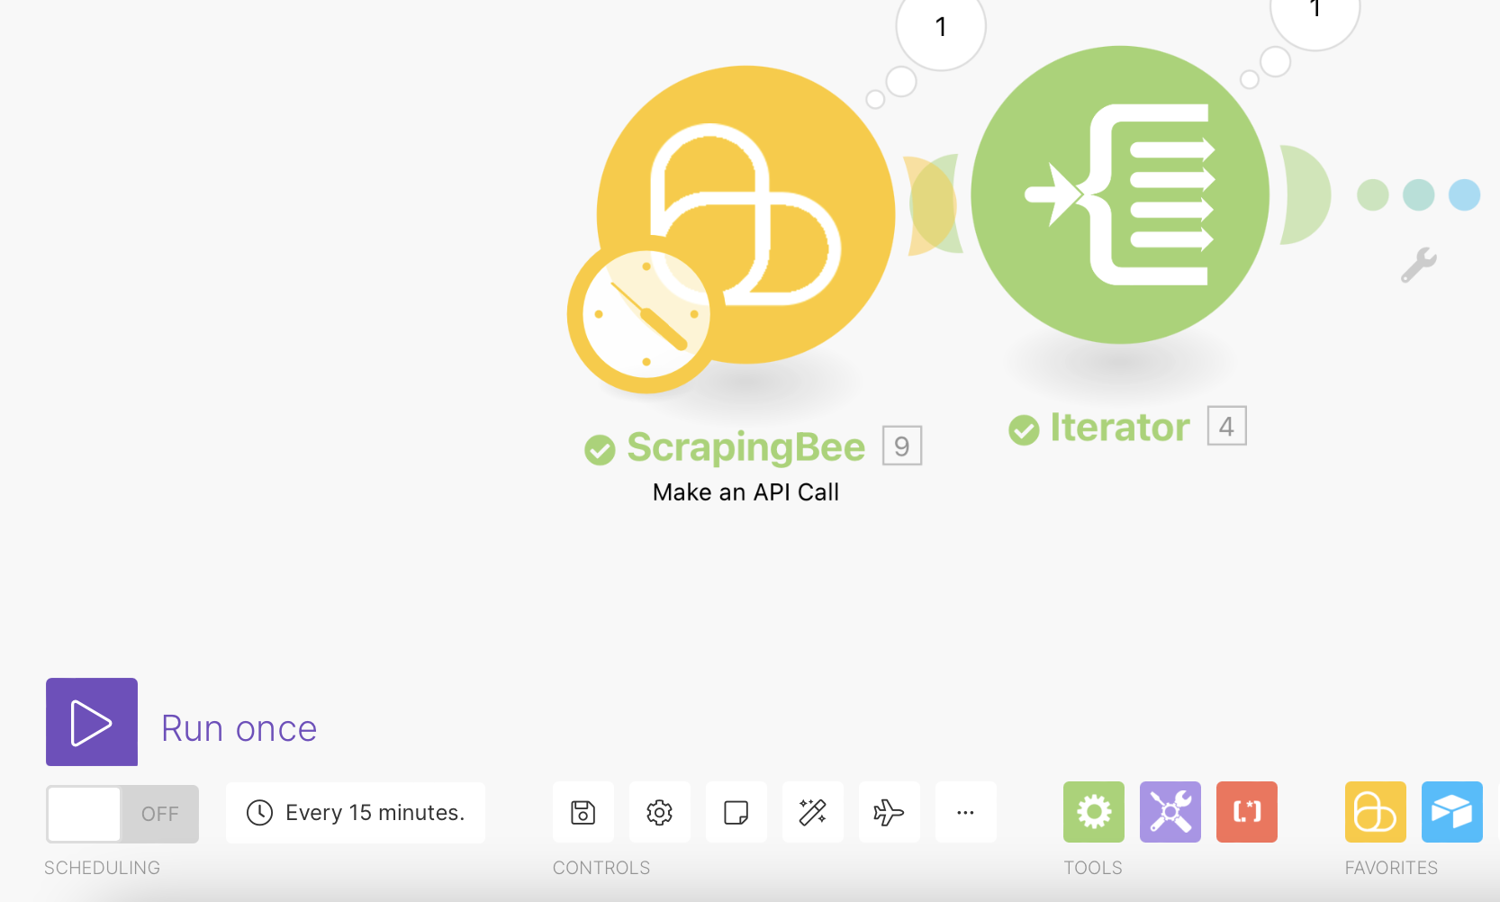
To make this run every day, click the clock icon overlaying the ScrapingBee module and change the Run Scenario to Every day. Also, set the time when it should run.
Finally, turn on Scheduling for the scenario. Without turning it on, the scenario will not be run automatically regardless of the scheduling settings.
When you do this, it’ll be advisable to add a date field on Airtable to record the time the product was scraped. By doing this, you can group the field by the date added.
🤖 Want more No-Code Web Scraping? Check out our guide on N8N Web Scraping
Conclusion
There you go. So that demonstrates the use of the ScrapingBee > Scrape data from Amazon in a scenario.
In this way, you can use the real-time information of your competitors to better manage your products and stay competitive by tracking the data automatically.
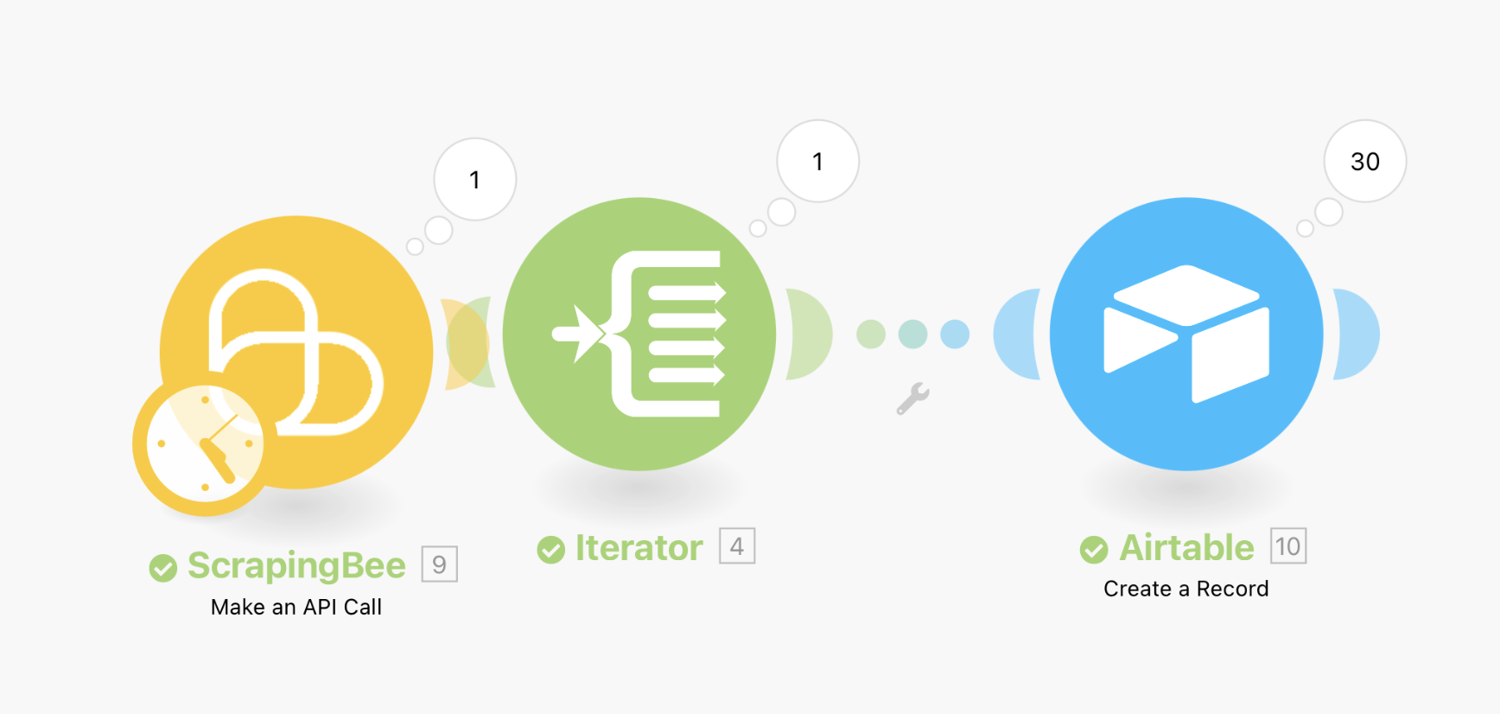
Here’s a quick recap. The scenario consists of the following modules:
- ScrapingBee > Make an API call
- Iterator
- Airtable > Create a record
That concludes this tutorial on scraping product prices from Amazon.
Happy Scraping!
Before you go, check out these related reads: