The process of scraping at scale can be challenging. You have to handle javascript rendering, chrome headless, captchas, and proxy configuration. ScrapingBee offers all the above in one API.
Paired with Make (formerly known as Integromat), we will build a no-code workflow to perform any number of actions with the scraped data. Make allows you to design, build, and automate anything—from tasks and workflows to apps and systems—without coding.
In this web scraping article you will learn to:
- scrape the blog posts from any website
- push the scraped content into Google Sheets
The target URL for this tutorial is https://www.scrapingbee.com/blog/. We will scrape data fields including post title, author name, post introduction and published date.

Getting Started
First, get a ScrapingBee account if you haven't already got one. For this tutorial, you’d also need an account with both Make and Google.
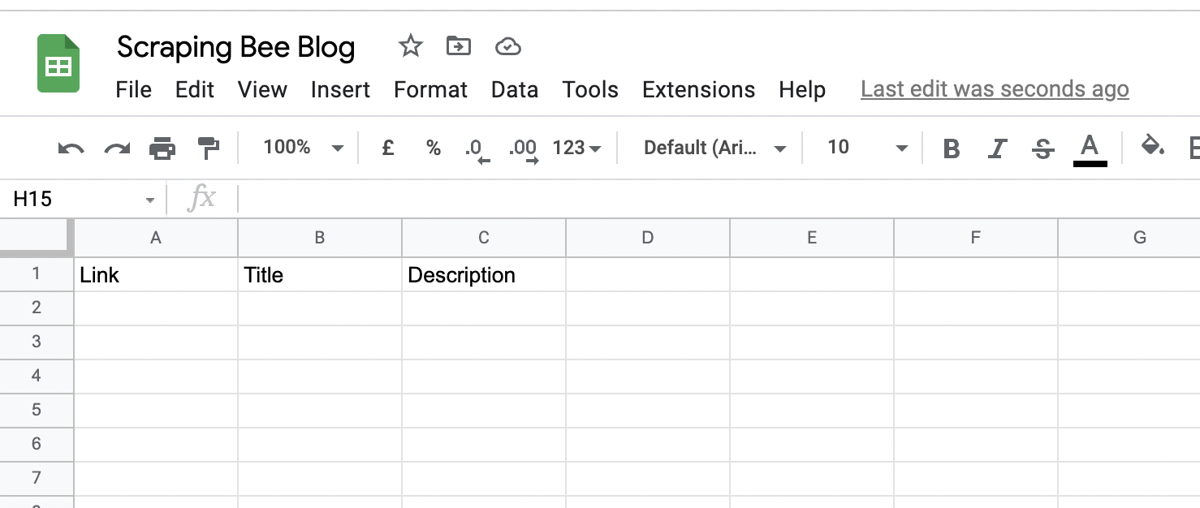
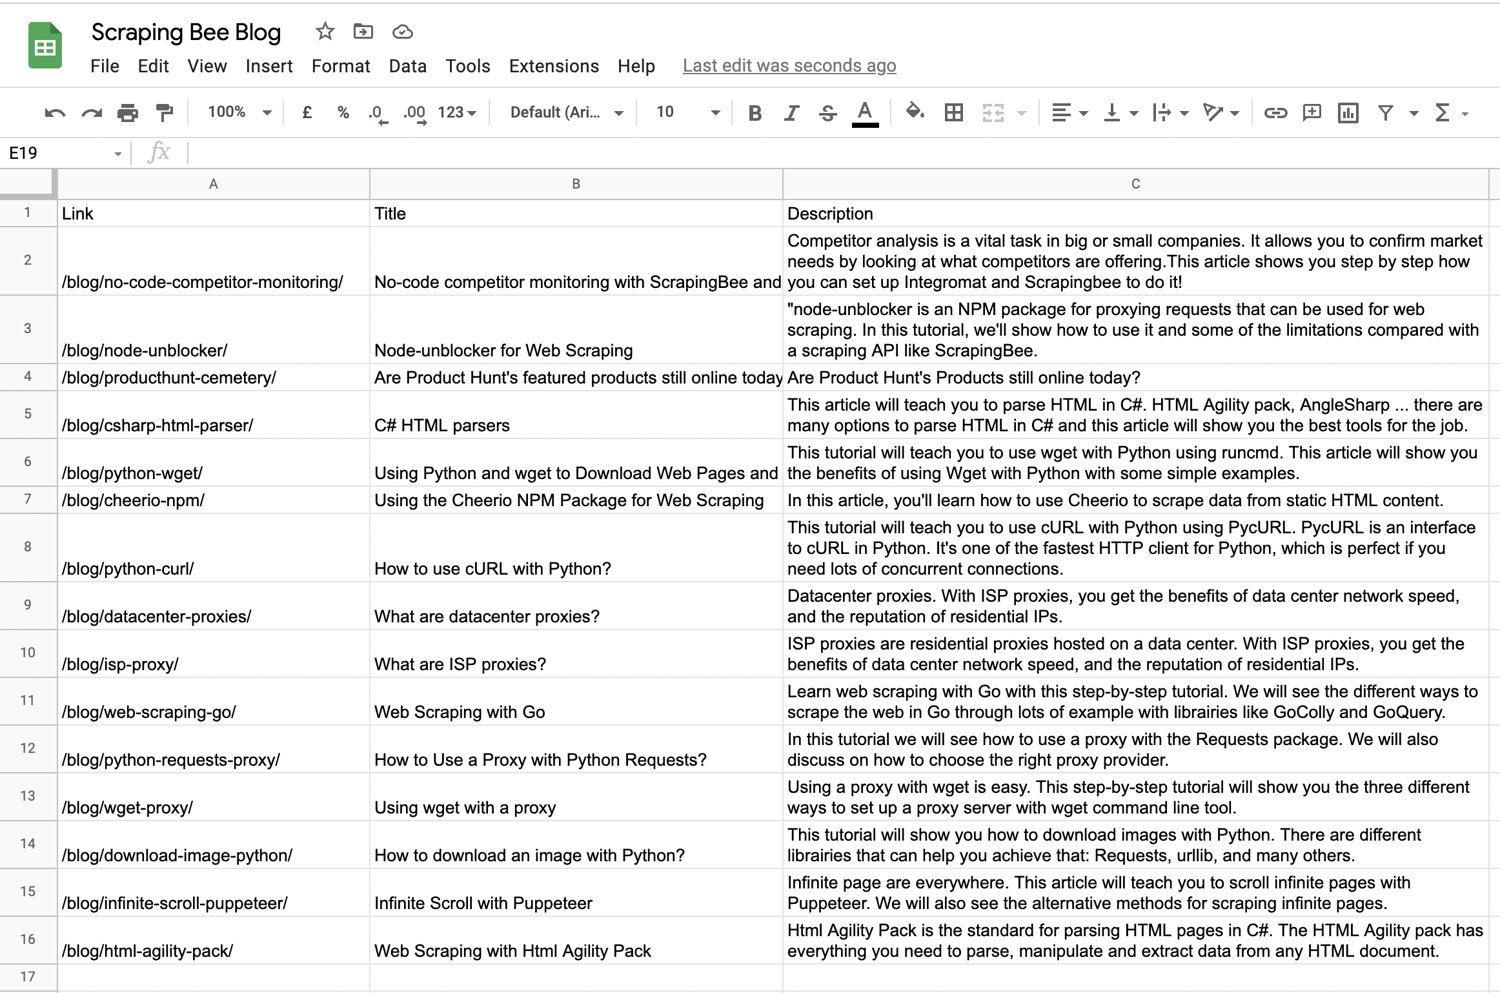
Next, create a spreadsheet in Google Sheets with the header row containing a link, title and description.
This spreadsheet will contain the blog articles we scrape from the URL:
Create a Make Scenario
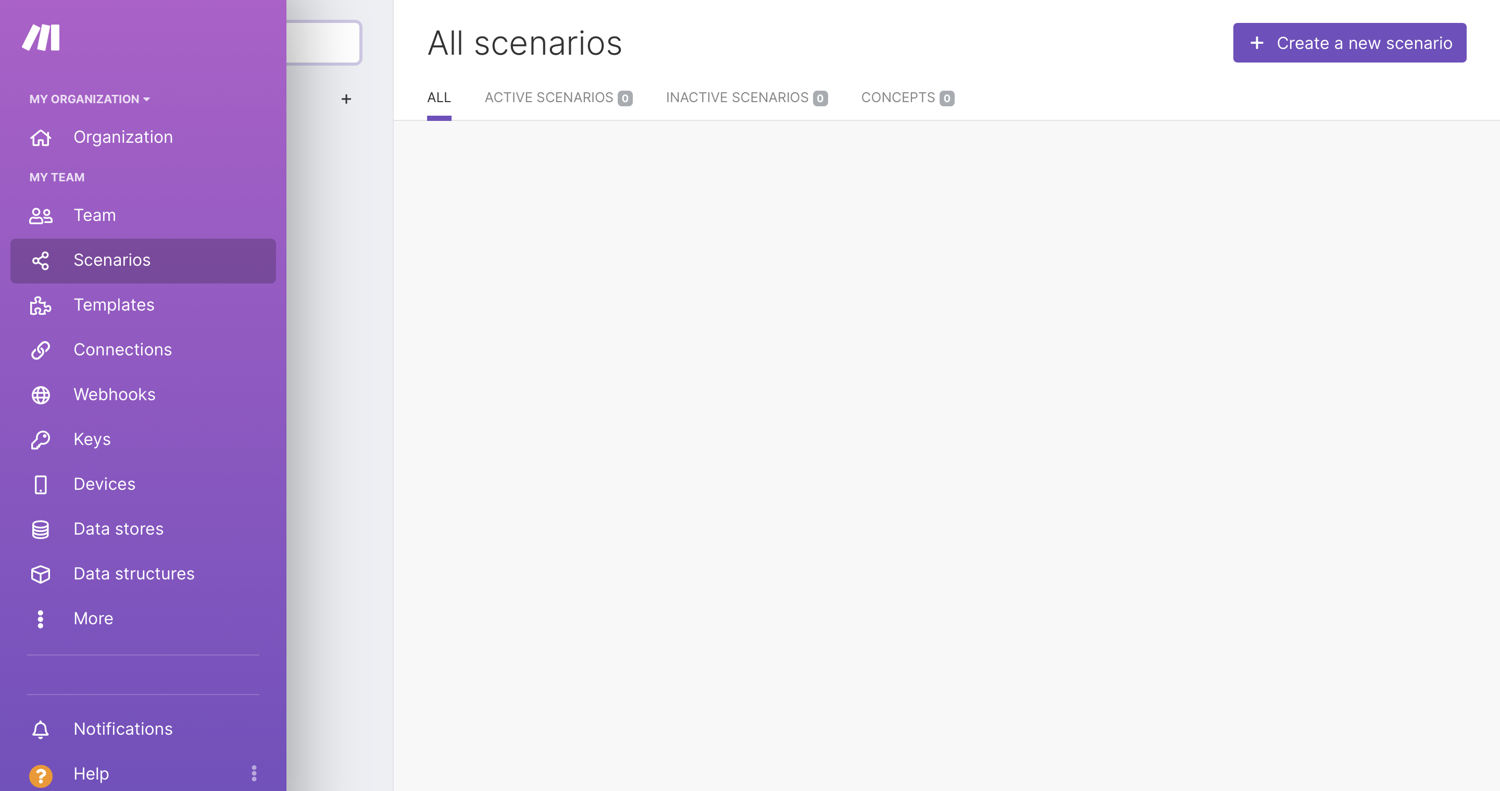
For Make (formerly known as Integromat) to automate your tasks for you, you have to create a scenario. Before you begin creating any scenario, ensure you are signed in to your account and on your Dashboard page.
Sign up for or log into your Make account:

Once in your Dashboard, click the Create a new scenario button, as seen in the top-right corner in the image below. A Make scenario is comprised of a series of modules that indicate how data should be transferred and transformed between apps/services:
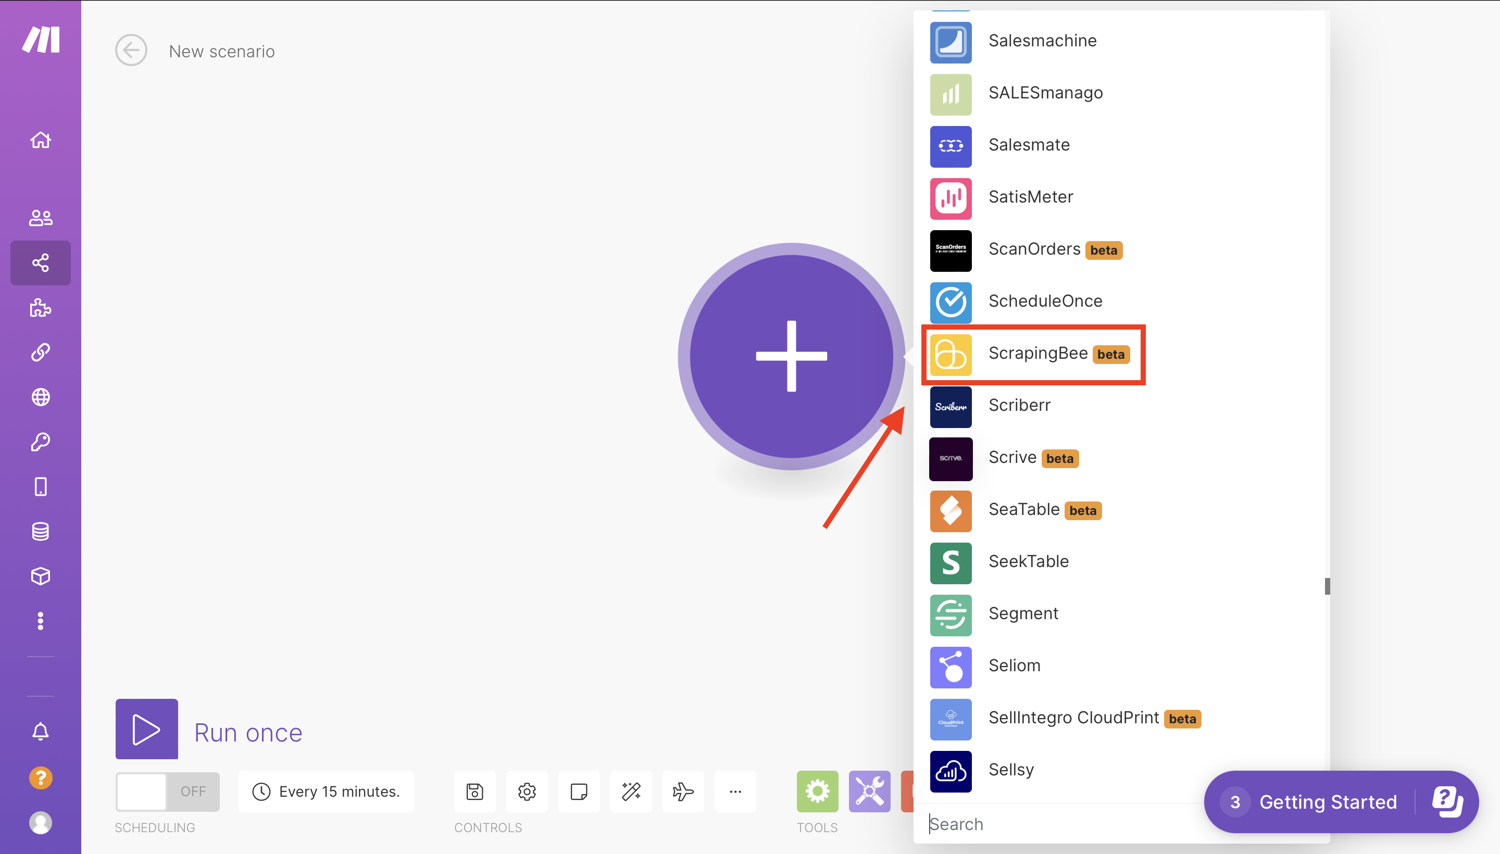
Select the app that will trigger your scenario. Click the first “+” sign and a screen will come up that will allow you to search and choose the apps/services you would like to use. In this case, search for ScrapingBee **and click the app:
Build your scenario
On the scenario editor screen, you will see an empty module with a question mark. Select a trigger that will start your scenario and you can choose what data you want to watch.
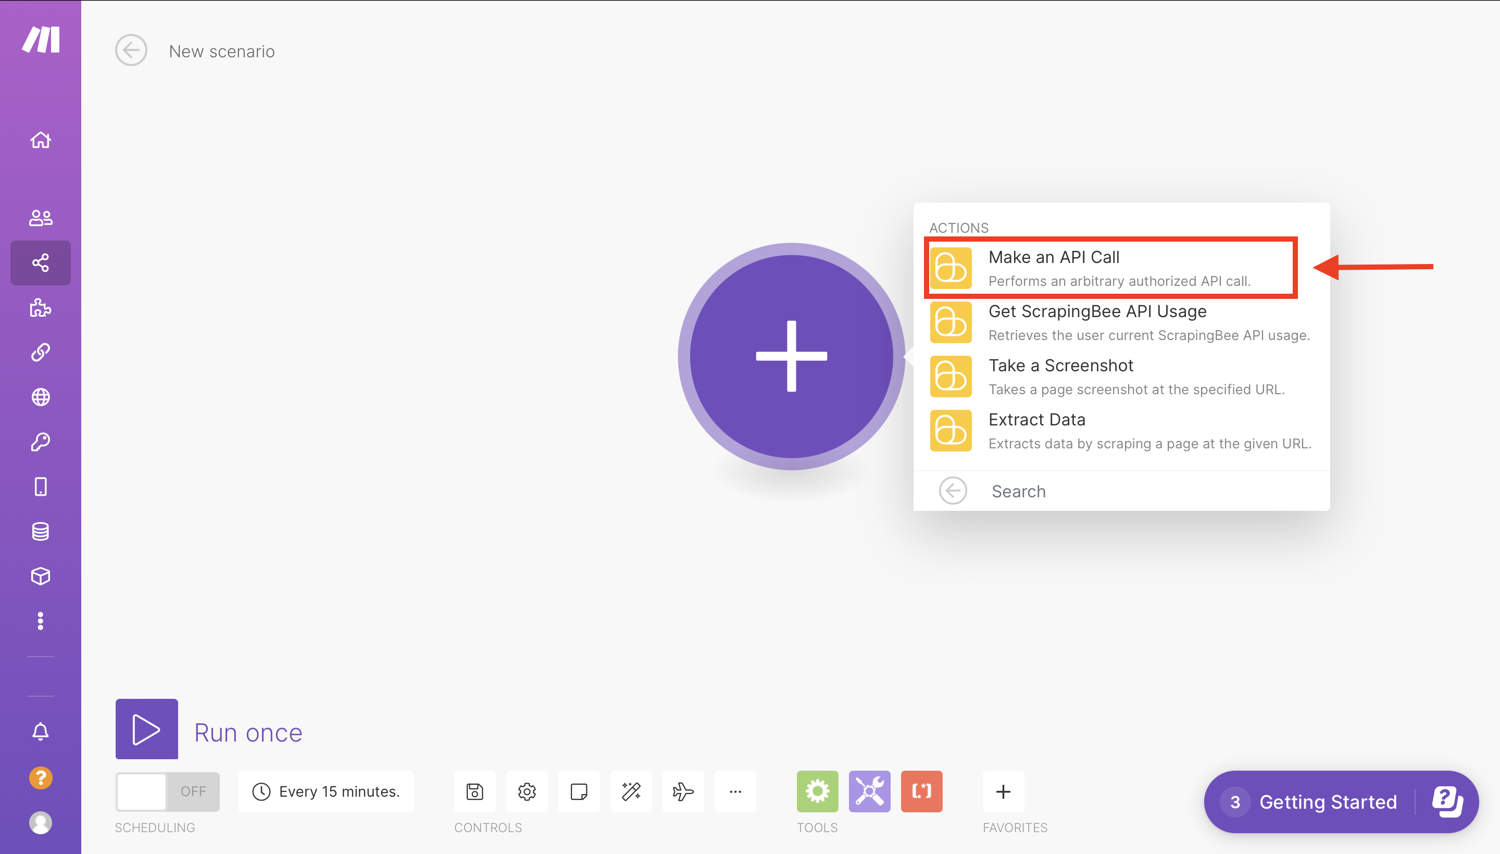
Now choose one of the modules from the list. In this case, select the “Make an API call” ******module:
Next, you will need to create a connection or select one of your previously configured connections for the module.
Make uses connections to connect to different services that require authentication. For example, to perform a scrape, we need to connect to ScrapingBee using our API key.
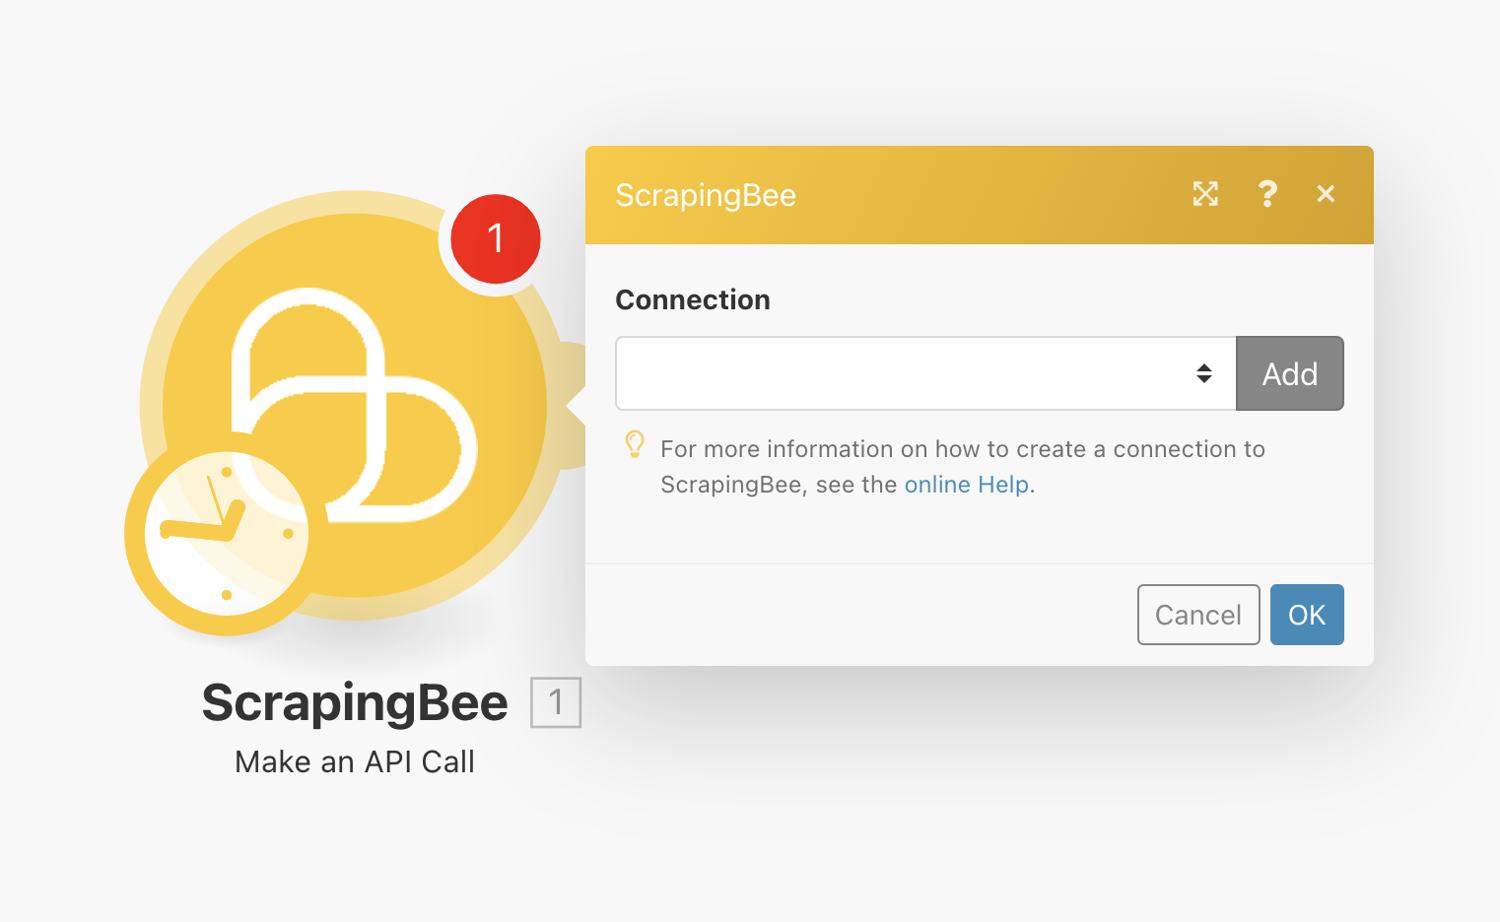
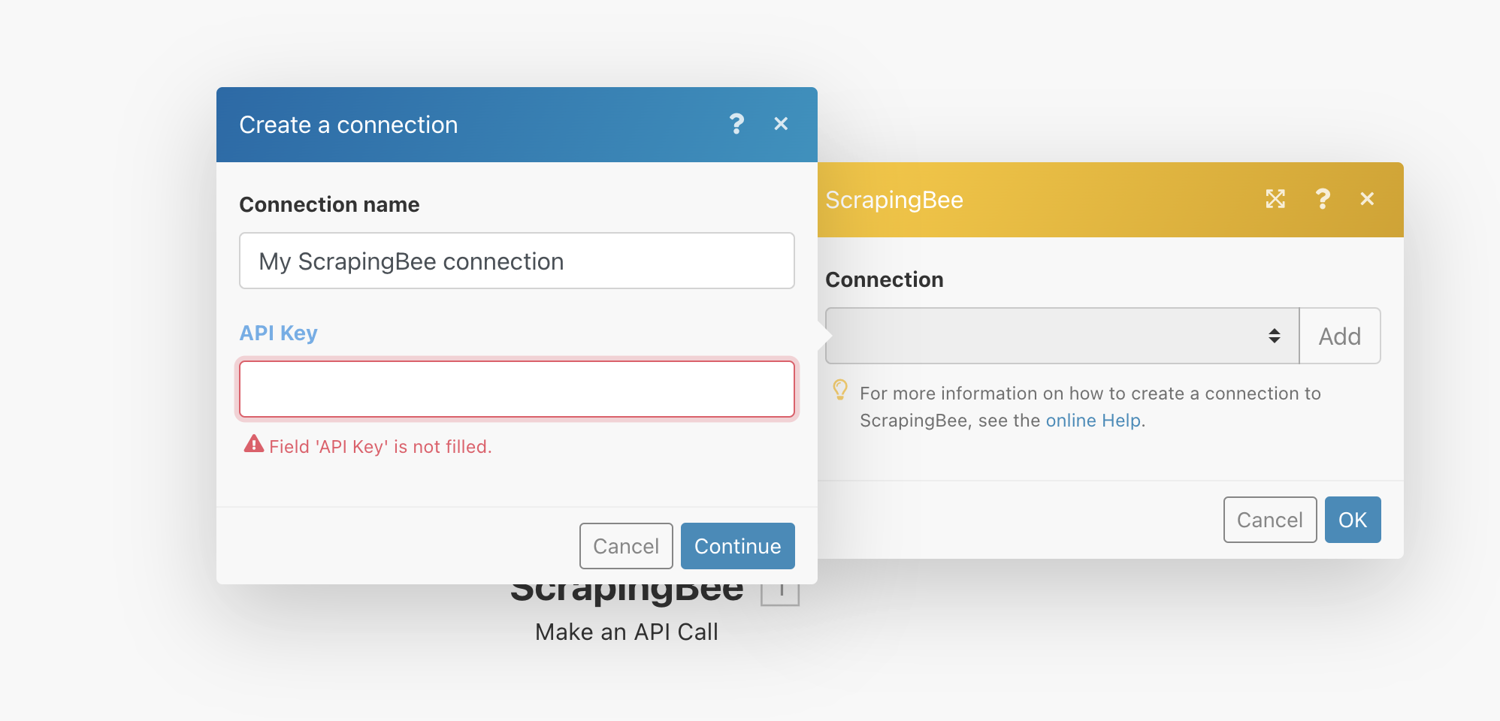
To add a connection, click on “Add” and then enter your ScrapingBee API key gotten from the ScrapingBee dashboard.
Configure Action
Once the connection is set up, we will now configure the action.
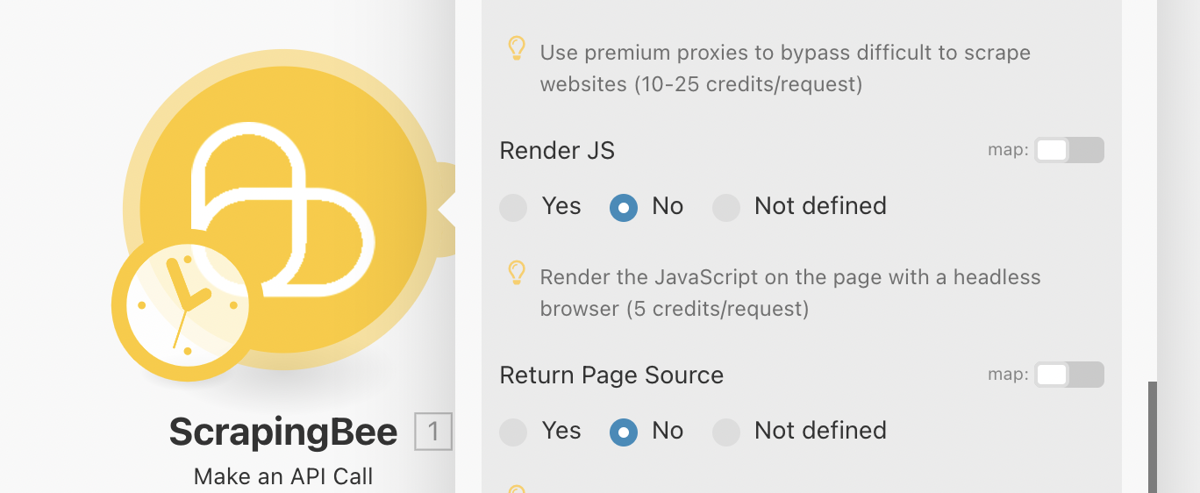
Set method to GET. This is the default method and is what browsers use to display pages. POST is used to submit forms, but we have no need for that here.
Enter the URL of the blog you want to watch to the URL field. The URL field is the link we want to scrape. For this tutorial, we will scrape the ScrapingBee blog, and the URL for that is https://www.scrapingbee.com/blog/
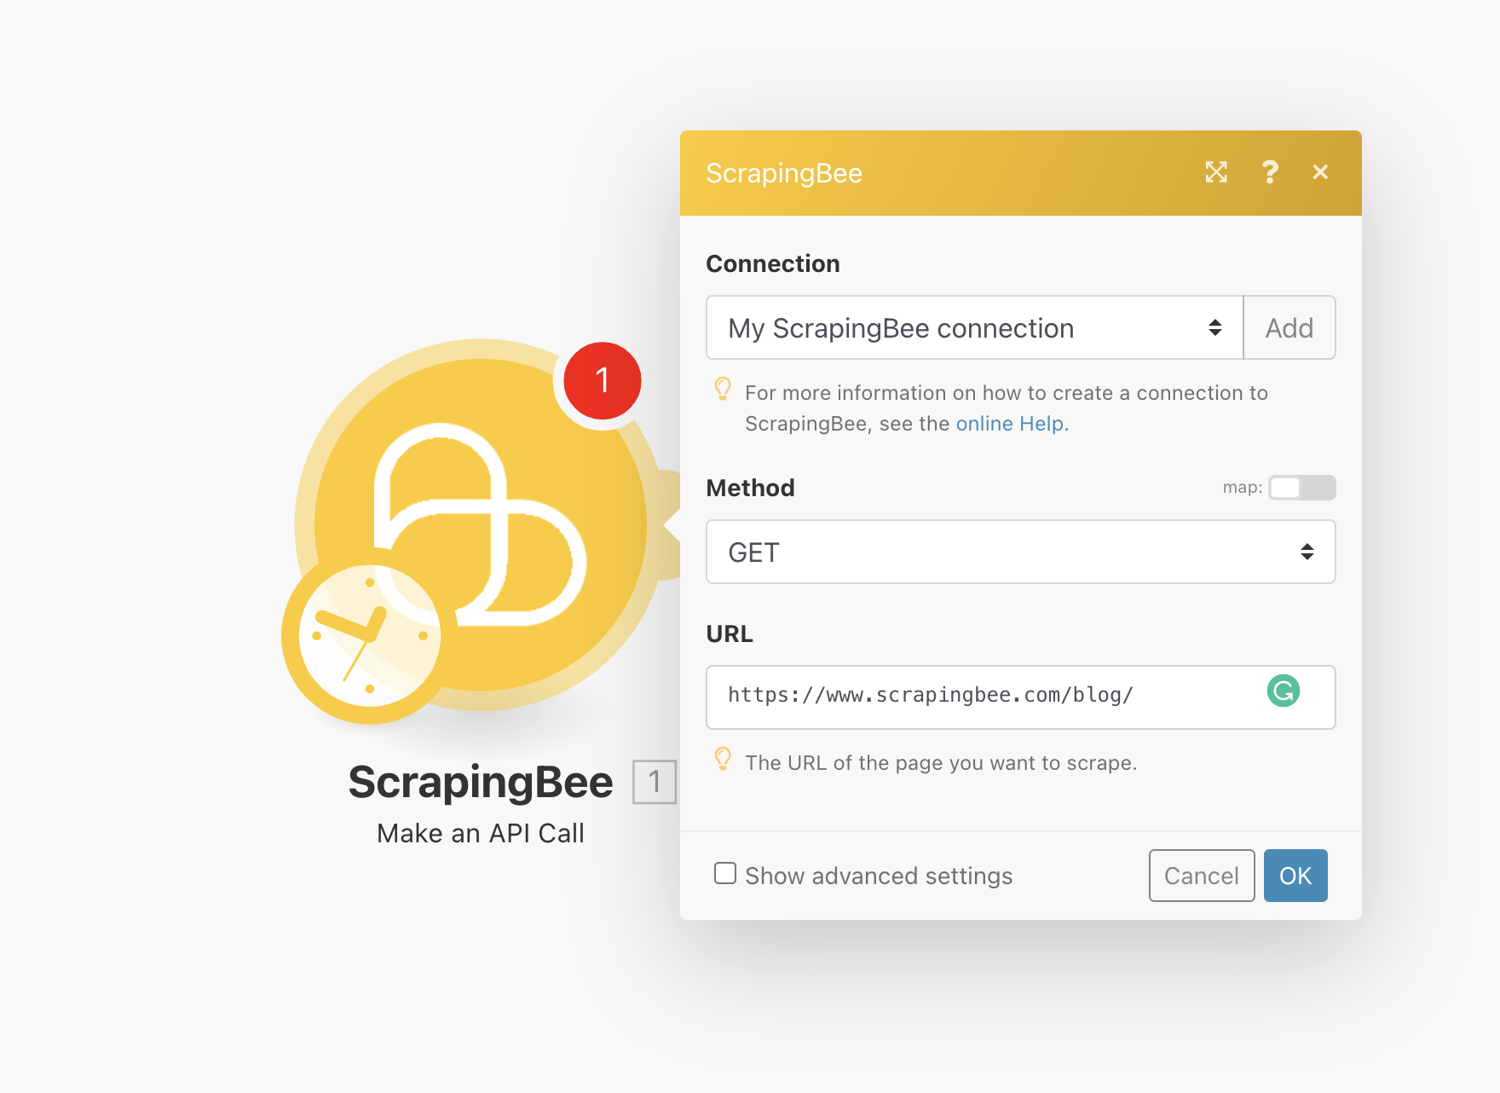
Check the box “Show advanced settings”. This is where we enter the data extraction rules that allow ScrapingBee to return the data in a nicely formatted way.
Scroll to “Extract Rules (JSON)” and enter the following:
{
  "posts" : {
    "selector": "a.shadow-card",
    "type": "list",
    "output": {
      "link": {
        "selector": "a",
        "output": "@href"
      },
      "title": "h4.font-bold.mb-12",
      "description": "div.text-gray-200>p",
    }
  }
}
Extraction rules can be quite complex for those not familiar with CSS. You may be interested in reading the documentation for more details about how it works.
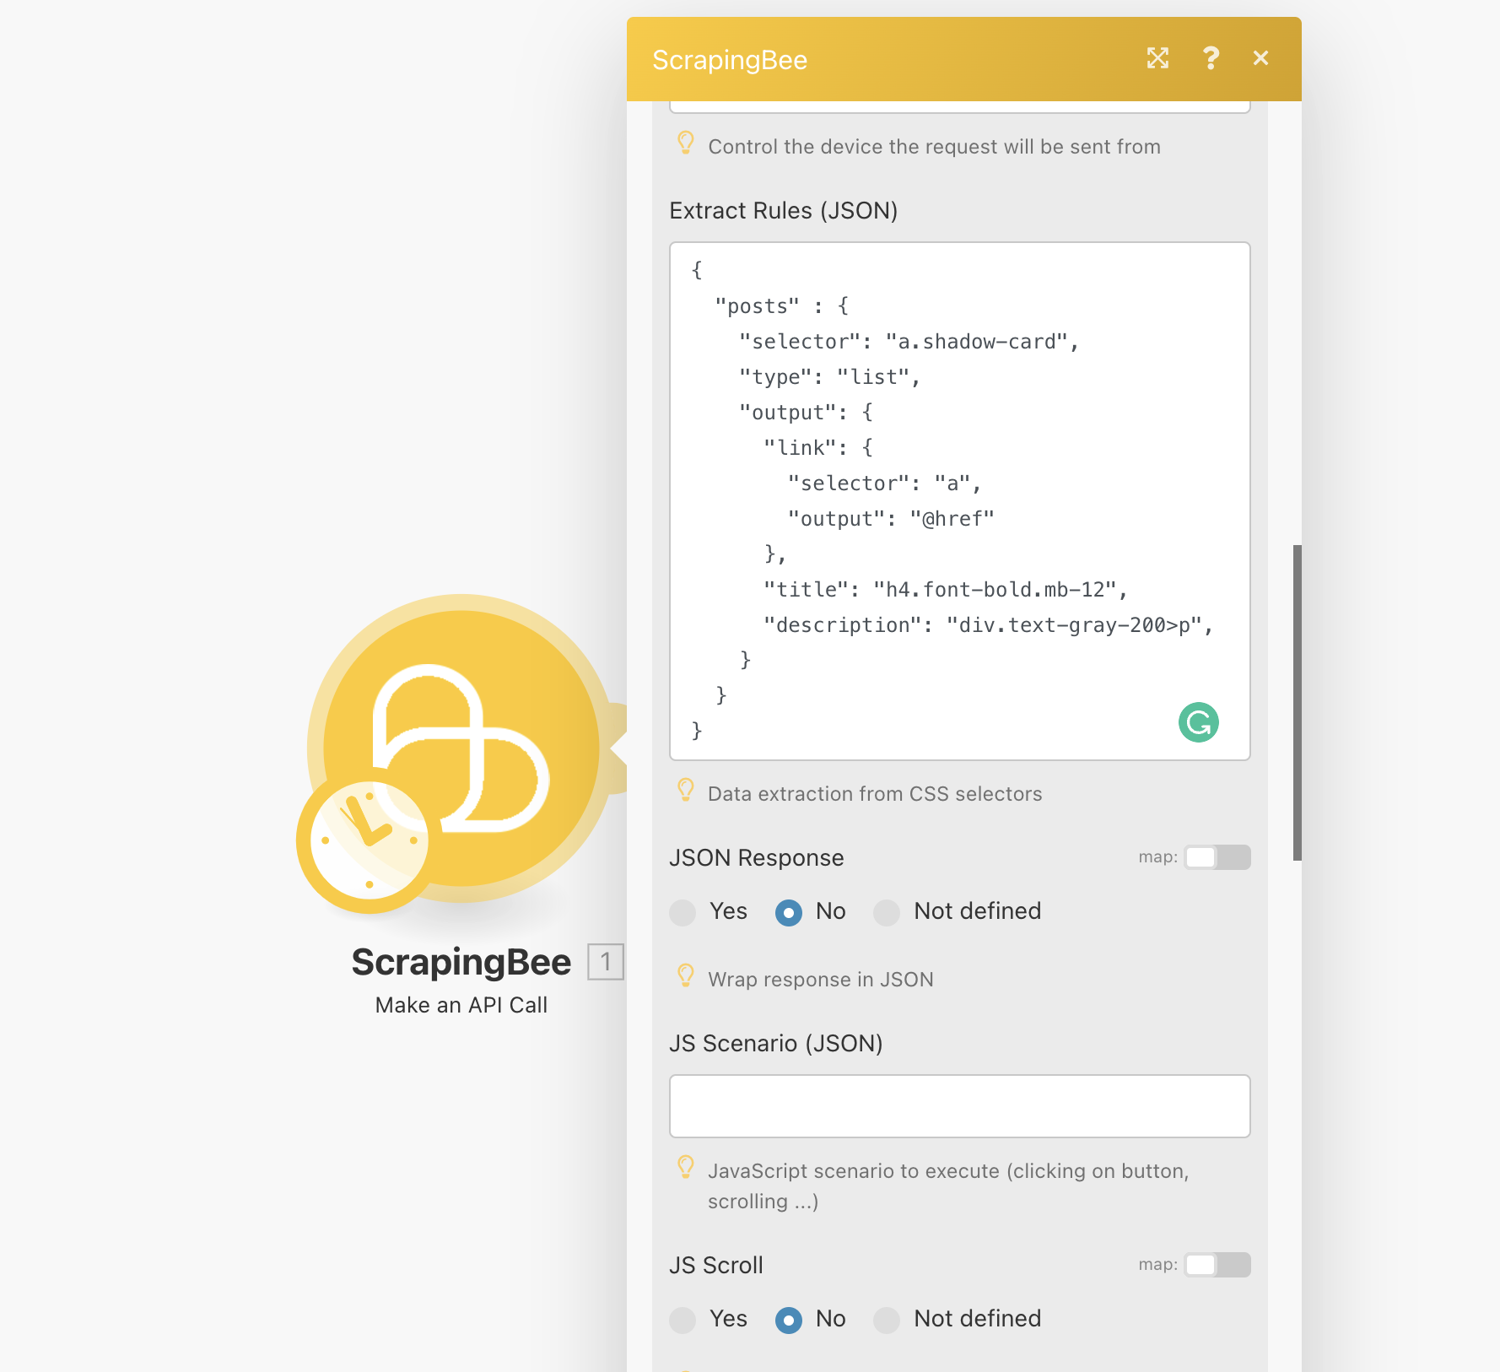
Optionally, you should mark “Render JS” as No. This is not a feature required for this scraping job and costs extra credits.
Test Connection
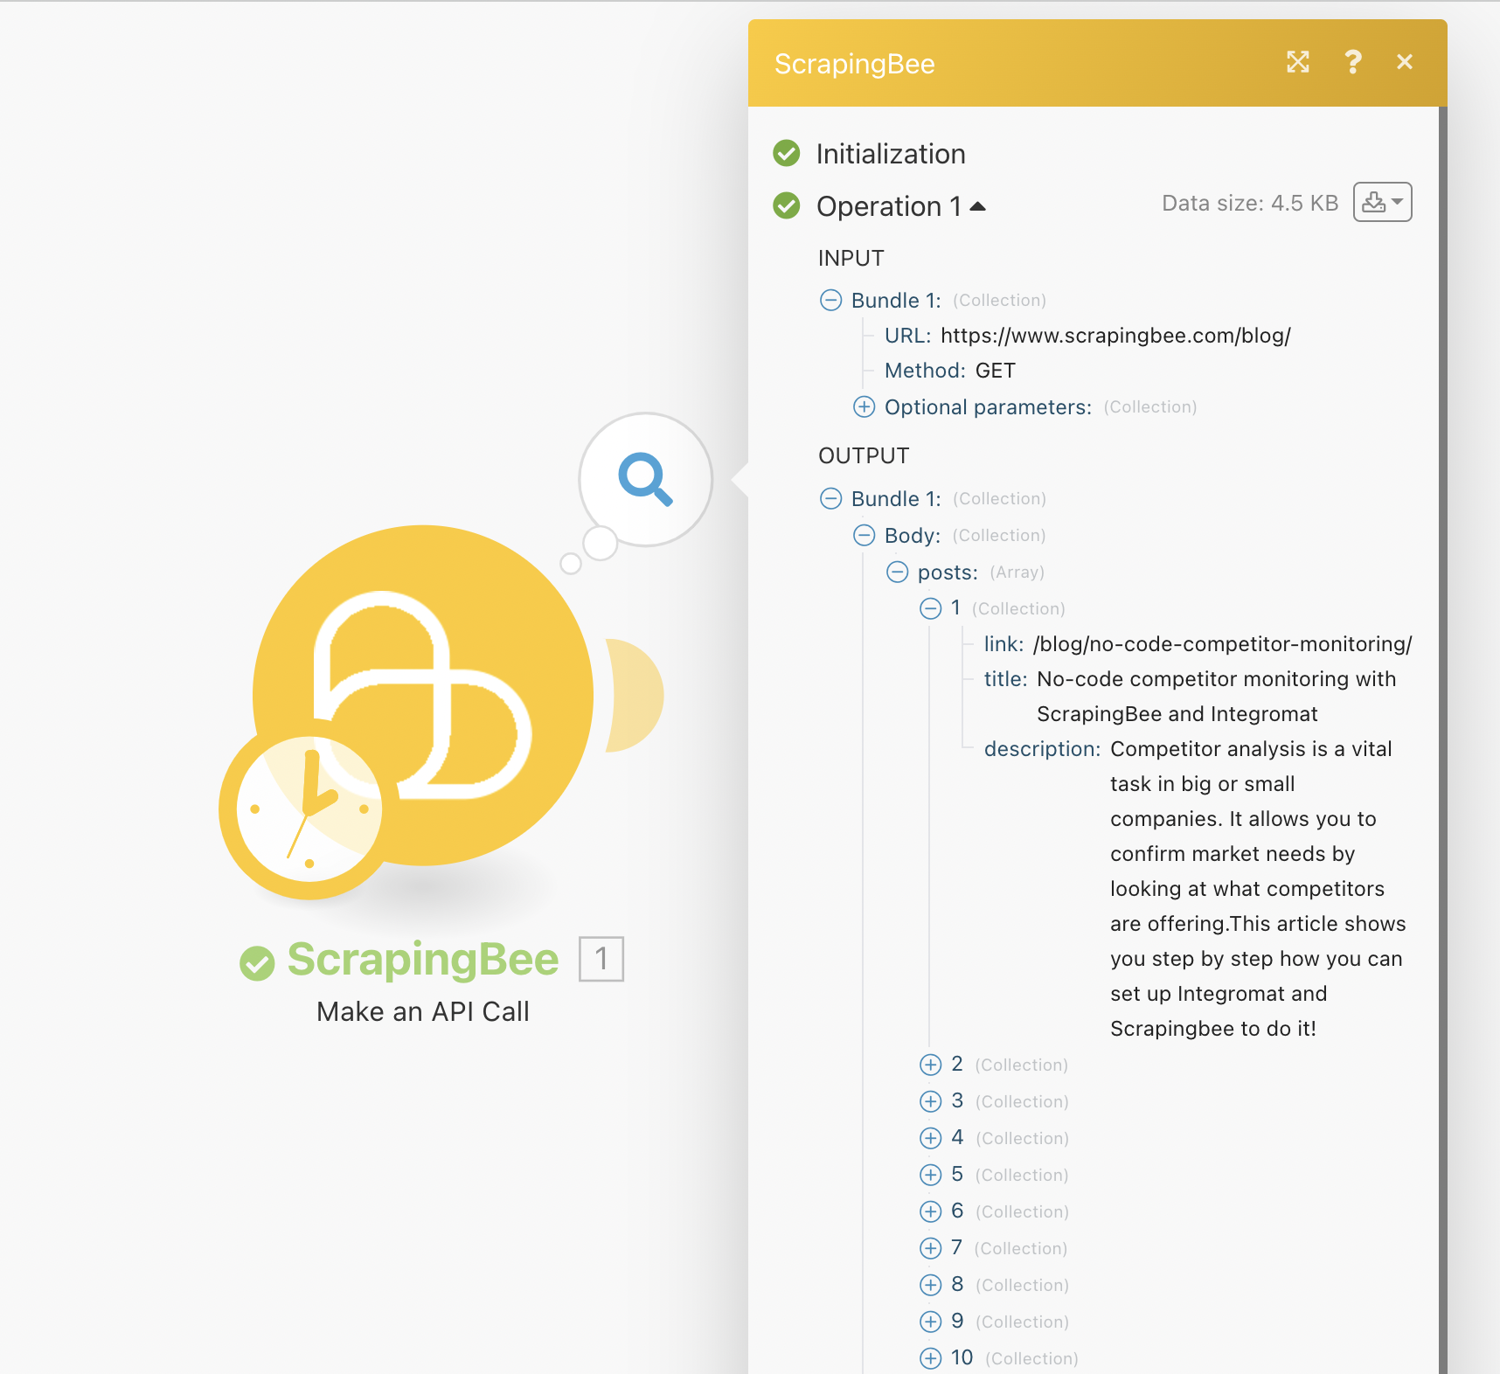
You can now test run the scrape job using the “Run Once” button at the bottom of the page
Control workflow with Iterator
For the next step in the scenario, we will select “Flow Control” and pick “Iterator”. Iterators are a separate tool that can be found under the Flow section of tools.
Iterator is a special type of module that converts an array into a series of bundles. Iterators allow you to split a large bundle of data into multiple smaller bundles.
Each array item will be outputted as a separate bundle. The results returned are then passed on one after another to subsequent modules. This way you can deal with each smaller bundle as separate bundles.
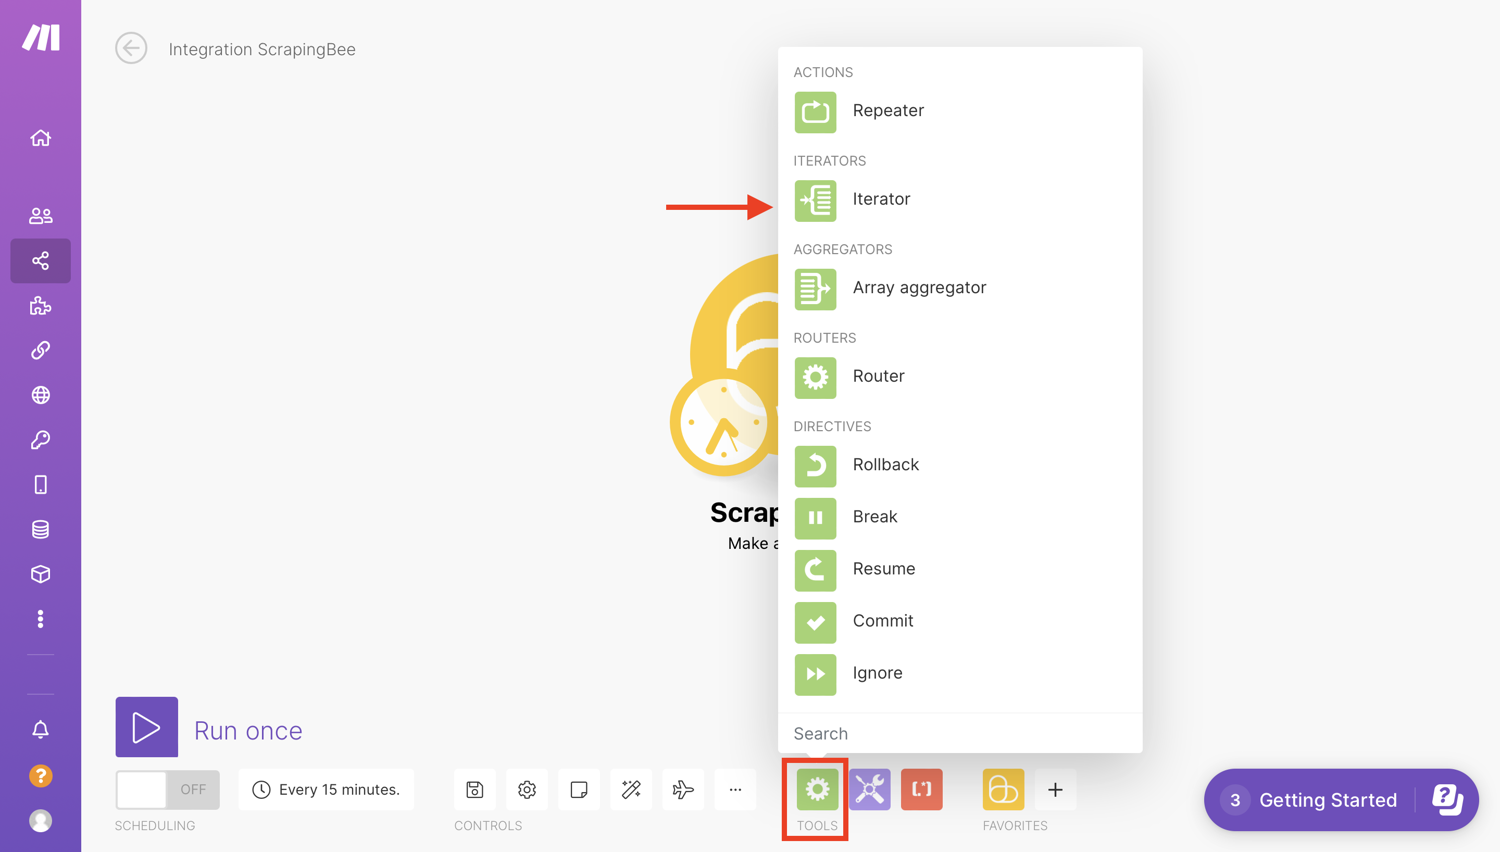
This allows us to make the rest of the scenario run for each value in the result set. This is because (as we will see later) we one to add a row in our spreadsheet for each scraped post.
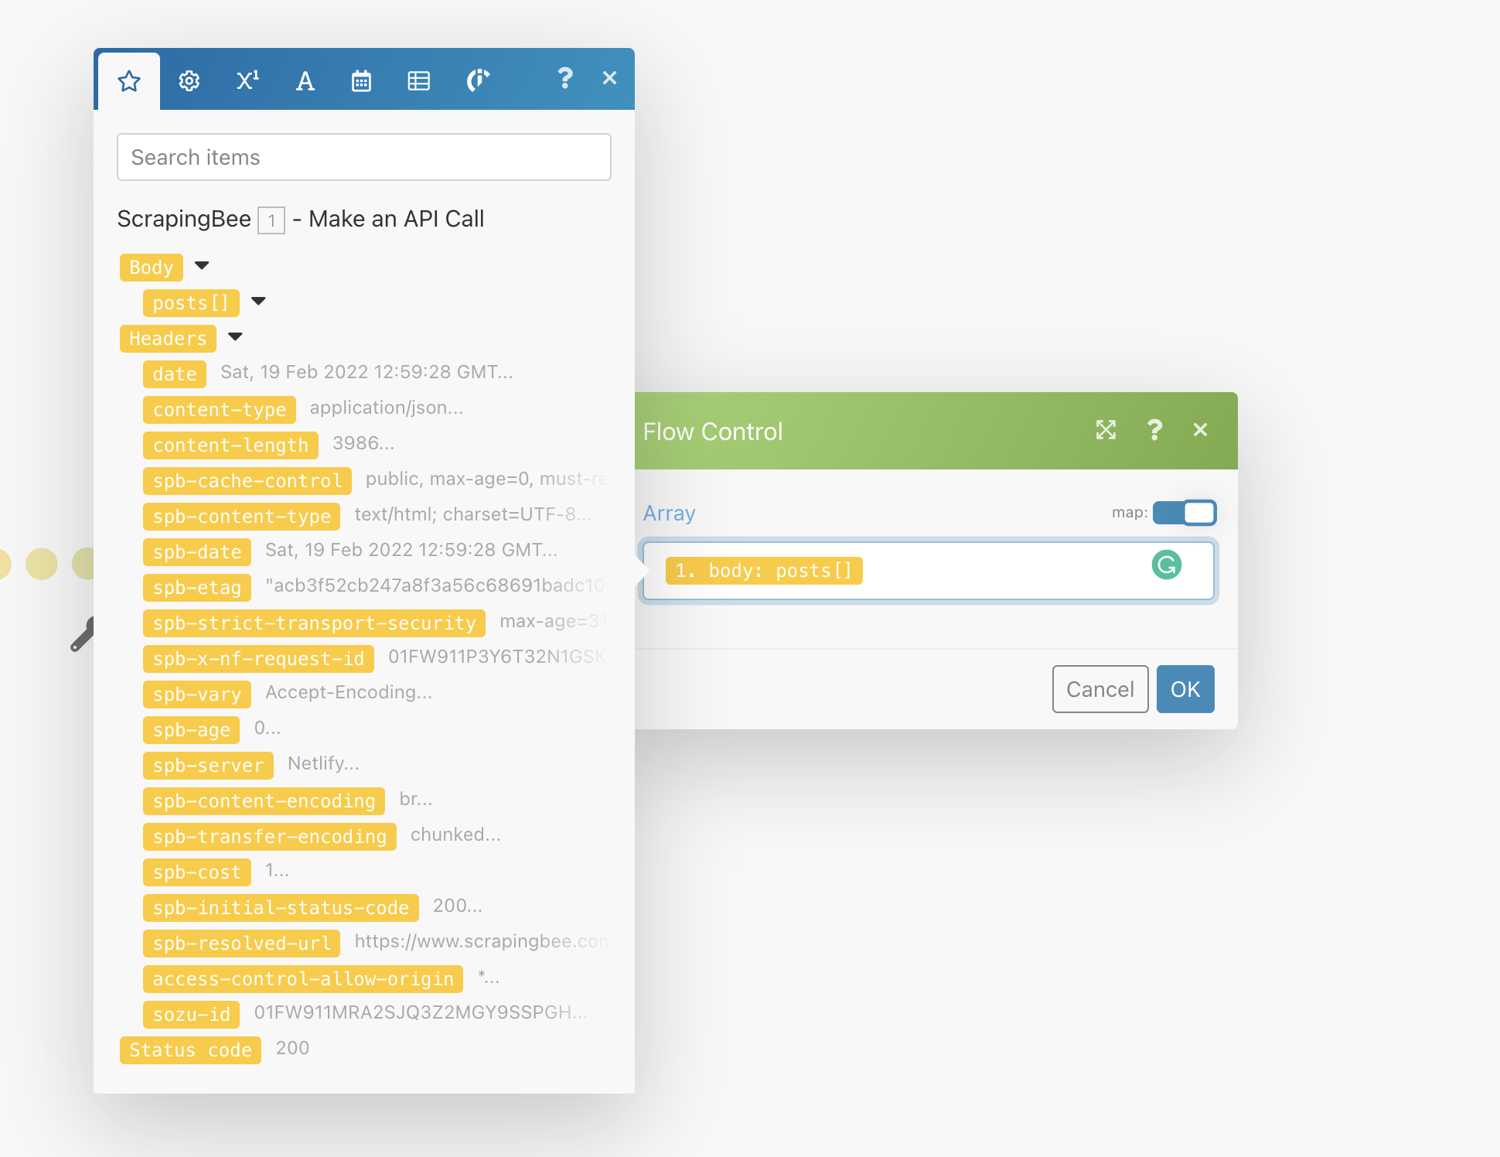
To configure the Iterator, we will select “Body→Posts”. This makes it lope over the scraped posts and will perform any subsequent action for each item:
Now, you will have to create a connection to the corresponding service.
Configure Google Sheets Module
Just like with the ScrapingBee integration, we need to add a connection. This will redirect you to Google to give Make access to some parts of your Google account.
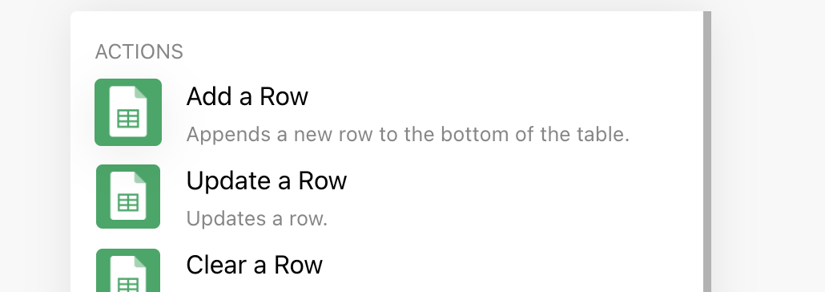
Click the plus (+) sign and add a Google Sheets module. From the list of actions, select “Add a Row”:
Since this comes after the Iterator, it will Add a Row for EACH post, which is what we want:
The step-by-step description of creating a connection for the given service/app is displayed after clicking the question mark in the top-right corner of the module settings dialog.
Now we configure the Google Sheets integration.
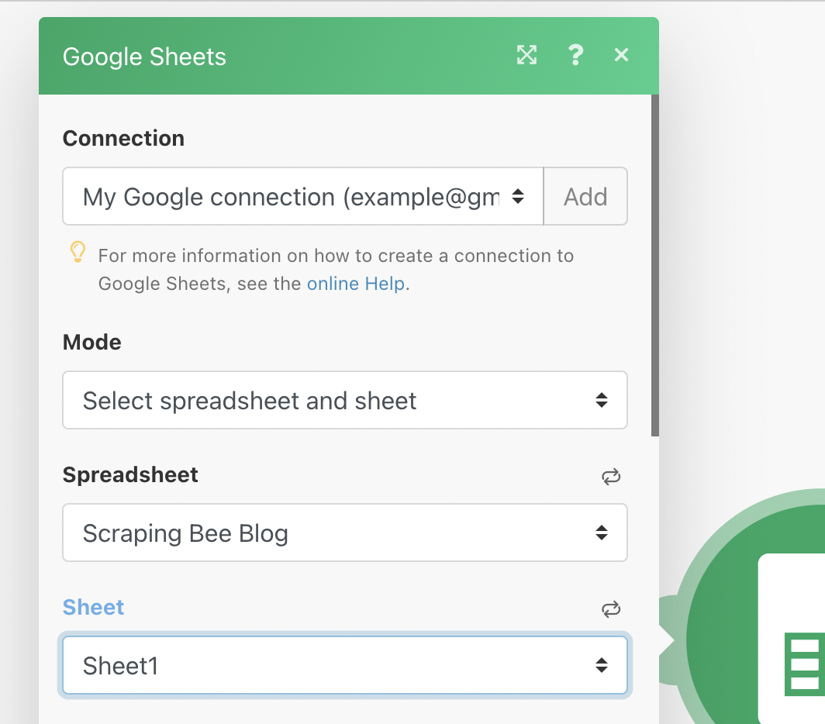
Select the Spreadsheet. In the dropdown, look for one with the same name as the spreadsheet you created earlier.
Select the “Sheet”. This refers to the tabs at the bottom of a spreadsheet. Select the appropriate one. By default this is Sheet1.
![16. Connect to Google and select the spreadsheet and sheet.png]()
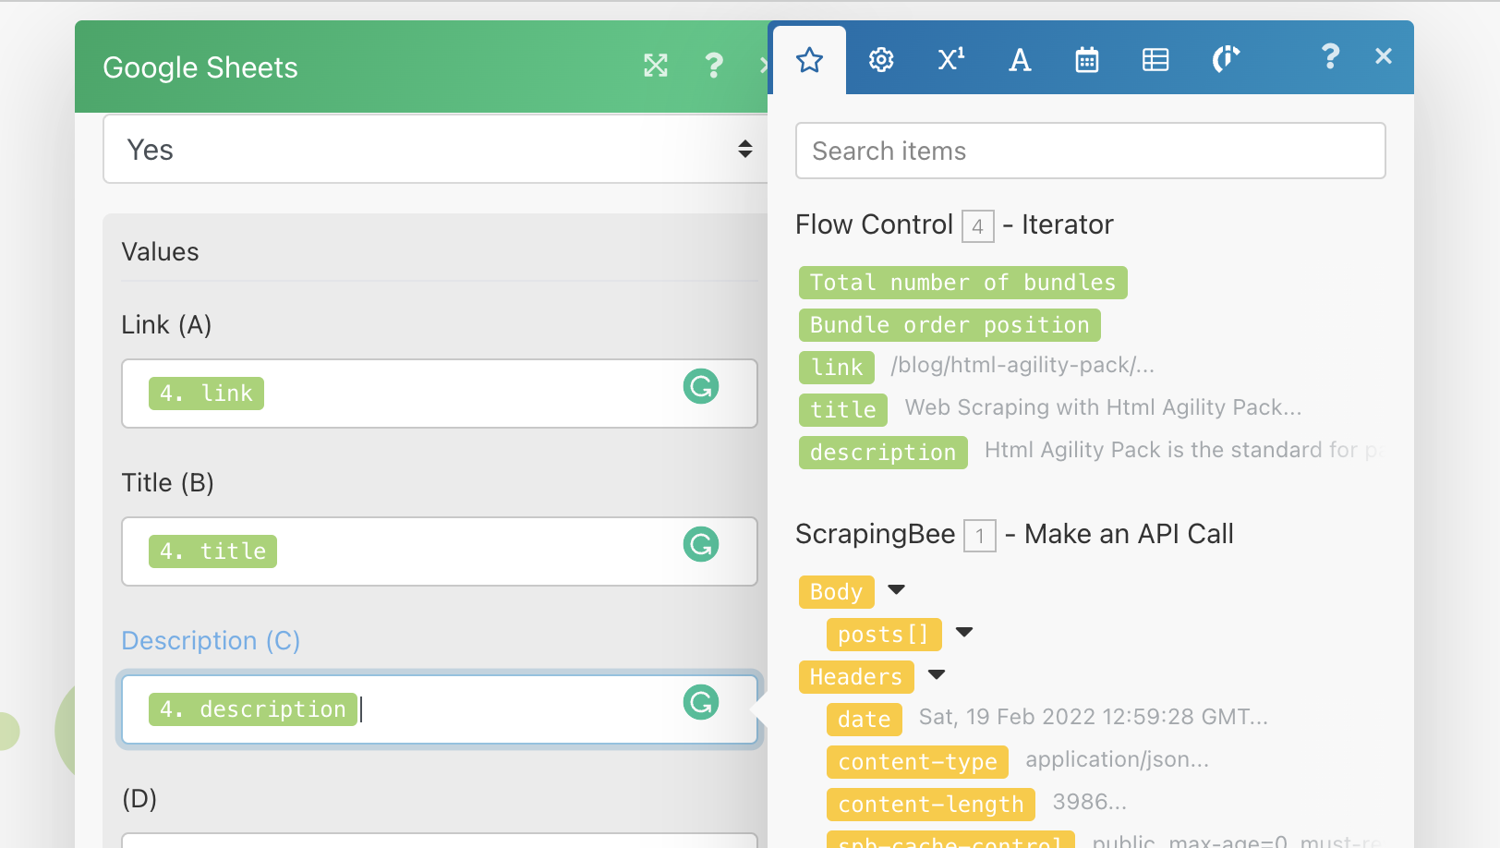
Under values, map the fields from the Iterator step to the rows you want them entered as shown in the screenshot below:
![17. Map the fields to the rows.png]()
Run the integration again. You should be able to see the values in the spreadsheet.
Conclusion
We hope that you liked this tutorial. Do not hesitate to check out the one we released about no-code competitor monitoring and using formulas to scrape with Google Sheets.