If you've used Python Selenium for web scraping, you're familiar with its ability to extract data from websites. However, the default webdriver (ChromeDriver) often struggles to bypass anti-bot mechanisms. As a solution, you can use undetected_chromedriver to bypass some of today's most sophisticated anti-bot systems, including those from Cloudflare and Akamai.
However, it's important to note that undetected_chromedriver has limitations against advanced anti-bot systems. This is where Nodriver, its official successor, comes in.
In this blog, you will learn about Nodriver, which provides next-level web scraping and browser automation through a relatively simple interface.
Without further ado, let’s get started!
What is Nodriver and How Does It Work?
NoDriver is an asynchronous tool that replaces traditional components such as Selenium or webdriver binaries, providing direct communication with browsers. This approach not only reduces the detection rate by most anti-bot solutions but also significantly improves the tool's performance.
This package has a unique feature that sets it apart from other similar packages - it is optimized to avoid detection by most anti-bot solutions. Its key features include:
- A fast and undetected Chrome automation library.
- No need for chromedriver binary or Selenium dependency.
- Can be set up and running in just one line of code.
- Uses a fresh profile for each run and cleans up on exit.
- Packed with helpers for common operations.
- Smart element lookup lets you interact with elements by selector or text content, even within iframes.
To get started with nodriver, you'll first need to install it using the following commands:
pip install nodriver
Here's the code snippet. We've kept it short and simple to allow you to quickly set up your environment and start using Nodriver with minimal code.
Be sure to avoid naming your Python file "nodriver" or you'll get an error.
import nodriver as uc
import time

async def main():

    browser = await uc.start(headless=True)
    page = await browser.get("https://www.nowsecure.nl")

    time.sleep(4)

    await page.save_screenshot("image.png")

if __name__ == "__main__":
    uc.loop().run_until_complete(main())
Nodriver offers various custom starting options to enhance scraper authenticity. The browser_args parameter allows you to set arguments such as user-agent and proxy. You can also control headless mode and other browser behaviors.
from nodriver import *

browser = await start(
    headless=False,
    user_data_dir="/path/to/existing/profile",  # by specifying it, it won't be automatically cleaned up when finished
    browser_executable_path="/path/to/some/other/browser",
    browser_args=["--some-browser-arg=true", "--some-other-option"],
    lang="en-US",  # this could set iso-language-code in navigator, not recommended to change
)
tab = await browser.get("https://somewebsite.com")
🤖 Check out how Nodriver performs in headless mode vs other headless browsers when trying to go undetected by browser fingerprinting technology in our How to Bypass CreepJS and Spoof Browser Fingerprinting face-off.
TL;DR Scraping with Nodriver Example Code
If you're in a hurry, here's the code we'll be creating in this blog. We'll scrape the product data, including the product title, price, image, reviews, rating, and product description.
import nodriver as uc
import json

async def main():
    # Start the headless browser
    browser = await uc.start(headless=True)

    # Navigate to the Amazon product page
    page = await browser.get(
        "https://www.amazon.in/Meta-Quest-Console-Virtual-Reality/dp/B0CB3WXL12"
    )

    # Extracting product title
    title_element = await page.select("#productTitle")
    title = title_element.text.strip() if title_element else None

    # Extracting product price
    price_element = await page.select("span.a-offscreen")
    price = price_element.text if price_element else None

    # Extracting product rating
    rating_element = await page.select("#acrPopover")
    rating_text = rating_element.attrs.get("title") if rating_element else None
    rating = rating_text.replace("out of 5 stars", "") if rating_text else None

    # Extracting product image URL
    image_element = await page.select("#landingImage")
    image_url = image_element.attrs.get("src") if image_element else None

    # Extracting product description
    description_element = await page.select("#productDescription")
    description = description_element.text.strip() if description_element else None

    # Extracting number of reviews
    reviews_element = await page.select("#acrCustomerReviewText")
    reviews = reviews_element.text.strip() if reviews_element else None

    # Storing extracted data in a dictionary
    product_data = {
        "Title": title,
        "Price": price,
        "Description": description,
        "Image Link": image_url,
        "Rating": rating,
        "Number of Reviews": reviews,
    }

    # Saving data to a JSON file
    with open("product_data.json", "w", encoding="utf-8") as json_file:
        json.dump(product_data, json_file, ensure_ascii=False)
    print("Data has been saved to product_data.json")

    # Stopping the headless browser
    browser.stop()

if __name__ == "__main__":
    # Running the main function
    uc.loop().run_until_complete(main())
The result is:

How to Scrape Amazon Product Data with Nodriver
Let’s take a look at the step-by-step process of scraping Amazon product data with Nodriver.
Step 1. Importing Libraries and Setting Up Async Function
The code begins by importing the necessary libraries, such as nodriver for web scraping and json for handling JSON data. It then defines an asynchronous function named main() using the async keyword.
import nodriver as uc
import json

async def main():
    # ...
Step 2. Initializing Web Scraping Browser and Opening a Page
Inside the main function, the code uses uc.start() to initiate a headless browser instance. The argument headless=True specifies that the browser should run without a graphical user interface.
browser = await uc.start(headless=True)
Step 3. Navigating to the Product Page
Let’s navigate to the Amazon product page.
Here’s the code snippet:
page = await browser.get(
    "https://www.amazon.in/Meta-Quest-Console-Virtual-Reality/dp/B0CB3WXL12"
)
The code uses browser.get() to navigate the browser to the specified Amazon product page URL.
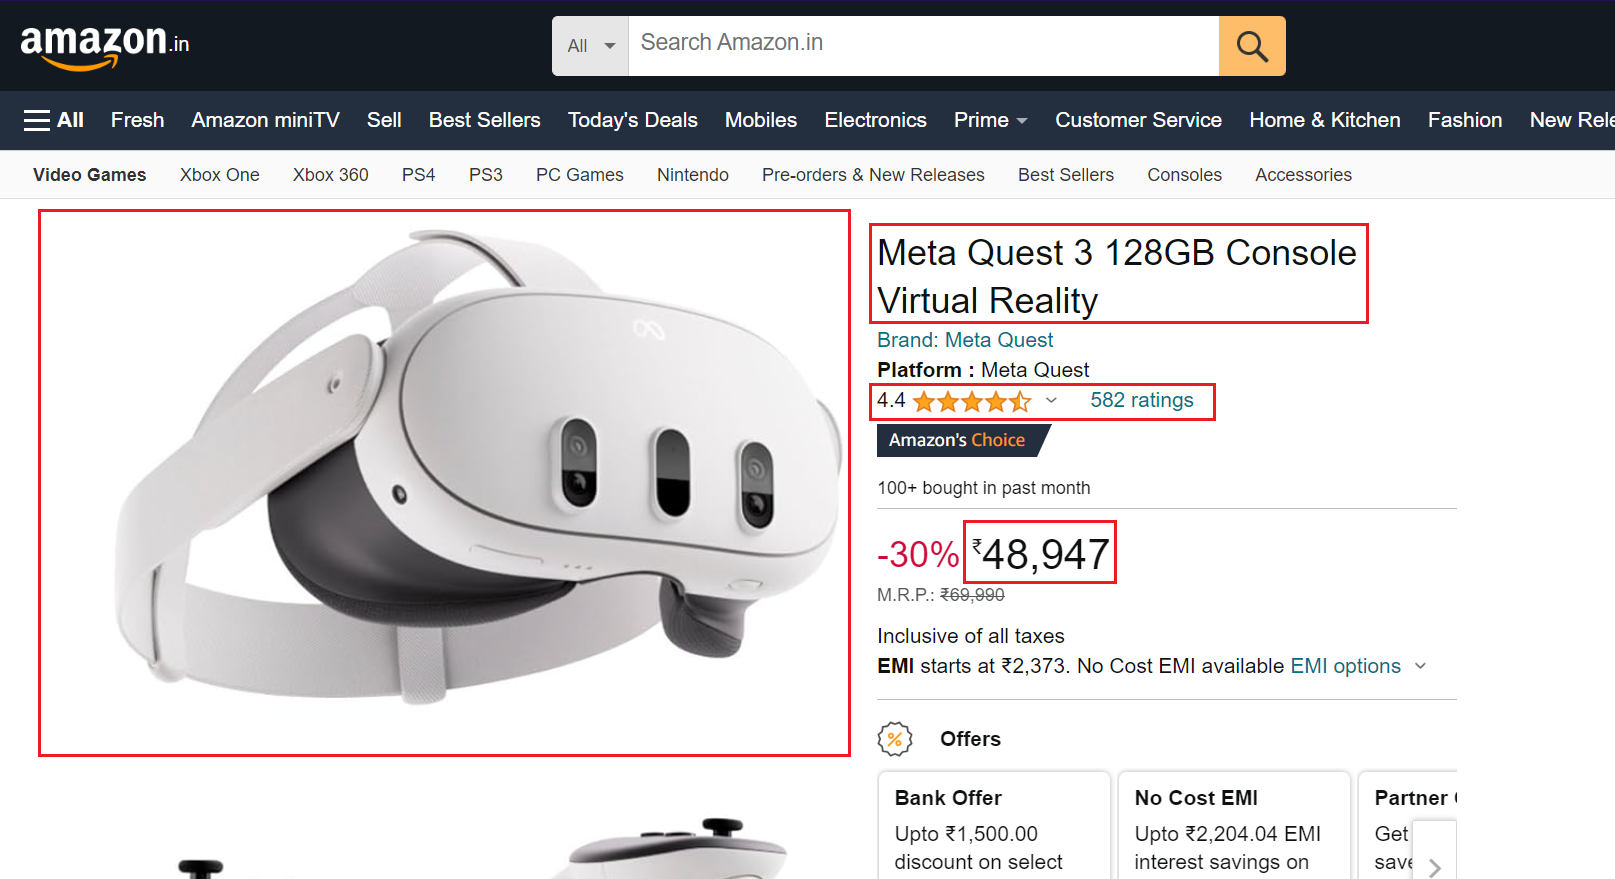
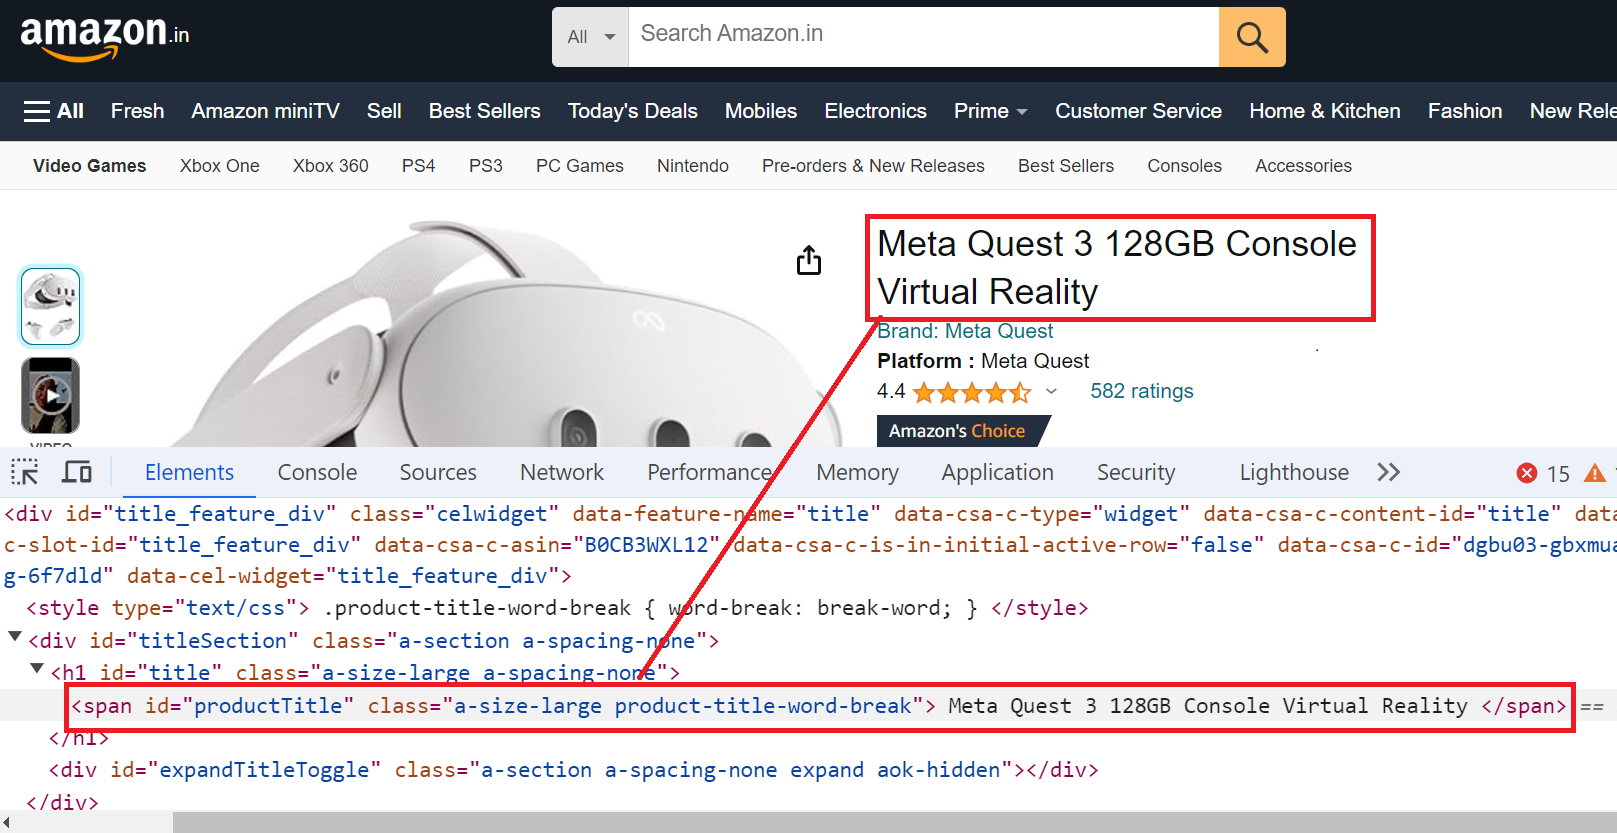
Step 4. Extracting Product Title
The product title is located in a span element with the id "productTitle." It’s easy to select elements having ID.
Here’s the code snippet:
title_element = await page.select("#productTitle")
title = title_element.text.strip() if title_element else None
The select method locates the element with the ID "productTitle" on the page and then uses .text to extract the text content of the element.
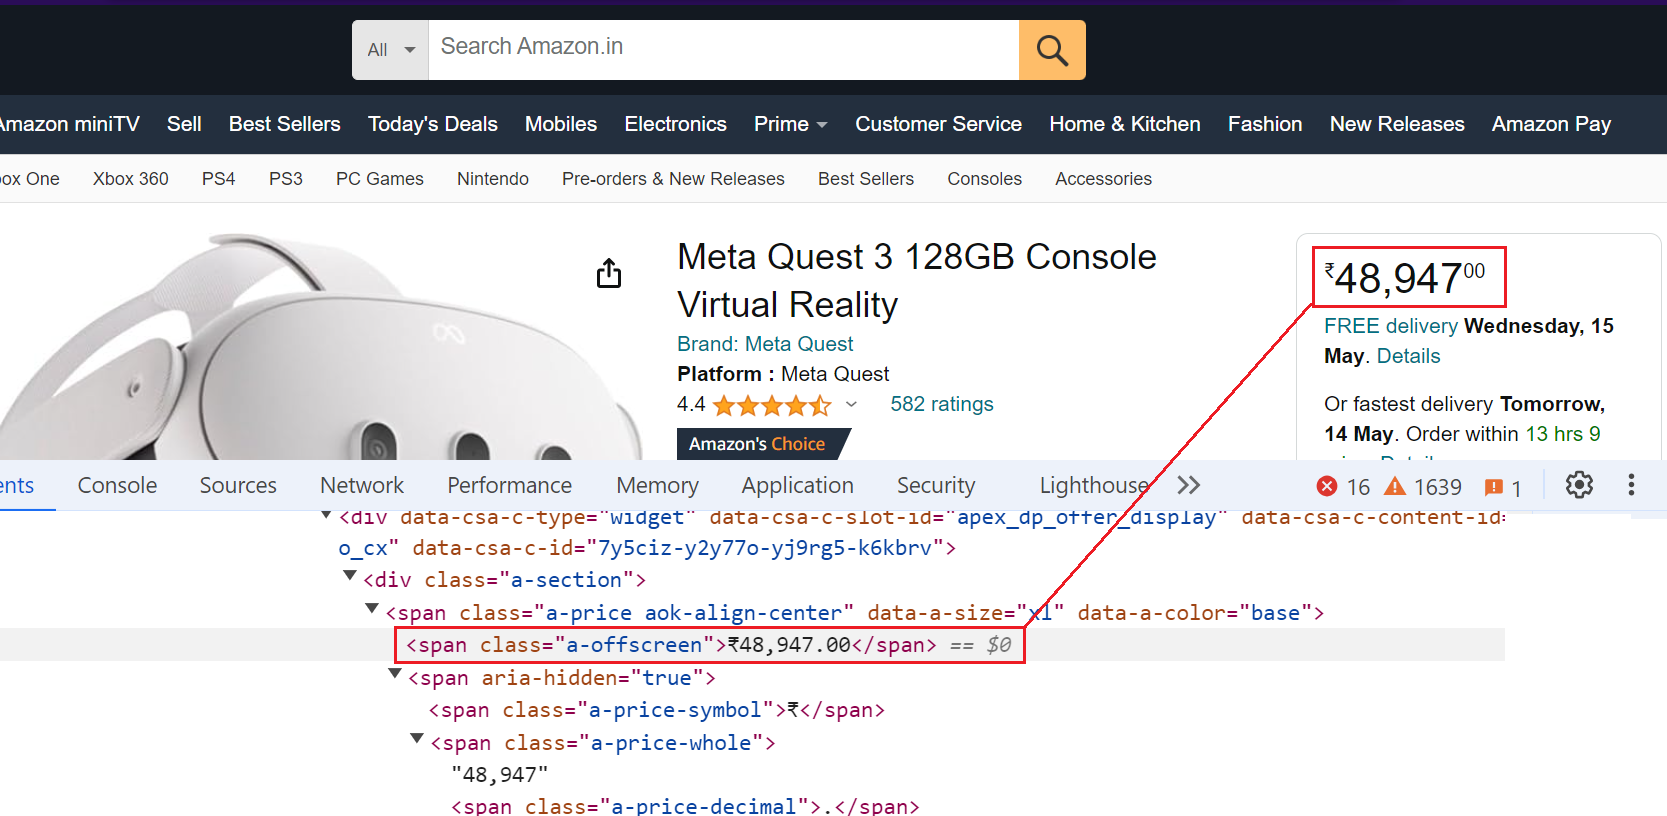
Step 5. Extracting Product Price
The product price is available below the title and on the Buy Now box, but we'll focus on extracting the price from the Buy Now box.
Here’s the code snippet:
price_element = await page.select("span.a-offscreen")
price = price_element.text if price_element else None
Similar to the title, the code extracts the price using the selector span.a-offscreen. It selects the element with the class a-offscreen and then retrieves the text content.
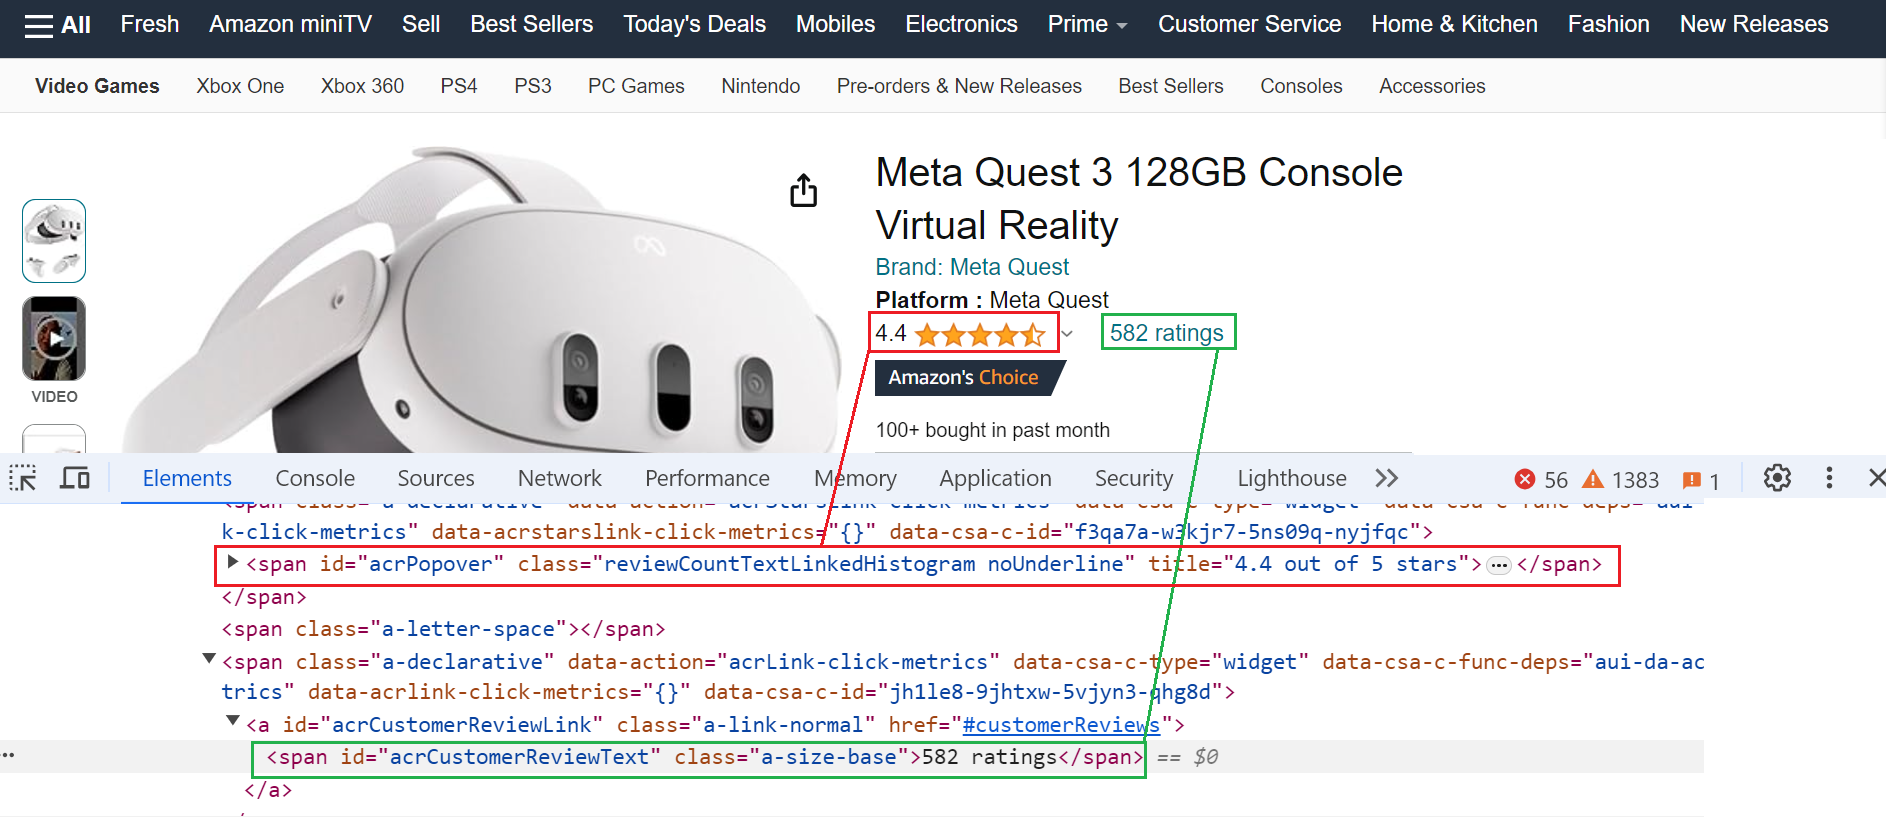
Step 6. Extracting Product Rating and Review
Now, let’s scrape product ratings and reviews.
Here’s the code:
rating_element = await page.select("#acrPopover")
rating_text = rating_element.attrs.get("title") if rating_element else None
rating = rating_text.replace("out of 5 stars", "") if rating_text else None

reviews_element = await page.select("#acrCustomerReviewText")
reviews = reviews_element.text.strip() if reviews_element else None
The code extracts the product rating from the element with the id "acrPopover". It retrieves the title attribute, which likely holds the rating information. Finally, it processes the text to remove "out of 5 stars" and isolate the actual rating value. The number of reviews can be found in the span element with the unique identifier "acrCustomerReviewText".
Step 7. Extracting Product Image URL
You can scrape the default image using the CSS selector #landingImage.
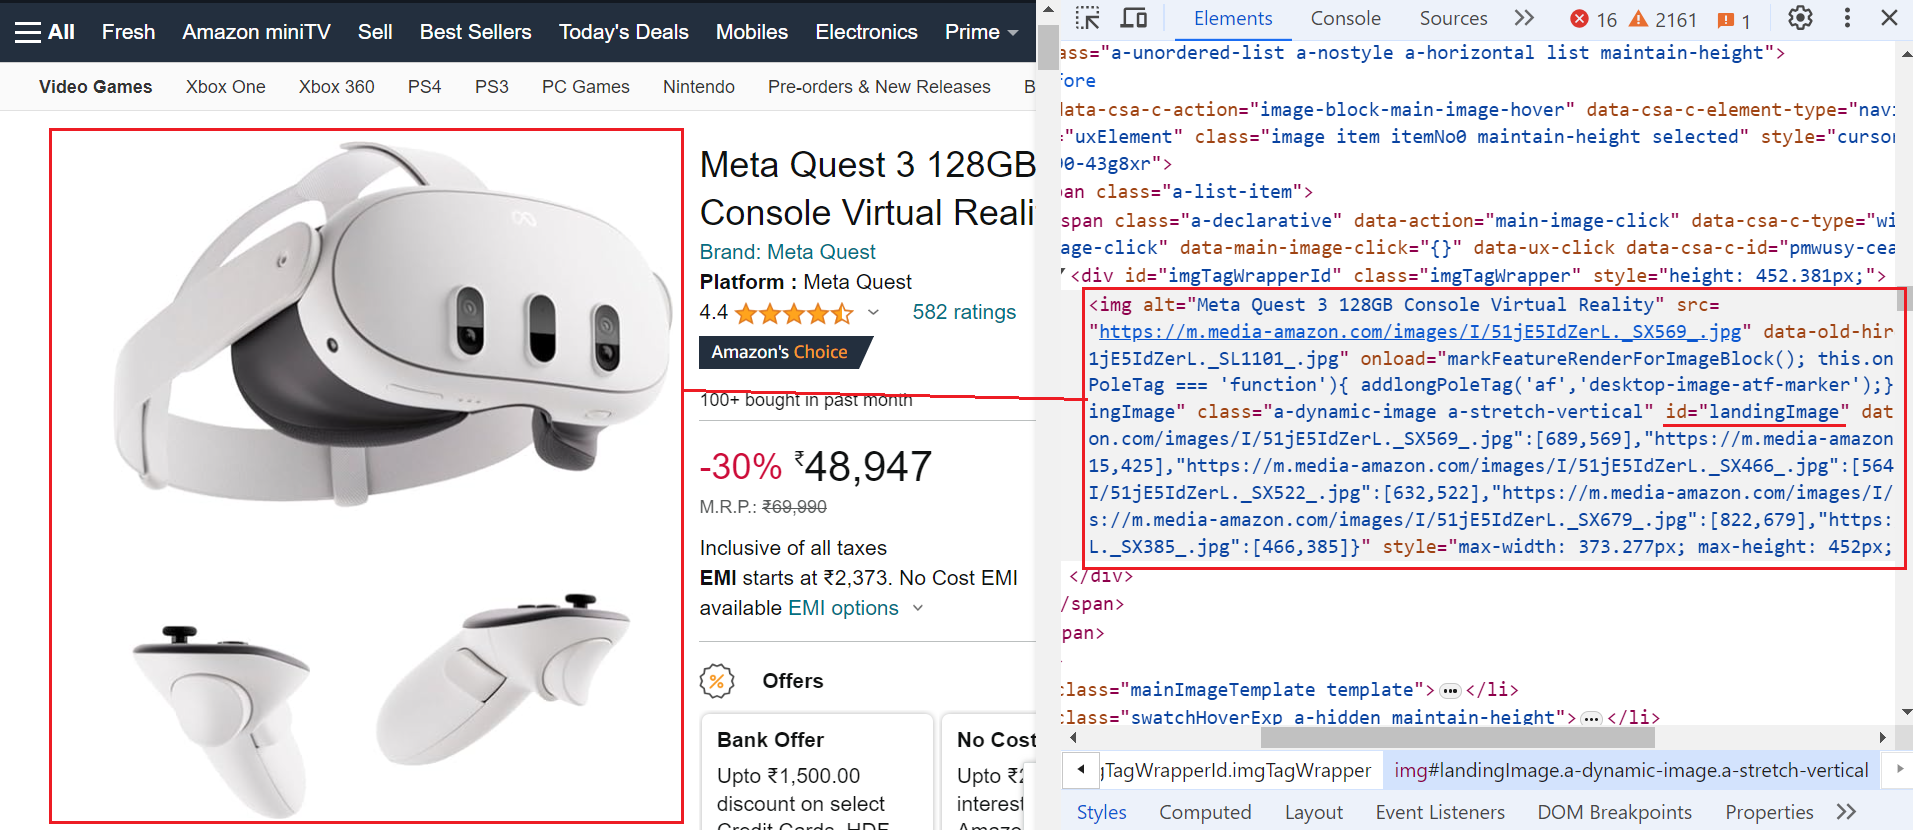
Here’s the code snippet:
image_element = await page.select("#landingImage")
image_url = image_element.attrs.get("src") if image_element else None
The code targets the element with the ID "landingImage" and extracts the image URL stored within its src attribute.
Step 8. Extracting Product Description
The next step in scraping Amazon product information is scraping the product description. To achieve this, target the element with the ID "productDescription".
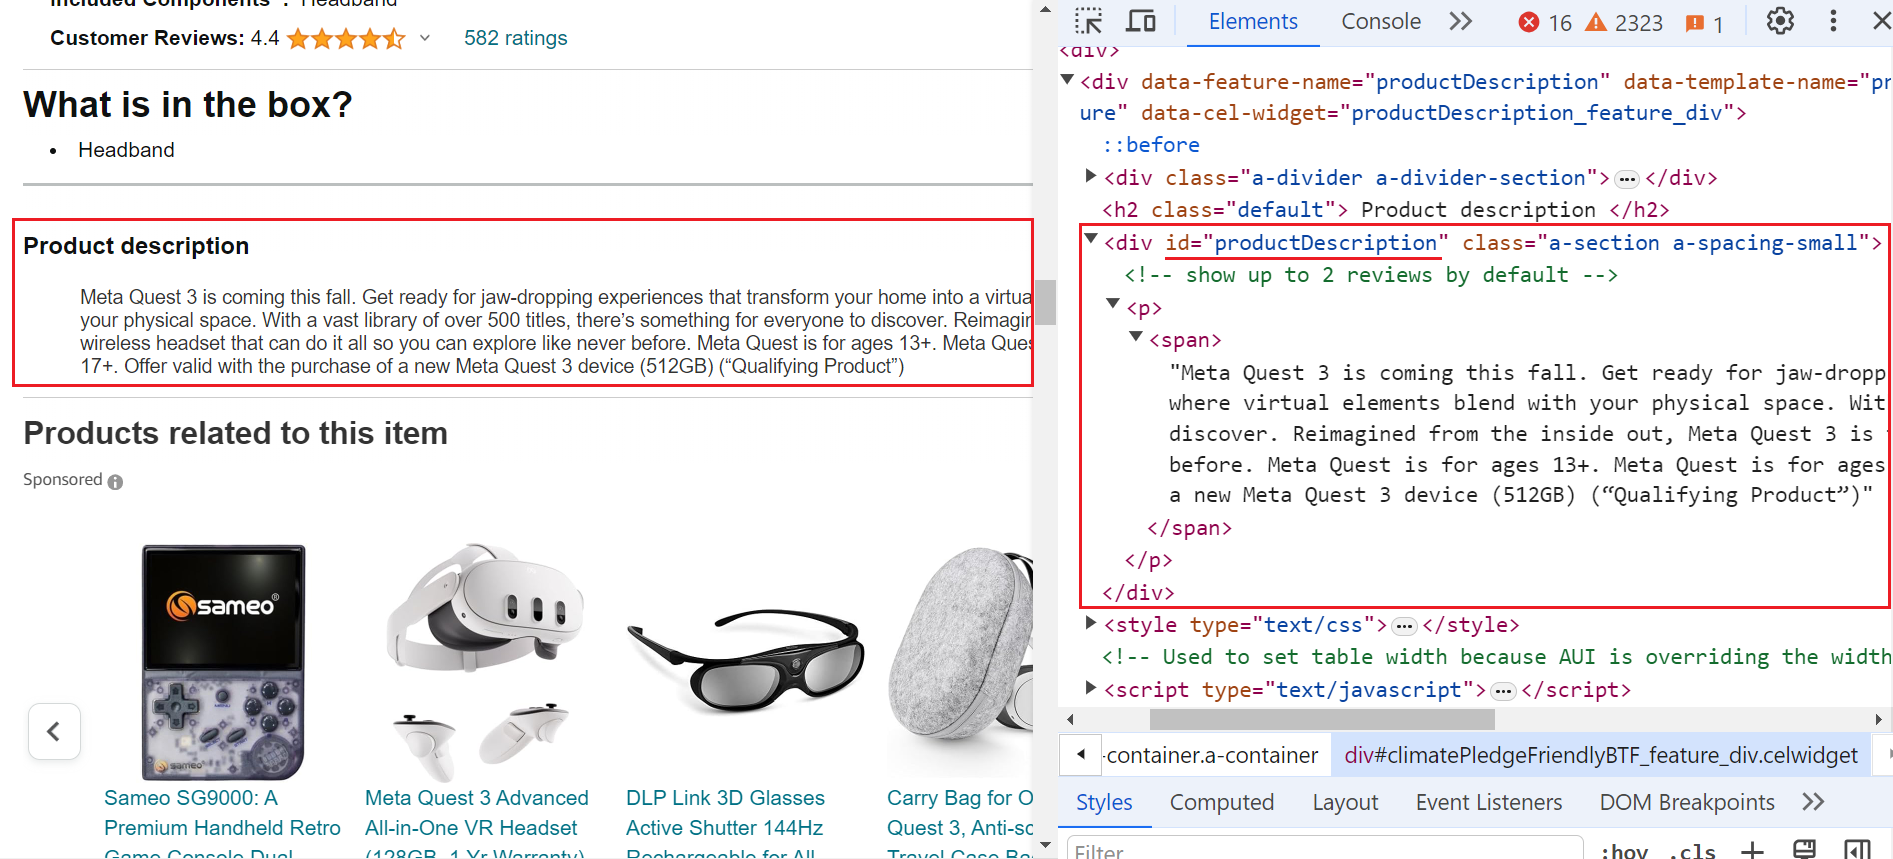
Here’s the code snippet:
description_element = await page.select("#productDescription")
description = description_element.text.strip() if description_element else None
Step 9. Creating Product Data Dictionary
The code creates a dictionary named product_data to store the scraped information. It uses keys such as "Title", "Price", "Description", "Image Link", "Rating", and "Number of Reviews" to store the corresponding extracted values.
product_data = {
    "Title": title,
    "Price": price,
    "Description": description,
    "Image Link": image_url,
    "Rating": rating,
    "Number of Reviews": reviews,
}
Step 10. Saving Data to JSON File
The code opens the file "product_data.json" in write mode with UTF-8 encoding. It then uses json.dump from the json library to serialize the product_data dictionary into JSON format and write it to the opened file.
with open("product_data.json", "w", encoding="utf-8") as json_file:
    json.dump(product_data, json_file, ensure_ascii=False)
Step 11. Closing the Browser
Finally, the web scraping browser is stopped to release system resources.
browser.stop()
Final Output
Once the code runs successfully, all the extracted data will be saved in a JSON file.
Alternatives to Nodriver
In the above code, if you attempt to make multiple requests, the website will detect and impose a challenge to your scraper. If you attempt to bombard the server with too many requests, you will suddenly face a complex challenge or be blocked by the website.
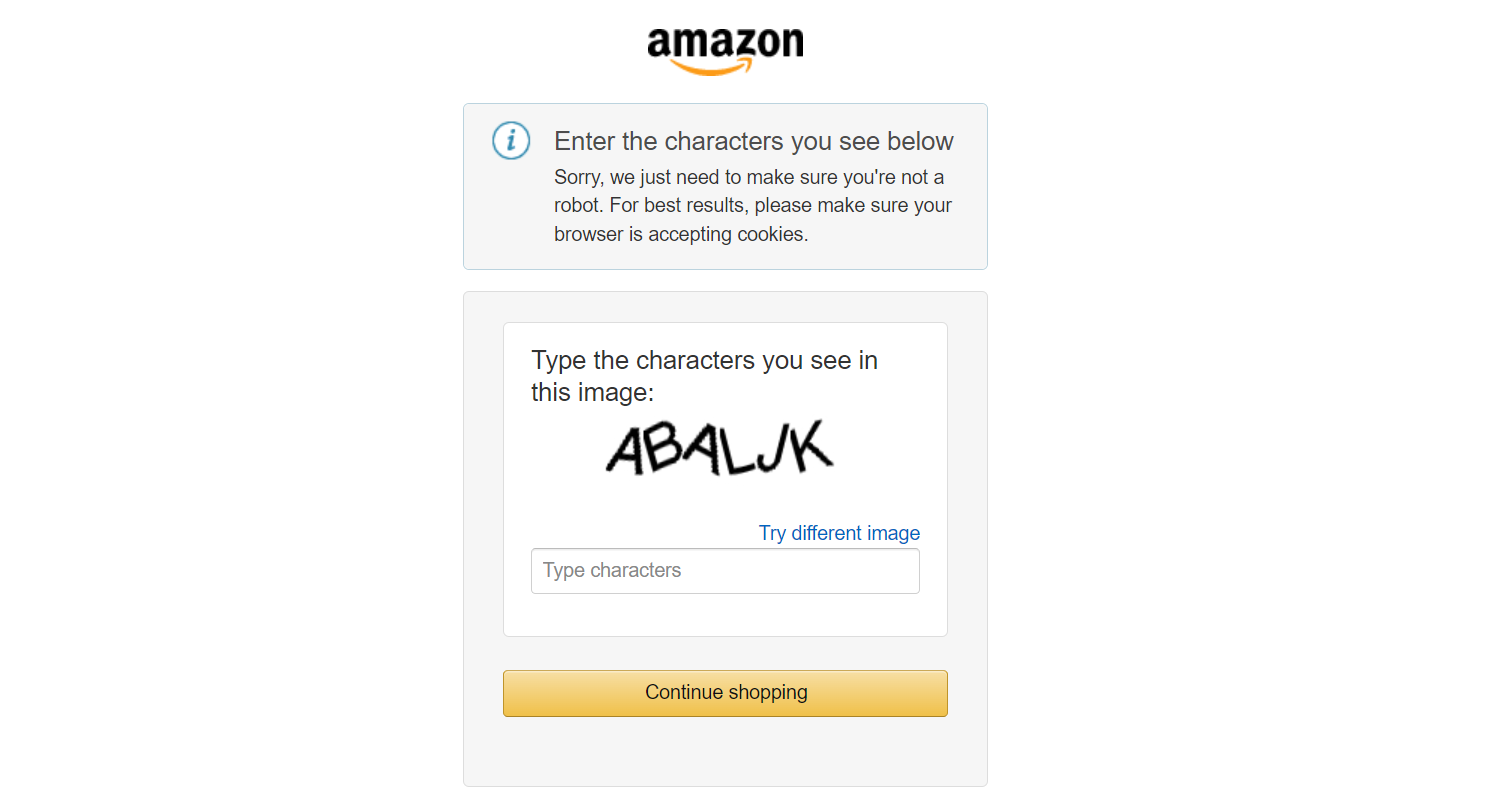
Here's a simple way to address this: using user-agents as shown below.
agent = "Mozilla/5.0 (Windows NT 10.0; WOW64) AppleWebKit/537.36 (KHTML, like Gecko) Chrome/109.0.0.0 Safari/537.36"
browser = await uc.start(headless=False, browser_args=[f"--user-agent={agent}"])
Using a single user-agent will eventually stop working. To address this, you should create a pool of user agents and rotate them for each request. While this solution can work for scraping small amounts of data, it's likely to get blocked or banned by websites when dealing with millions of data points in a real-world scenario.
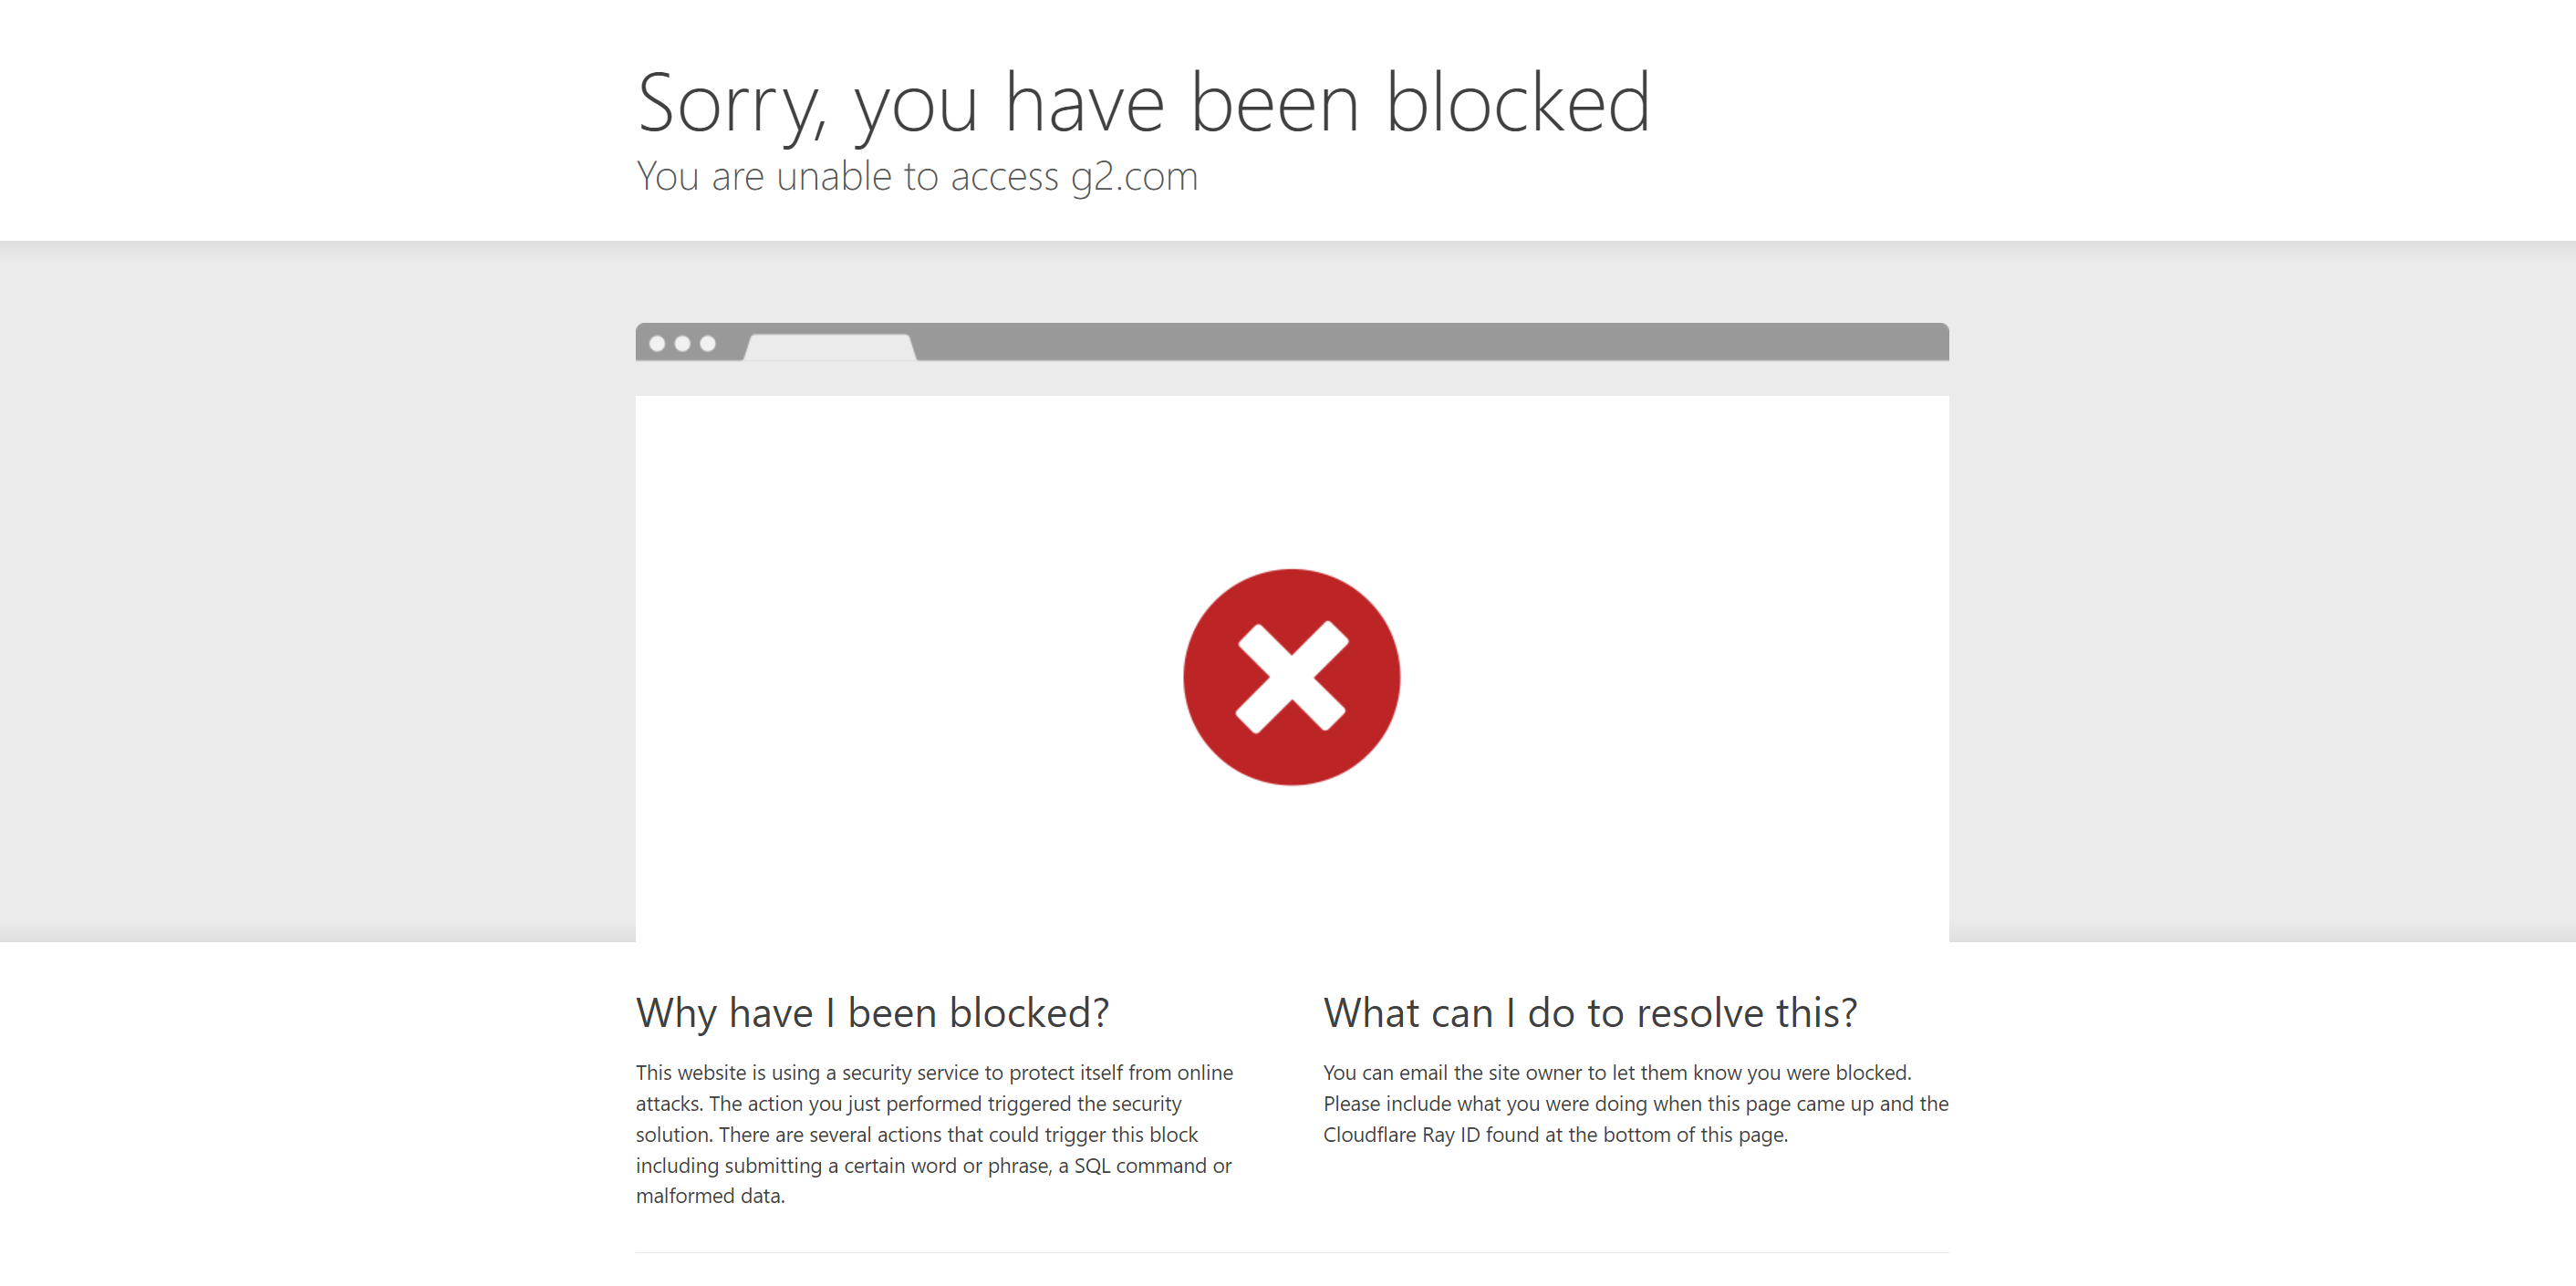
Let's see another scenario where NoDriver struggles against advanced anti-bot systems. Here's an example of Nodriver being used against a Cloudflare-protected website, the G2 product review page.
import asyncio
import nodriver as uc

async def main():
    browser = await uc.start(headless=True)
    page = await browser.get("https://www.g2.com/products/anaconda/reviews")

    await page.sleep(6)

    await page.save_screenshot("g2.png")

if __name__ == "__main__":
    uc.loop().run_until_complete(main())
Our scraper is instantly detected and blocked by G2's bot detection system, resulting in our failure to bypass it.
One of the major issues with open-source packages such as Nodriver is that anti-bot companies can detect how these packages bypass their anti-bot protection systems and easily fix the issues that they exploit. This leads to an ongoing arms race where these packages come up with new workarounds, and anti-bot companies patch these workarounds as well.
You need to choose a long-term effective solution. There are multiple effective solutions for web scraping. Take a look at our detailed guide on Web Scraping Without Getting Blocked to explore the various solutions.
Now, let's quickly review the alternatives to Nodriver.
Fortified Headless Browser: Selenium
Selenium offers solutions to strengthen your web scraper. You can use undetected_chromedriver, which optimizes and patches the base Selenium library, making it more adept at bypassing Cloudflare.
However, even undetected_chromedriver can get stuck when dealing with advanced anti-bot mechanisms. Its successor, nodriver, as you've already seen, also has difficulty overcoming certain advanced anti-bot systems.
Fortified Headless Browser: Puppeteer
Puppeteer, a powerful headless browser library, can be easily detected by anti-scraping measures. This is where Puppeteer Extra, along with plugins like Stealth, comes in. Puppeteer Extra, an open-source library, extends the functionality of Puppeteer.
The Stealth plugin, also known as puppeteer-extra-plugin-stealth is a must for Puppeteer users. It employs various techniques to disguise properties that would normally expose your requests as bot activity. This makes scraping detection by websites more difficult.
Puppeteer Stealth is effective at avoiding detection, but it does have limitations. It cannot evade advanced anti-bot measures. For instance, if you use Puppeteer Stealth to try to bypass Cloudflare or DataDome, your script will likely be detected and blocked easily.
For more, check our full tutorial on Puppeteer-stealth.
Fortified Headless Browser: Playwright
The Stealth plugin is also available for Playwright. Here are some Puppeteer Extra plugins compatible with Playwright at the time of writing: puppeteer-extra-plugin-stealth, puppeteer-extra-plugin-recaptcha, and plugin-proxy-router.
Like Puppeteer, Playwright also struggles against advanced anti-bot systems.
ScrapingBee API
The downside of using open-source Cloudflare solvers and pre-fortified headless browsers is that anti-bot companies like Cloudflare can detect how they bypass their anti-bot protection systems and quickly fix the vulnerabilities they exploit. Consequently, most open-source Cloudflare bypass methods only remain effective for a few months before they become ineffective.
Most of the time, it's impractical to spend significant time, energy, and money developing and maintaining your own solver. Similarly, paying for the bandwidth and resources required by headless browsers can be costly.
Forget those open-source solvers? Smart proxies are an effective option. They handle the behind-the-scenes checks to get you the data, saving you time and resources.
ScrapingBee offers smart proxies and is an excellent choice. It simplifies the entire process by managing your code infrastructure and ensuring that you are always updated with the latest software updates from Cloudflare.
ScrapingBee offers a fresh pool of proxies that can handle even the most challenging websites. To use this pool, you simply need to add stealth_proxy=True to your API calls.
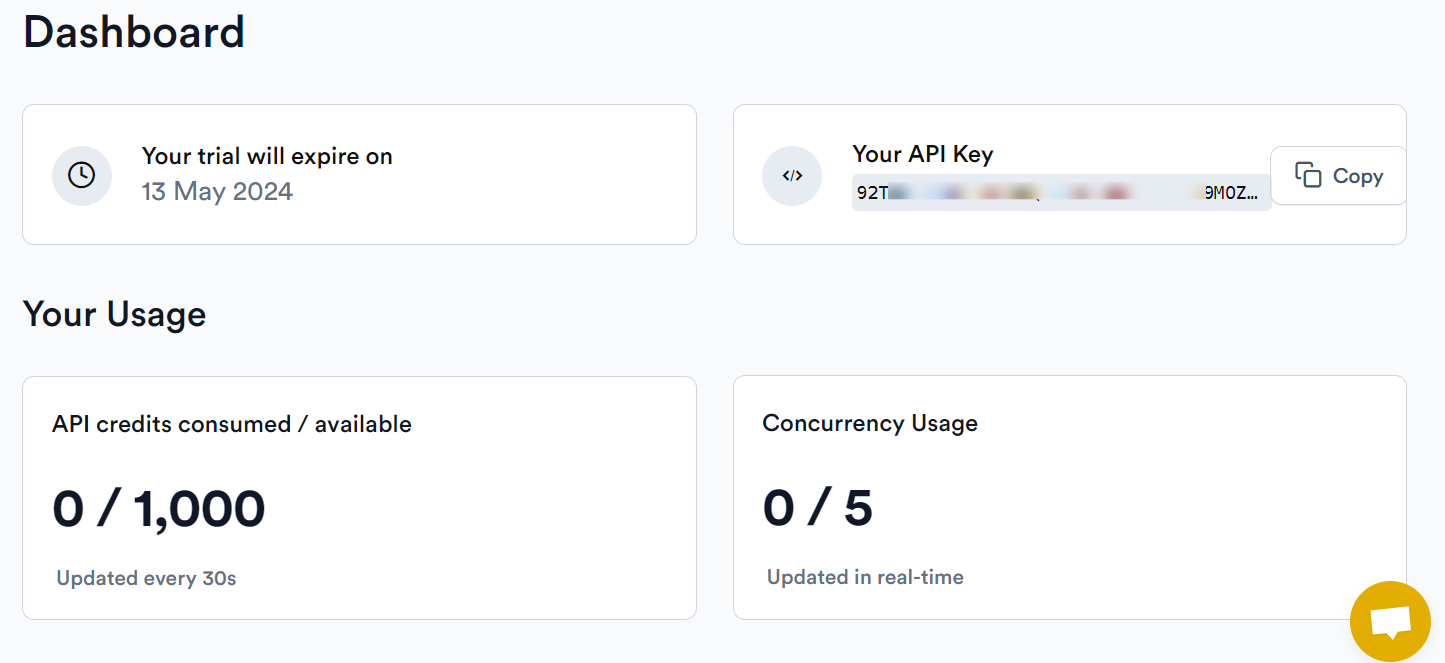
To start, sign up for a free ScrapingBee trial; no credit card is needed, and you'll receive 1000 credits to begin. Each request costs approximately 25 credits.
Upon logging in, navigate to your dashboard and copy your API key; you'll need this to send requests.
Next, install the ScrapingBee Python client:
pip install scrapingbee
You can use the below Python code to begin web scraping:
from scrapingbee import ScrapingBeeClient
client = ScrapingBeeClient(api_key="YOUR_API_KEY")
response = client.get(
"https://www.g2.com/products/anaconda/reviews",
params={
"stealth_proxy": True, # Use stealth proxies for more tough sites"country_code": "gb",
"block_resources": True, # Block images and CSS to speed up loading"device": "desktop",
"wait": "1500", # Milliseconds to wait before capturing data
# Optional screenshot settings:# "screenshot": True,# "screenshot_full_page": True,
},
)
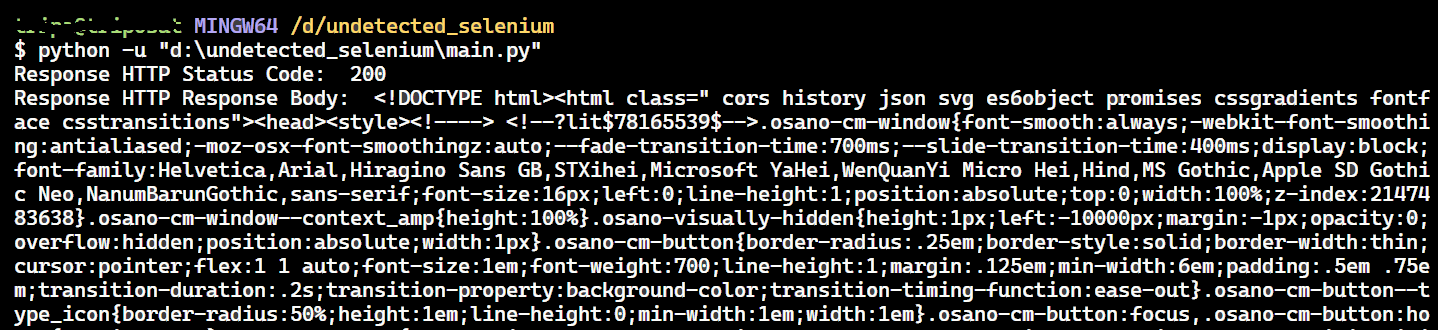
print("Response HTTP Status Code: ", response.status_code)
print("Response HTTP Response Body: ", response.text)
The status code 200 indicates that the G2 anti-bot has been bypassed.
Using a web scraping API like ScrapingBee saves you from dealing with various anti-scraping measures, making your data collection efficient and less prone to blocks.
Wrapping Up
This article explained how to use Nodriver for web scraping without getting blocked. What sets this package apart from other known packages is its optimization to stay undetected by most anti-bot solutions. However, there are still instances where it can fail. In such cases, ScrapingBee can be a great alternative that helps you scrape any website data with just a few lines of code.
Before you go, check out these related reads: