You can create software without code.
It’s crazy, right?
There are many tools that you can use to build fully functional software. They can do anything you want. Without code.
You might be thinking to yourself, what if I need something complex, like a web scraper? That’s too much, right?
To create a web scraper, you need to create a code block to load the page. Then, you need another module to parse it. Next, you build another block to deal with this information and run actions. Also, you have to find ways to deal with IP blocks. To make matters worse, you might need to interact with the target page. Clicking buttons, waiting for elements, taking screenshots.
That’s a lot of work.
And yet, you can build a no code web scraping tool.
The magic of building a no code web scraper is to use APIs and services to do the heavy lifting. And even if you know how to code, using an API is much easier.
And that’s our goal for today. We are going to explore many aspects of no code web scraping for coders and no-coders.
You’ll see how no code web scraping tools can be useful with many real-life examples. Besides, you’ll learn how a no code web scraper compares with coding a web scraping app. By the end of the day, you’ll understand why and how you can use no-code web scraping to take your projects to the next level.
These are the main topics in case you want to jump ahead:
- What is no-code
- Why you should build a no code web scraping tool
- How to scrape the web without code
- Conclusion
Let’s get started!

What is no-code
No code tools allow you to build software without code.
This might seem like a distant reality, but certainly know one of the most popular no code tools out there: Microsoft Excel.
It sounds weird, but it makes sense. No code tools give you the power to solve unique problems using premade functions.
In Excel, you don’t need to know what the “AVERAGE” formula does under the hood. You just call the function, pass the variables and watch the output. It’s the same be it for simple or complex functions. Sums, Lookups, searches, If statements.
There’s yet another interesting aspect of no code tools. They are useful even for coders.
If you don’t believe me, think about it this way. I’m sure you know how to sum a few numbers if you want to. You can do it with pen and paper. But it is much easier to simply add your numbers in a spreadsheet and call SUM().
The same logic applies to no code.
And when you need something highly specific, there are ways to expand the premade functions. In Excel, you can create macros, or use VBA. In no code tools, you can use code snippets or connect with external services.
No code tools help everyone!
If you can’t code, you can use the premade tools, connect different functions, and build something even if you don’t know how to do that from scratch.
If you can code, you can use the no code tool as a starting point, and build only the specific functions you need.
You don’t need to reinvent the wheel.
Another helpful feature is the visual builders. Most no code tools have drag and drop interfaces, so you don’t even need to know the function names.
Of course, there are limitations to this approach.
- customization: this depends on the tool, but it’s likely that they put a limit on what you can do to stay in their controlled environment.
- performance: If a tool is highly customizable, it usually isn’t super optimized to do the specific task you are trying to do.
In other words, quite often you can’t make it scale to millions and millions of users.
But it’s likely that if you reach the point where performance is an issue, you are ready to invest in a custom solution.
Therefore, no code tools are great for building software fast. They are great for building MVP and internal tools. But don’t be limited to that.
They can be even used for commercial tools. You can sell, deliver results, and move to a custom solution when you are ready.
Why you should build a no code web scraping tool
Web scraping is loading content from a site as if you were a visitor. Therefore, a web scraper loads a page and has all its data ready to be used in other actions.
This technique allows you to perform many tasks and save a lot of time. Instead of manually checking sites, you can use a web scraper to load this information and do what you want to do automatically.
Here are some use cases for web scraping in your business:
- Price Monitoring - You can monitor prices from stocks or products everywhere
- Lead Generation - You can automatically load contact information from sites, and keep them up to date
- SEO Rankings - You can check your performance on Google search results for specific works, specific articles, monitor your main competitors
- Testimonials and Reviews - You can grab real reviews and testimonials from external sites, such as Amazon or TrustPilot
- Headhunting & HR - You can monitor talents and check their employment status
- Competitive Analysis - You can monitor page changes in your competitors' sites, so you’ll know when there are new products, services, spec changes.
- News Digest - You can combine multiple news sources in a single report, so you can read all headlines at once.
- Social media management - You can load your social media profiles and check followers counts, likes, comments, mentions
- Automation - You can load pages and interact with them, allowing you to automate tasks such as generating reports, cleaning up databases, moving content
As much as it is useful, web scraping is one of the hardest tasks in software development. You need to deal with a lot of variables, such as different code structures, IP bans, page interactions, and browser management.
That’s where an API comes in handy. You can just tell the API what you want to load and the page URL, and you just get the output. You don’t need to deal with any of these issues.
Now that you can just send commands to a web scraping API, you can build a no code web scraping tool with just 2 components:
- A module that sends your information to the API, considering what you want to retrieve
- A module to read the information sent back by the API, and do what you want to do with it.
Both of these tasks are usually built-in into no code builders.
For example, if you use Make (formerly Integromat), you can use their “data storage” module for the first component, and a connector to run your desired action.
But there’s a game-changing secret about no code web scraping. You aren’t limited to loading content. You can interact with it.
So, you can use a web scraper to automate the actions that you want to do. You can schedule tasks that can’t be scheduled. Automate purchases when there’s a price drop. You can send forms, click on buttons. Anything you do as a user, you can automate in a web scraper.
Let’s see how you can actually build your no code web scraper.
Setting up everything
Now you have some ideas of how web scraping can help you. Let’s bring these ideas to action with some examples.
In addition to showing you how to create your no code web scraper, you’ll see an outline of how hard it would be to create these elements with coding.
Let’s say you want to load this page for Products on Sale. You can check the list of products, prices, and even place an order. But before all that, we need to pick our tools.
We recommend you use ScrapingBee as your web scraping API. Then, you can use any no code builder you want. In our demo, we are using Make (formerly Integromat).
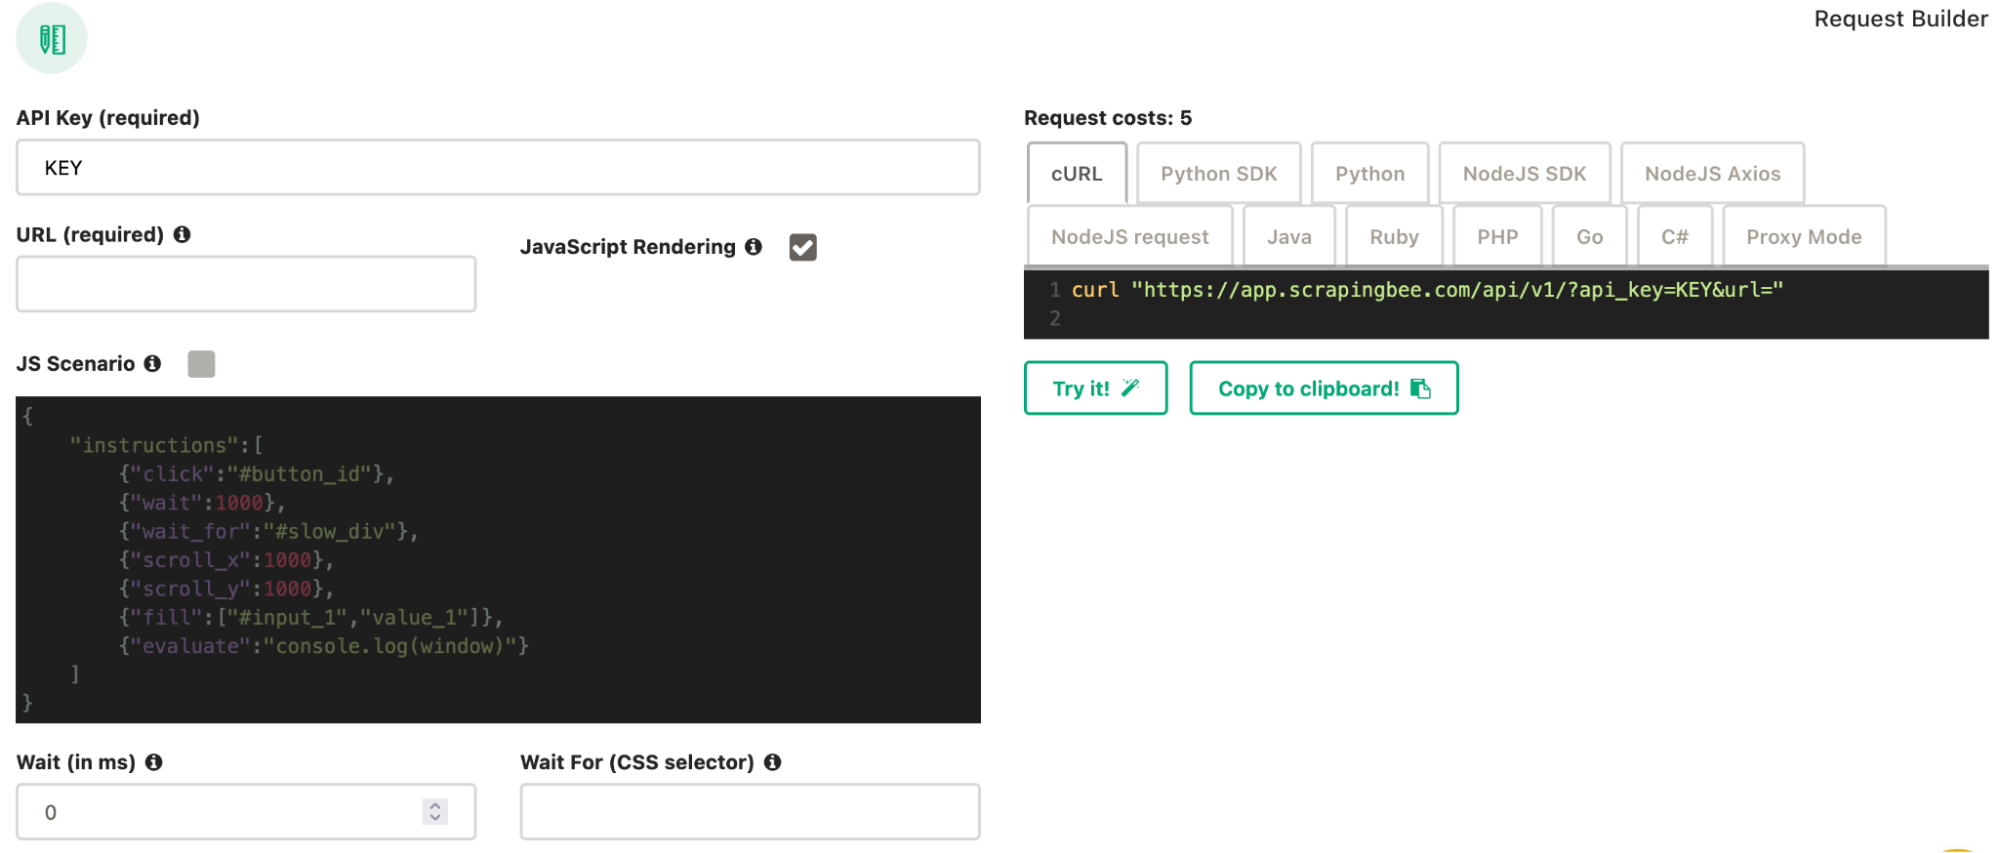
Let’s get started by using the ScrapingBee Dashboard to test our API calls and quickly see how each of these settings works.
You can set up each action you want to perform using the respective fields. Additionally, you can copy the API call using the field on the right side into your own software or server.
Let’s get started!
Load an element using CSS selectors - Extract Data
Loading a specific CSS element without an API like ScrapingBee is hard work. You have two main options.
You can use regular expressions. This might work if your page is static, but it still might bring the wrong results. Not to mention that creating the regular expression itself is quite complex, as opposed to simple CSS selectors.
Another option is to use an actual code parser and browser and then using it to load your desired element. The upside is that you can actually run the page the same way a regular user would, including JS code. The downside is that it means that you need to use a third-party library, not always very user-friendly, and often CPU intensive.
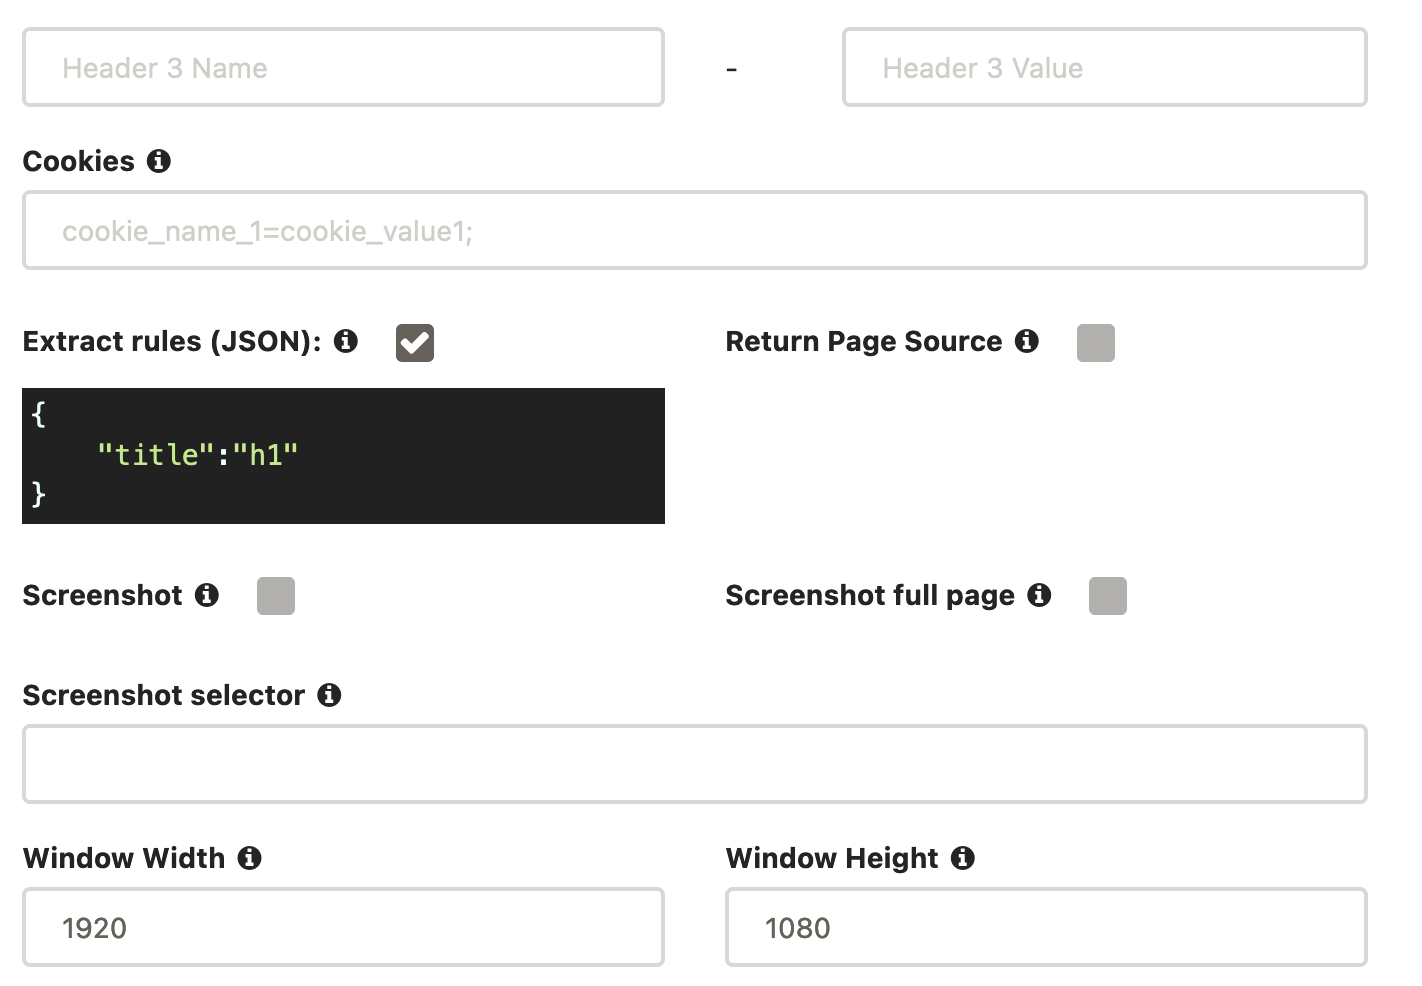
But if you want to do it with ScrapingBee, it is as simple as sending the CSS selector you want. Here is an example:
{
 "title":"h1"
}
You can check the “extract rules” box and use this code in your ScrapingBee request builder.
This is the scraping results for our demo page:
{
    "title": "Products on sale"
}
You can use any CSS selector you want. If you don’t know how to use CSS selectors, you can find out a way to do it in our No Code Competitor Monitoring tutorial. It requires no coding knowledge, and it’s very quick to implement.
Back to our extract data options, you aren’t limited to just getting the content of an element using CSS code.
Here are your options:
- Load the tag’s content (default) - "output": "text"
- Load the tag’s HTML contents - "output": "html"
- Load one of the tag attributes - "output": "@attributeName"
- Load just the first item (default) - "type": "item"
- Load all matching elements - "type": "list"
- Load clean text (default) - "clean": true
- Load the original text - "clean": false
In addition, you can nest rules using the “output” option. You can make the return JSON to be in the exact format and nesting you want.
Here is an example to load data from our demo page combining all these elements. You can load the page title (title), then load the list of products on sale, returning their titles, prices, and the `alt` attribute for their images.
{
    "title":"h1",
    "products": {
        "selector": ".product",
        "type": "list",
        "output": {
             "product": "h2",
             "price": ".newPrice",
             "": {
                 "selector": "img",
                 "output": "@alt"
             }
        }
    }
}
And this is the output:
{
    "title": "Products on sale",
    "products": [
   	 {
   		 "product": "Flying Ninja",
   		 "price": "$99.00",
   		 "": "ninja"
   	 },
   	 {
   		 "product": "Awesome Bee",
   		 "price": "$799.00",
   		 "": "bee"
   	 },
   	 {
   		 "product": "Brown Fox",
   		 "price": "$199.00",
   		 "": "fox"
   	 }
    ]
}
How to execute JS code in your web scraper - JS Scenario
Parsing JS code in your own browser is quite complex. You need to take into account many interactions, libraries, security. Thus, if you want to create your own scraper from scratch including JS execution, you’d need to manage your own headless browser.
If you only need to do this for a few dozens of pages, that is not that hard, here is an example using Python and Selenium, doing it at scale is more challenging.
With ScrapingBee, you can interact with your target page using the JS scenario field. It allows you to perform predefined JS actions, and execute your own JS code as well.
You pass them as JSON instructions, in the JS scenario field. Like this:
{
    "instructions": [
       {"click": "#buttonId"}
    ]
}
Here are the actions you can execute:
- Click button -
{"click": "CSS SELECTOR"} - Wait for a fixed time (ms) -
{"wait": 2000} - Wait for a specific element to be loaded -
{"wait_for": "CSS SELECTOR"} - Wait and element and click on it -
{"wait_for_and_click": "CSS SELECTOR"} - Scroll in the X axis (px) -
{"scroll_x": 1000} - Scroll in the Y axis (px) -
{"scroll_y": 1000} - Fill in a form field -
{"fill": ["CSS SELECTOR", "VALUE"]} - Run JS code -
{"evaluate": "console.log('foo')"}
Now you can do almost anything you want. Here is an example. We can load our demo page, and then check if the price for the Awesome Bee is lower than $800, our target price. If it is, we click on buy.
You probably want to know the results of this action. In this case, we can edit the page contents (text or attributes), then pass this element to our extraction rules. So, our JS scenario modifies the page, and the extraction rules let us know how it worked.
You can use this JS snippet to run the price comparison, purchase, and logging:
//get the element and price

var price = document.querySelectorAll(".product .newPrice")[1].textContent;

//convert the price into a float

price = Number(price.replace(/[^0-9.-]+/g,""));

//check price levels

if ( price < 800) {
   //if it is a good price, but it
   document.querySelectorAll(".product .buy")[1].click();
   //add a note in the #return element (or any element) with the message we want to see
   document.querySelectorAll("#return")[0].textContent = "Price: " + price + " - bought ";
} else {
   document.querySelectorAll("#return")[0].textContent = "Price: " + price + " - didnt buy ";
}
Since the JS scenario requires a JSON version of this code, you can minify it. Here is a minified version ready to be used in ScrapingBee:
{
    "instructions":[
          {"evaluate":"var price=document.querySelectorAll('.product .newPrice')[1].textContent;(price=Number(price.replace(/[^0-9.-]+/g,'')))<800?(document.querySelectorAll('.product .buy')[1].click(),document.querySelectorAll('h1')[0].textContent='Price: '+price+' - bought '):document.querySelectorAll('h1')[0].textContent='Price: '+price+' - didnt buy ';"}
    ]
}
In our case, we are writing the JS results to the H1 tag, so make sure you have it in your extract rules:
{
    "result":"h1"
}
Just one small adjustment. If you are getting a 500 error or if your result is returning empty, add a “wait” parameter in your query. Something as simple as 1,000 (1 second) is good enough, but if you want to be on the safe side you can use higher values (lower than 40,000)
This is the result for our demo:
{
    "result": "Price: 799 - bought"
}
This means that we bought the product for $799. What a bargain!
Screenshot
Just when you thought that coding your own web scraper was hard, it gets harder. Taking screenshots is even more difficult. In these cases, you need to process images, take into account the screen size, resolution, the screenshot target.
For example, if you want to take a screenshot of just one element, it probably means that you’ll need to find that element’s position (via JS code), then crop your image later. So you take a full screenshot and then crop it.
Now, when it comes to using ScrapingBee, it is again just a matter of passing some variables.
You can define these options for your screenshot:
- Screenshot of the visible portion
- Screenshot of a specific element (CSS selector)
- Full-page screenshot
There are many use cases for screenshots in the wild. In particular when you combine them with the JS scenario.
For example, you can take a screenshot of the latest 5-star review you got from Capterra.
Load the reviews specific page of your application (/reviews).
Then use this selector in your screenshot:
html > body > div:nth-of-type(1) > div > div:nth-of-type(2) > div > div:nth-of-type(3) > div > div:nth-of-type(4) > div:nth-of-type(1)
You can use this JS scenario to load reviews from high to low:
{
   "instructions":[
   	 {"click":"html > body > div:nth-of-type(1) > div > div:nth-of-type(2) > div > div:nth-of-type(3) > div > div:nth-of-type(3) > div:nth-of-type(2) > div:nth-of-type(1) > div > div > div:nth-of-type(2) > div:nth-of-type(2) > div:nth-of-type(2) > div:nth-of-type(1) > div > input"},
   	 {"wait":1000},
   	 {"click":"html > body > div:nth-of-type(1) > div > div:nth-of-type(2) > div > div:nth-of-type(3) > div > div:nth-of-type(3) > div:nth-of-type(2) > div:nth-of-type(1) > div > div > div:nth-of-type(2) > div:nth-of-type(2) > div:nth-of-type(2) > div:nth-of-type(1) > div:nth-of-type(2) > ul > li:nth-of-type(3)"}
  ]
}
You can use similar methods to take screenshots of tweets, reviews, pages.
Scheduled Scraping
Now that you have tested your scraping options, and you know what you want to do, you need to automate it.
If you wanted to code your own tool, you need to run a cron task, or another scheduling tool. You need to handle errors, debug, make sure it is called when it should.
Or you can use a no code tool to manage this for you.
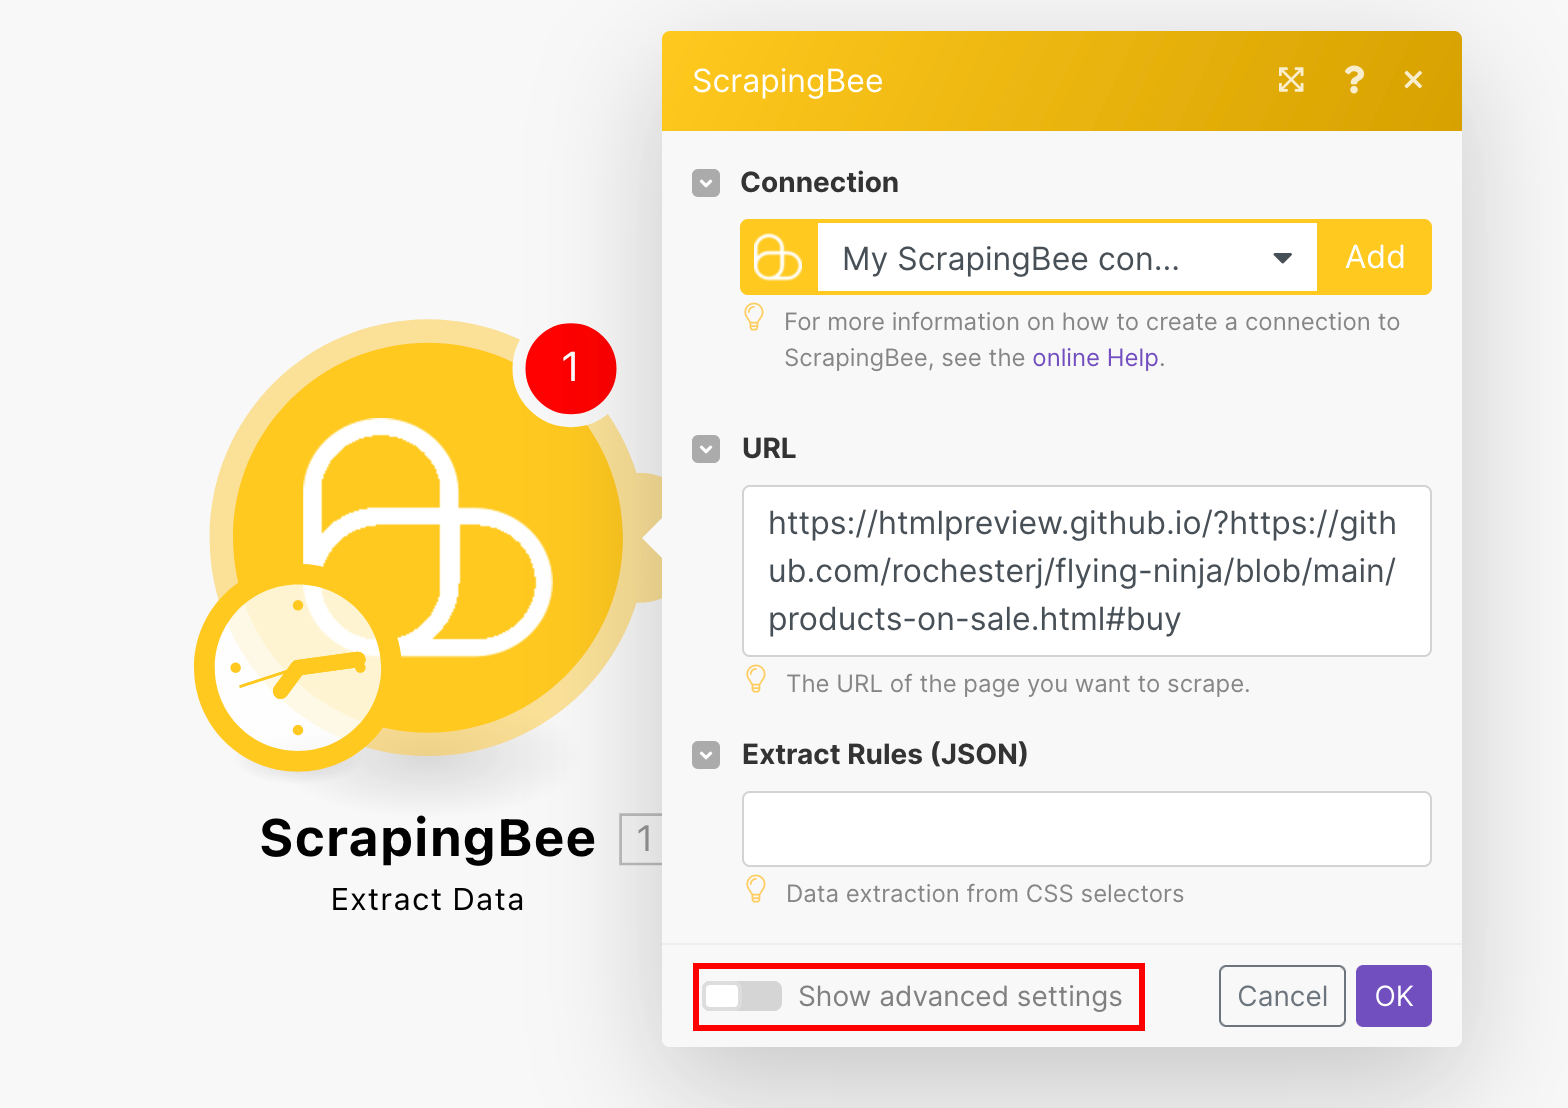
You can use Make.com as a way to call your scraping actions along with your desired options.
First, you need to create a scenario. Then, load the ScrapingBee module, in this case with the Extract Data mode.

Then you can add your API key and explore the options. There you can find the extract data field, JS scenario, screenshot options. Just check the “Show advanced options” box in case you don’t see them:
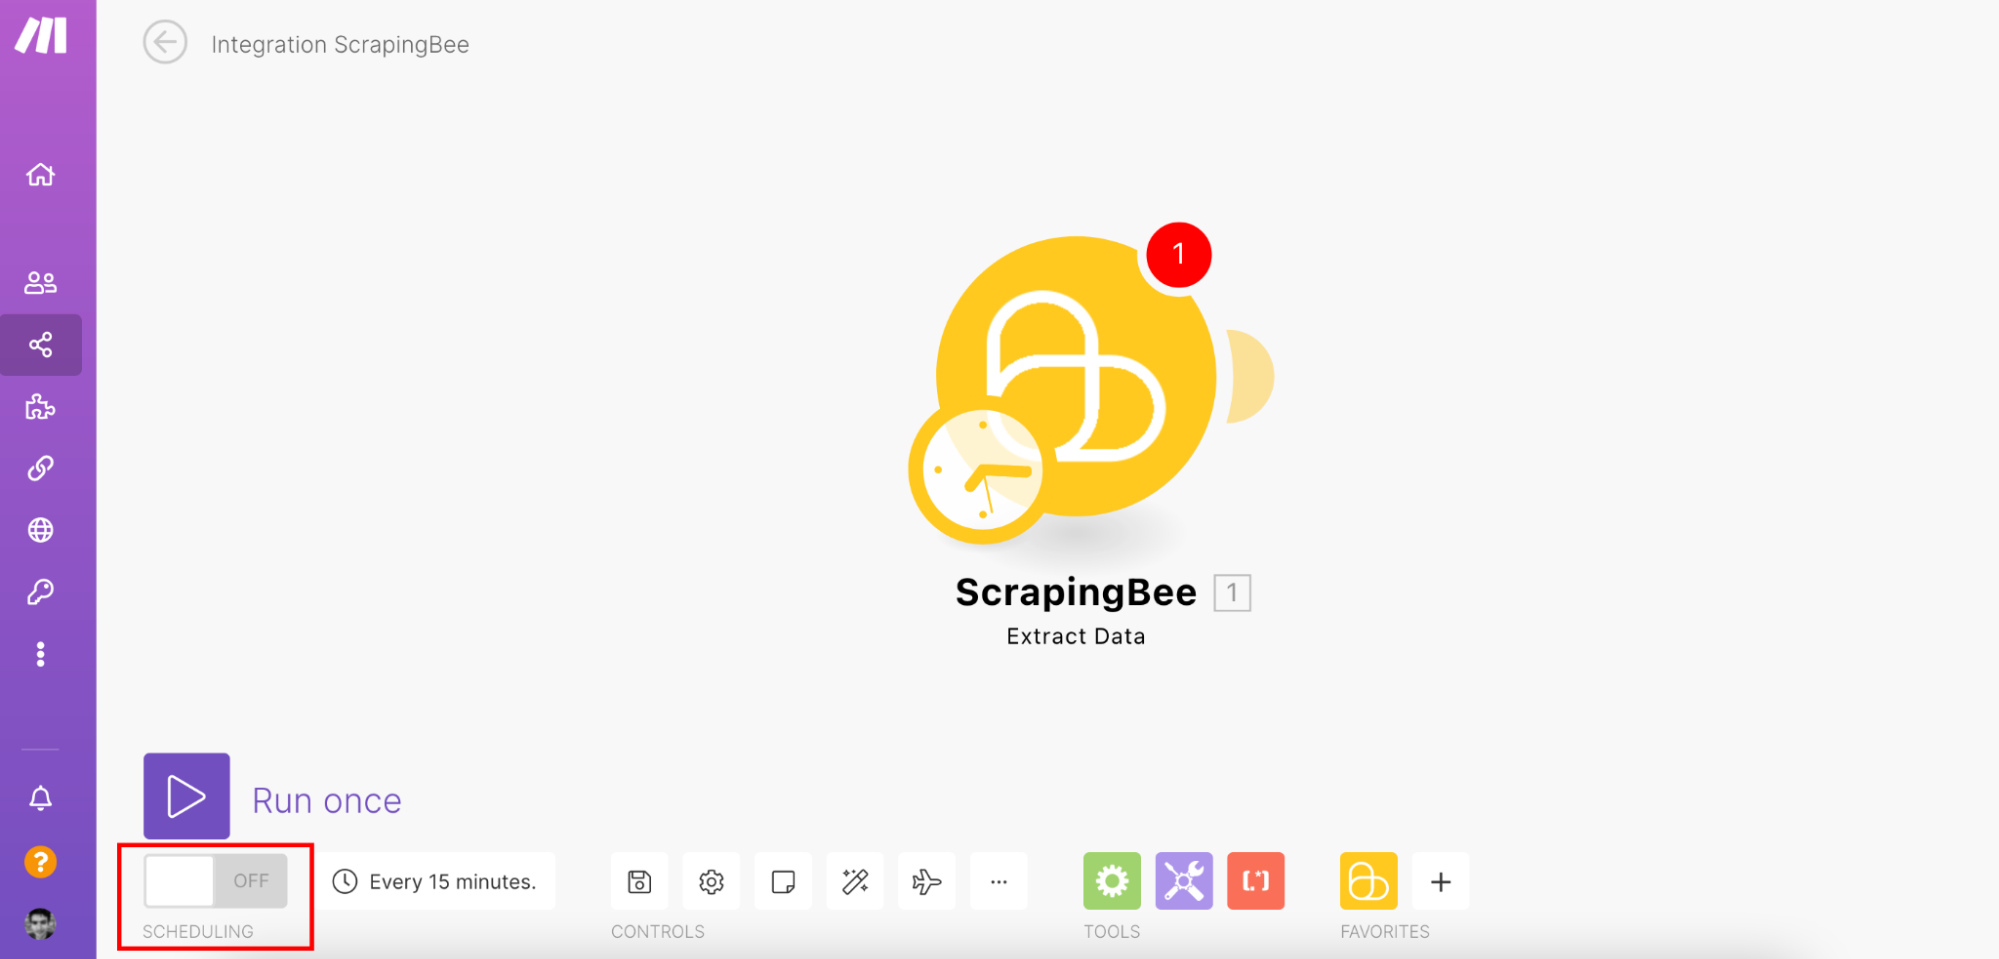
You can schedule your scenario using the Make’s scheduling options:
Send results by webhooks
Back to your coding endeavors, if you want to send your scraping results to a service, you’d need to connect with each of them. You’d need to read their API, check for the possible actions, authenticate. You’d need to test your calls and hope they won’t change. Any API changes will render your code useless.
But if you build your no code web scraping with ScrapingBee and Integromat, everything is ready for you. You can expand your scenarios, and make them send your scraping results to many modules.
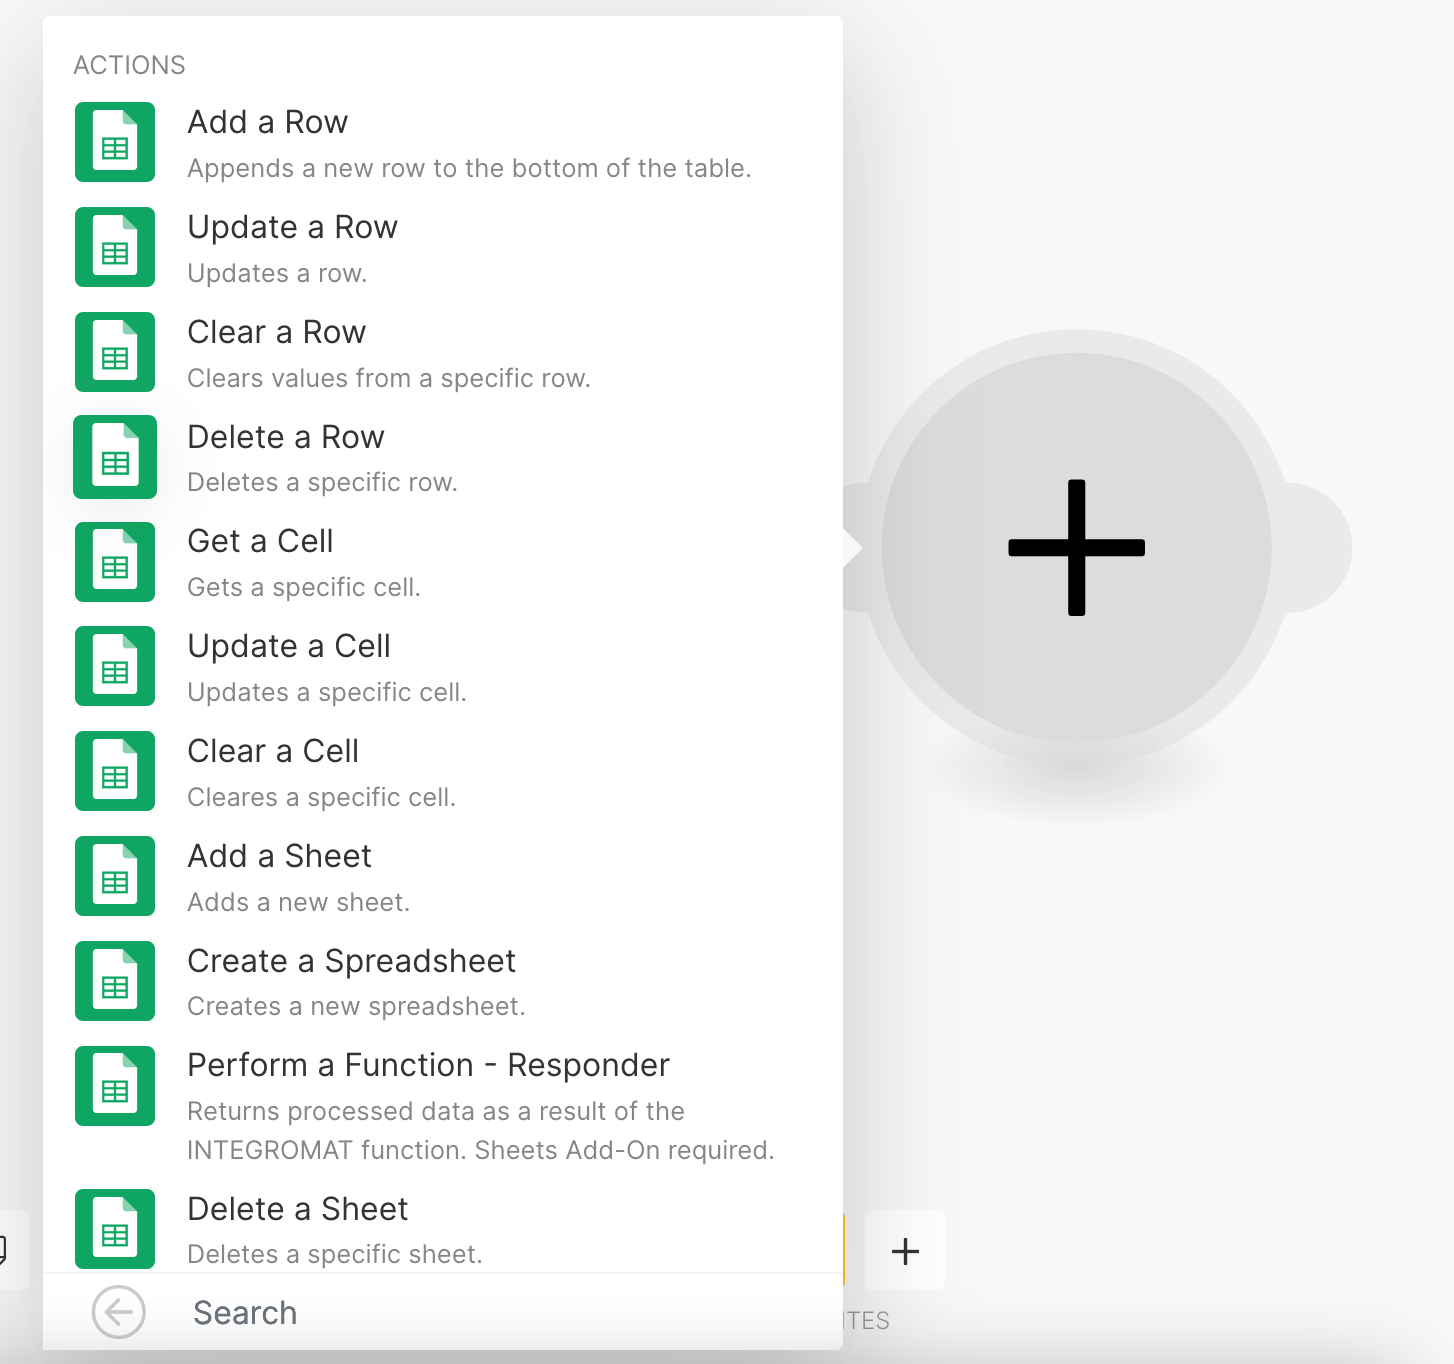
For example, you can add new rows to a Google Sheet, if you connect the Google Sheets module to the ScrapingBee results
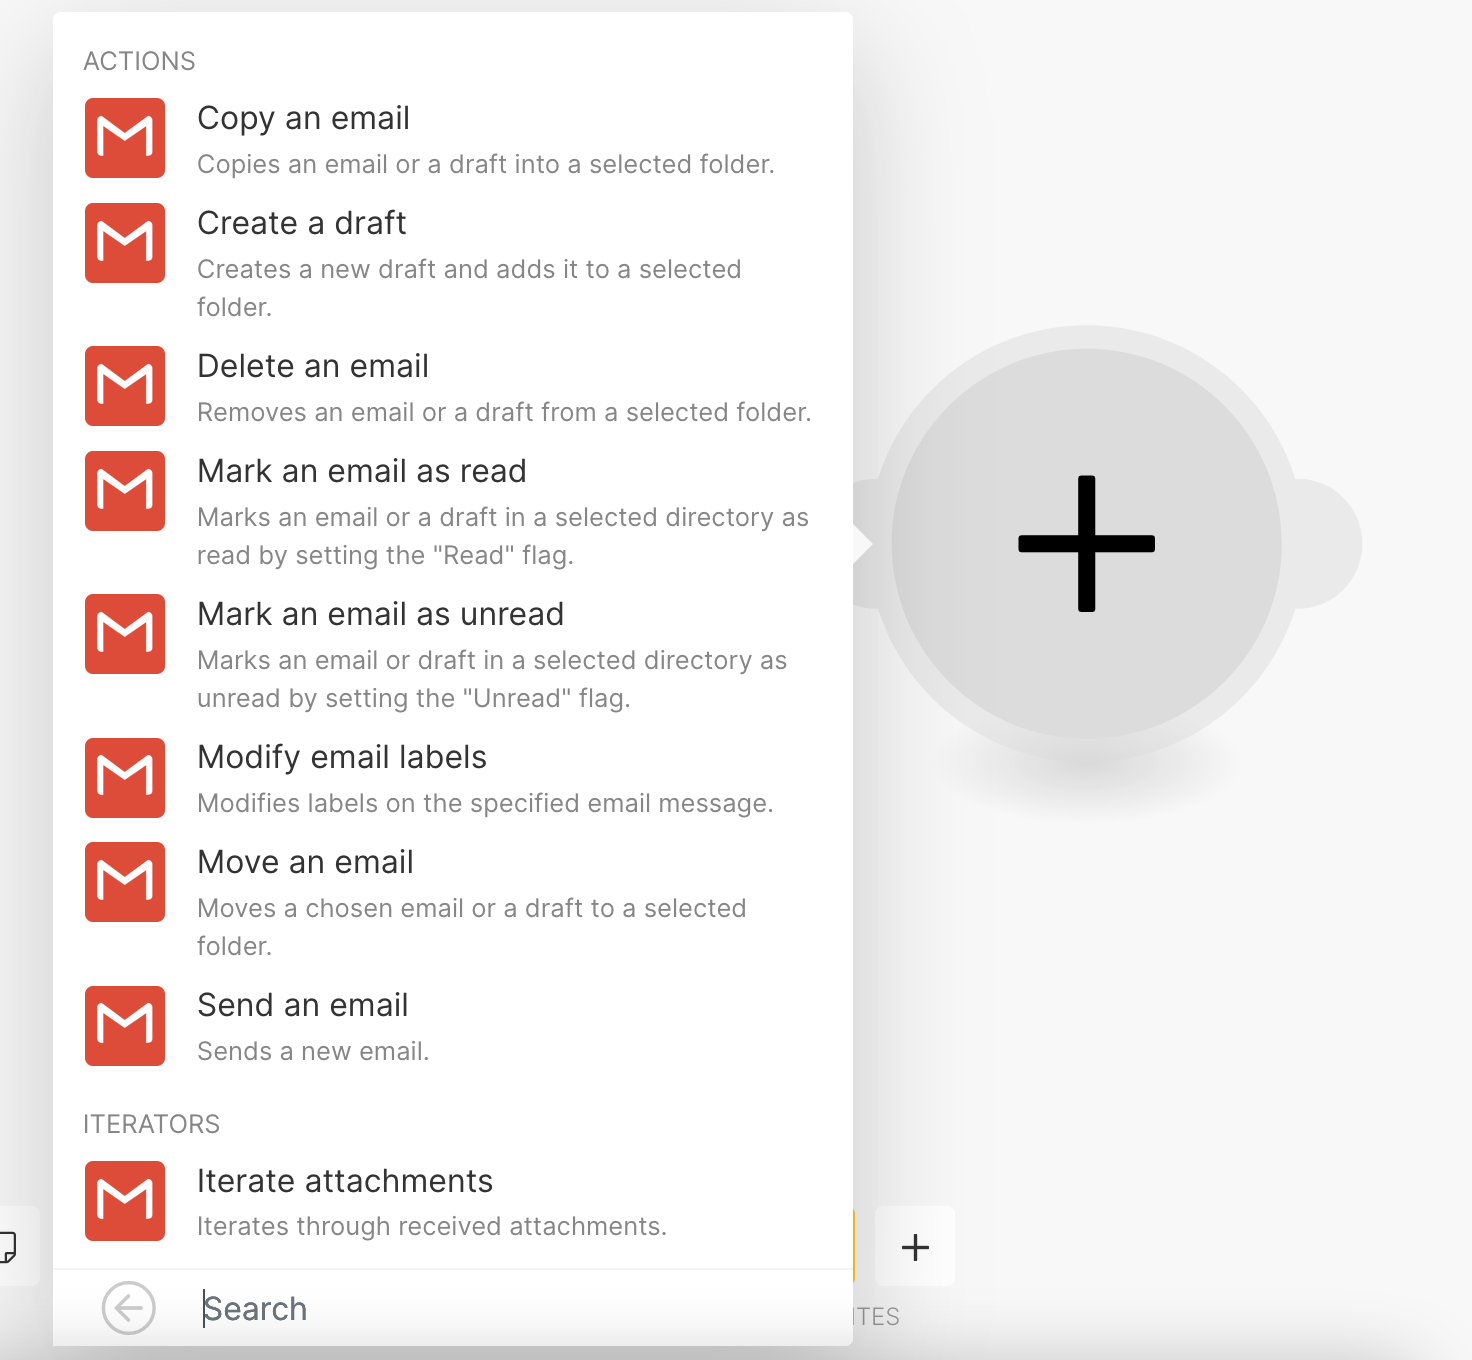
Another option is to send your screenshot results via email, using the Gmail module
You aren’t limited to the Make’s modules, though. You can send your results directly to a webhook or an API using the HTTP module:
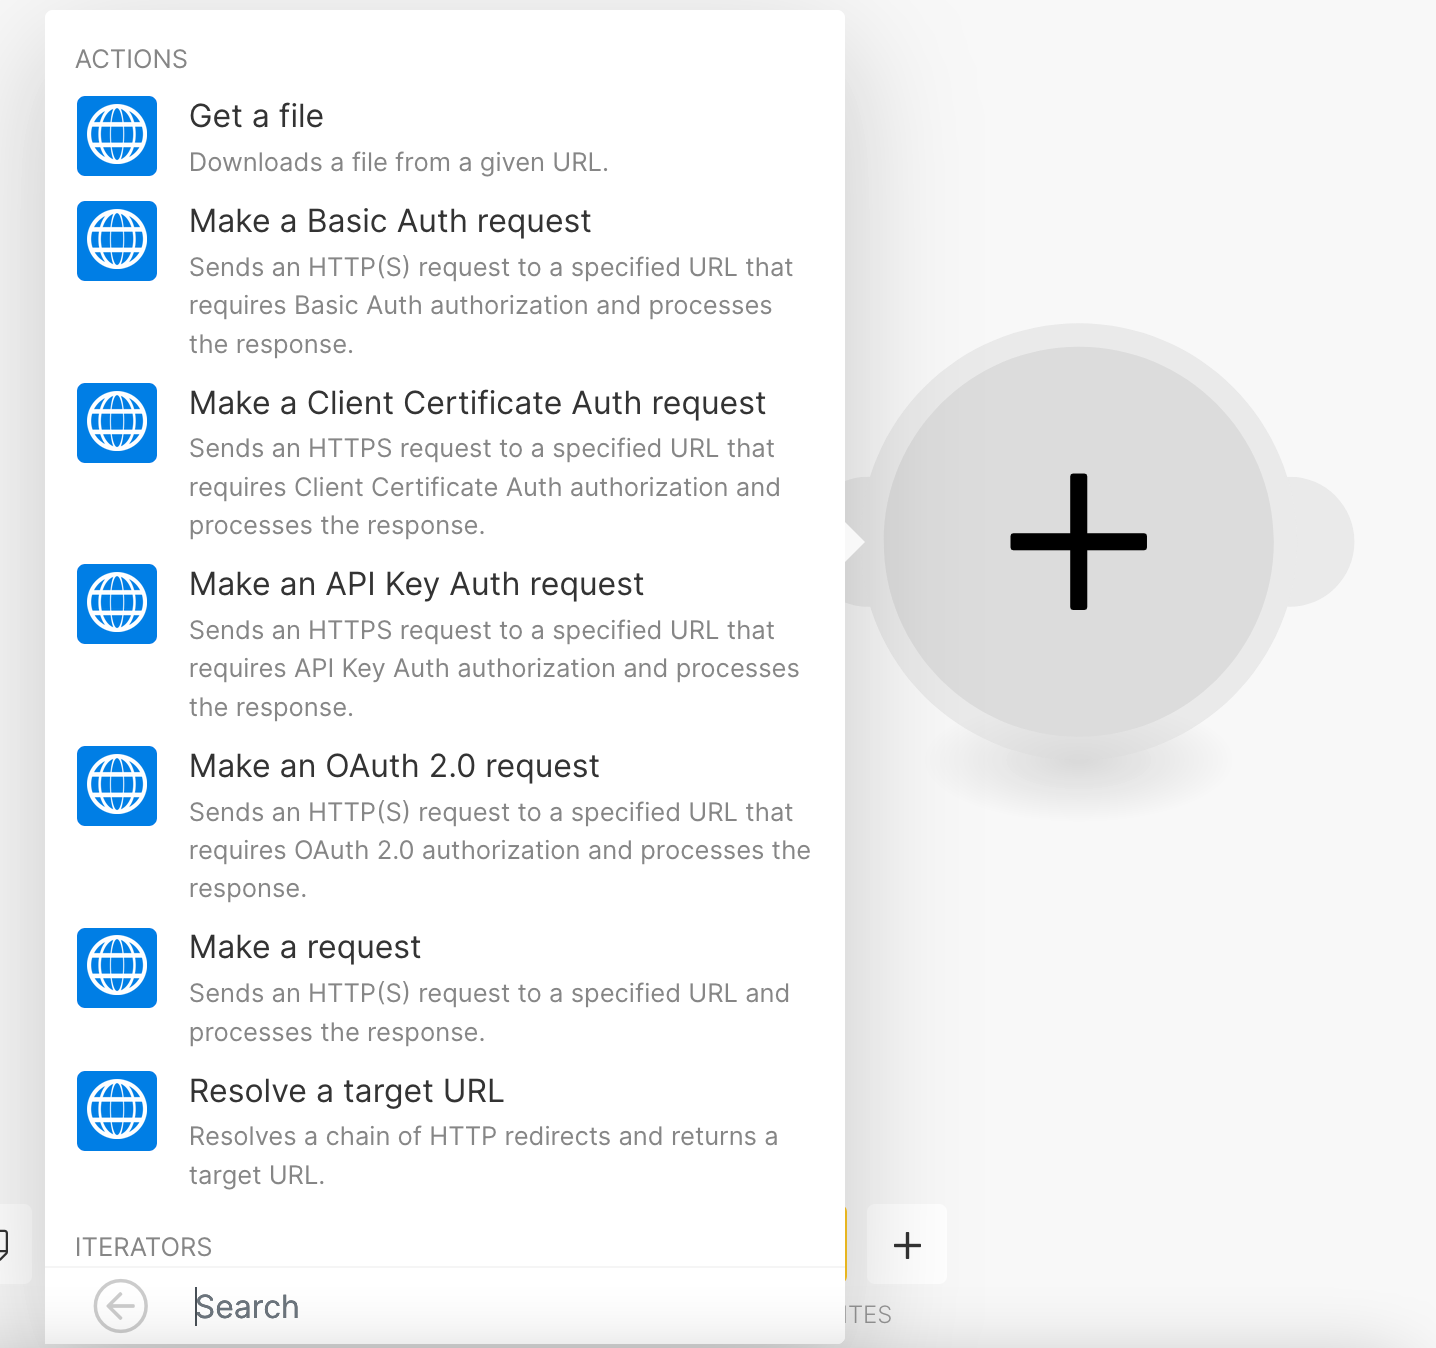
This allows you to connect with virtually any service and send your scraping results to any page you want.
Conclusion
Today we looked into how you can create a web scraping tool with no code. We discussed what is no code, and how it can be helpful even for coders. Then we saw how a web scraping tool can help your business. Finally, we saw some examples of how easy it is to load data from an API, as opposed to manually building your web scraper.
We hope you’ve enjoyed it, and see you again next time!