In order to perform price scraping, you need to know the CSS selector or the xPath for the target element. Therefore, if you are scraping thousands of websites, you need to manually figure out the selector for each of them. And if the page changes, you need to change that as well.
Well, not anymore.
Today, you are going to learn how to perform automated price scraping with AI. You are going to use the power of AI to automatically get the CSS selector of the elements you want to scrape, so that you can do it at scale.

The final result
By the end of the day, you will have built a Node.js web scraper. But you can use the same method for pretty much any programming language you want.
You will get a method to extract the xPath from a regular product pricing page, like this one:
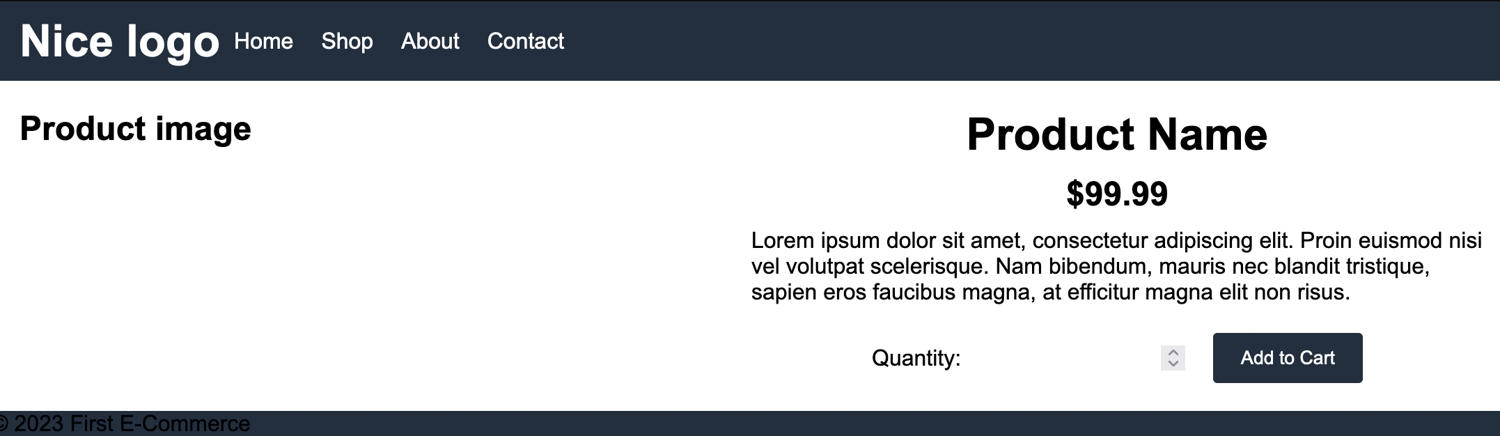
But without coding the xPath, using AI to do it.
This is basically a two-stages process:
Stage 1: Find the xPath for the price element for each of the target sites
Stage 2: Scrape the pages periodically using the rules you’ve found
Therefore, the first step is to send the websites to the AI so that it can figure out the web scraping rules for the elements you want to scrape.
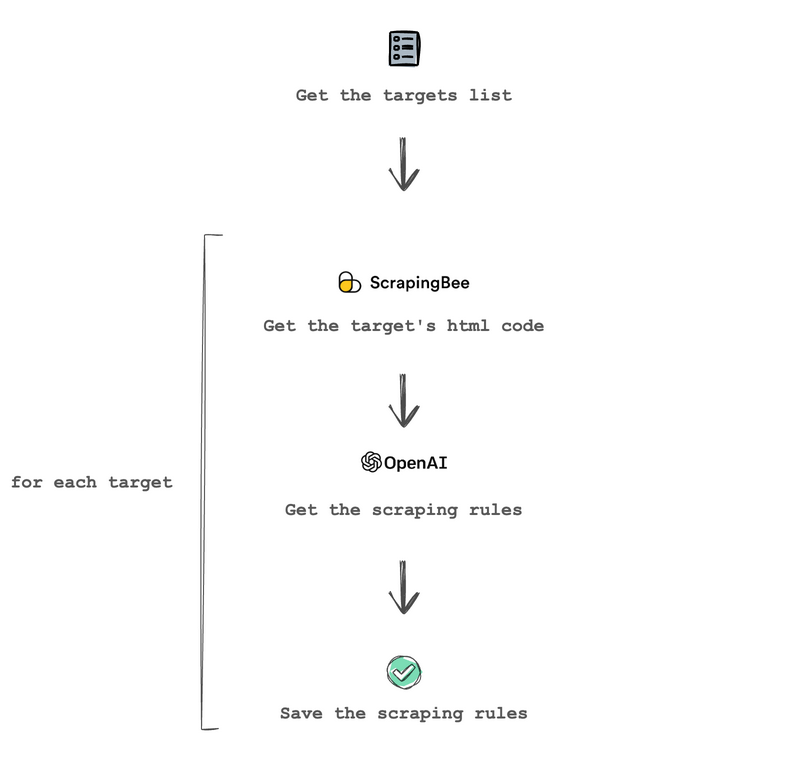
In this first stage, you get the targets list and use ScrapingBee to get the page’s source code. Then you send the source code to OpenAI along with the prompt to get the price scraping rules. Finally, you save the scraping rules for later use.
After that is done, you can just scrape the prices periodically as you would usually do. Like this:
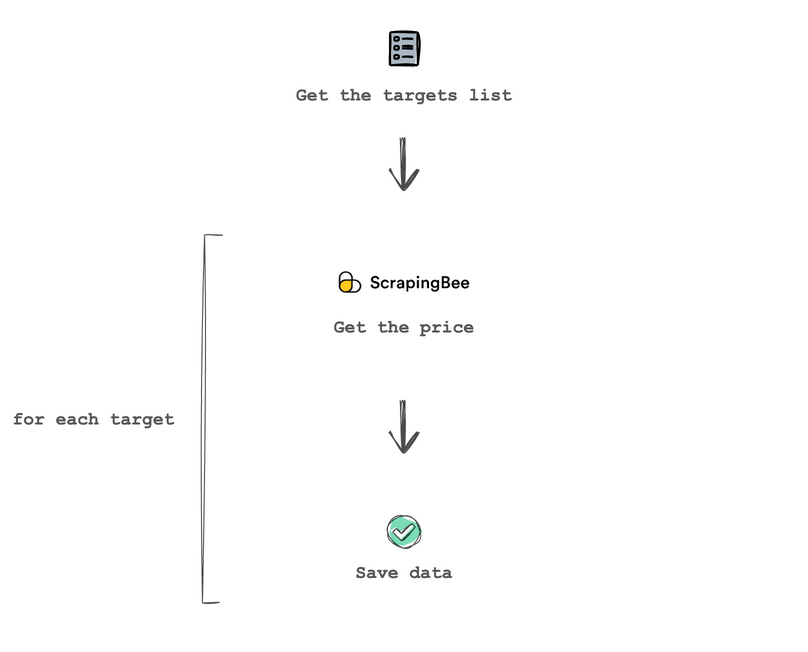
At this point, you just get the targets list, and use ScrapingBee to execute the scraping rules on each website and get the prices. Then you just need to save the prices, or process them in any way you want.
Let’s get started!
Prerequisites
These are the prerequisites to build your AI price scraping tool:
- Node.JS
- ScrapingBee’s Node.JS SDK
- OpenAI’s Node.JS Library
You can use other programming languages if you want, since both ScrapingBee and OpenAI provide libraries in other languages. In addition, you don’t really need the libraries, you can use regular API calls. So as long as your programming language (or even no code tool) can perform POST requests, you can use this same method.
You can install the ScrapingBee and OpenAI utilities using npm. Run this command:
$ npm init
$ npm install openai
$ npm install scrapingbee
You can get an OpenAI API key from their site. They might have some offers such as free credits when you sign up. Either way, testing it is quite inexpensive, given that it costs $0.002/1k tokens, you can process around 370,000 words for $1.
If you haven’t already, sign up for ScrapingBee and get 1,000 free API credits to test it as well.
Build a targets list
You can scrape prices from any site you want, but to make things easier, let’s use three dummy sites in this tutorial.
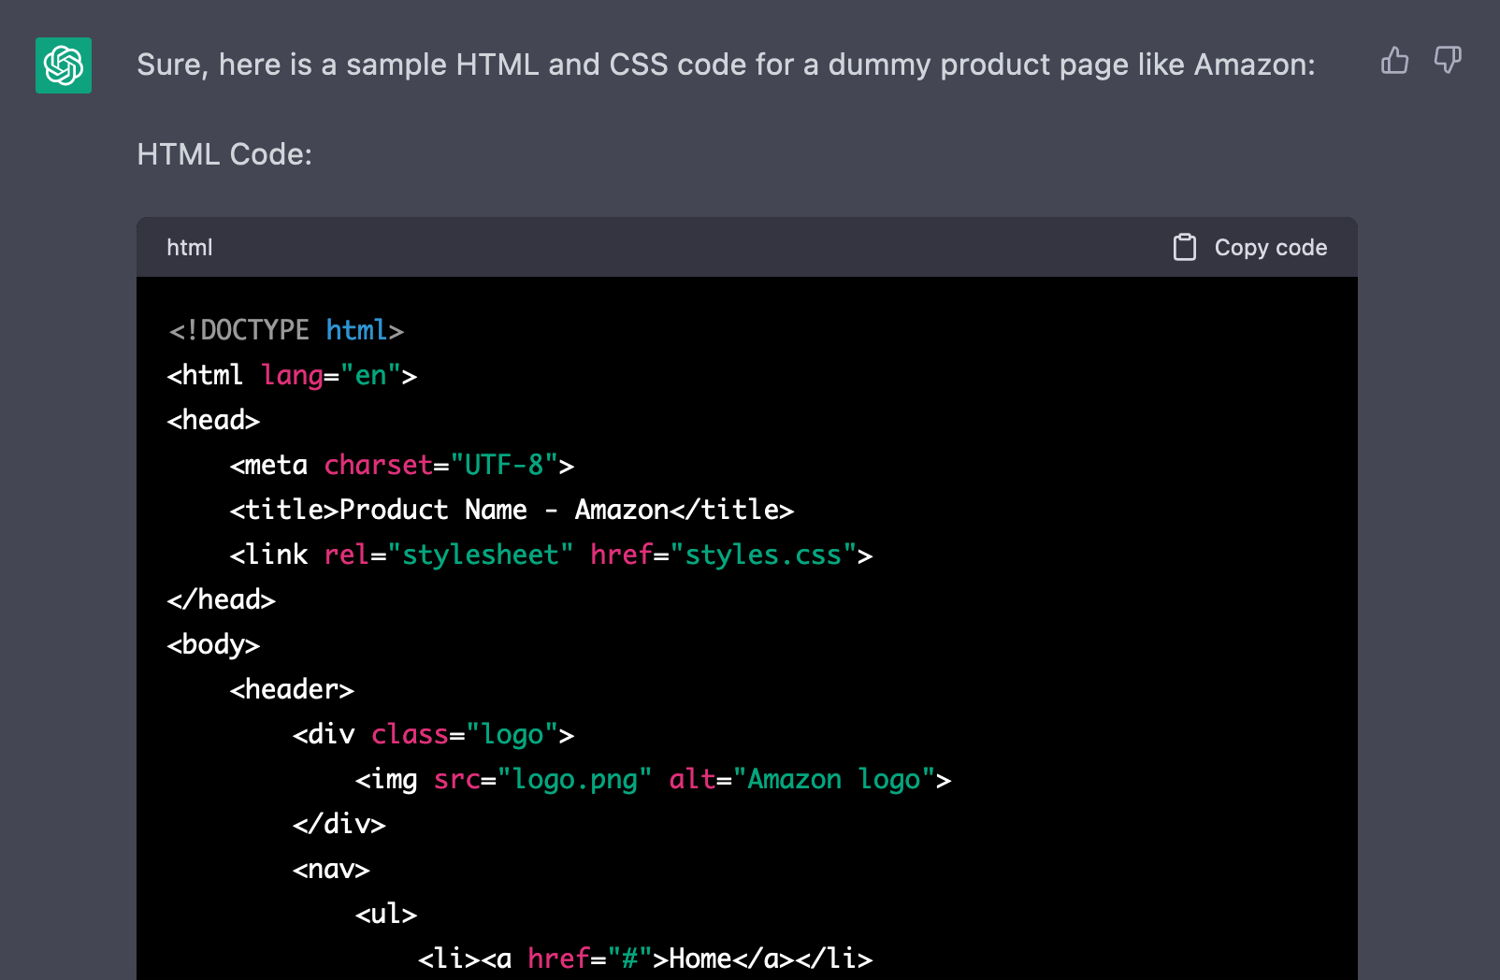
Since this is an AI tutorial, it makes sense to show a nice easter egg. Instead of manually coding the dummy sites, you can use ChatGPT to do it.
You can give ChatGPT a prompt to generate a product page to mimic Amazon’s website. And sure enough, it’s done in no time.
You can repeat this process as many times as you want. Let’s use three sample sites in this tutorial. The source code of each site is different, therefore, each site has its own xPath for the product price. That’s good enough to test how this method works in real life examples.
Here are the samples websites:
Craft a prompt to extract xPaths
Before you can use the OpenAI API, let’s play with ChatGPT or using the API Playground. This allows you to test prompts, see how it works for web scraping and find its limitations.
The real value of GPT is to give the CSS selector or xPath of an element without manually checking it. Thus, you need to find a prompt that gives you that.
Let’s try something really simple. Give ChatGPT the page link and ask for the price selector.
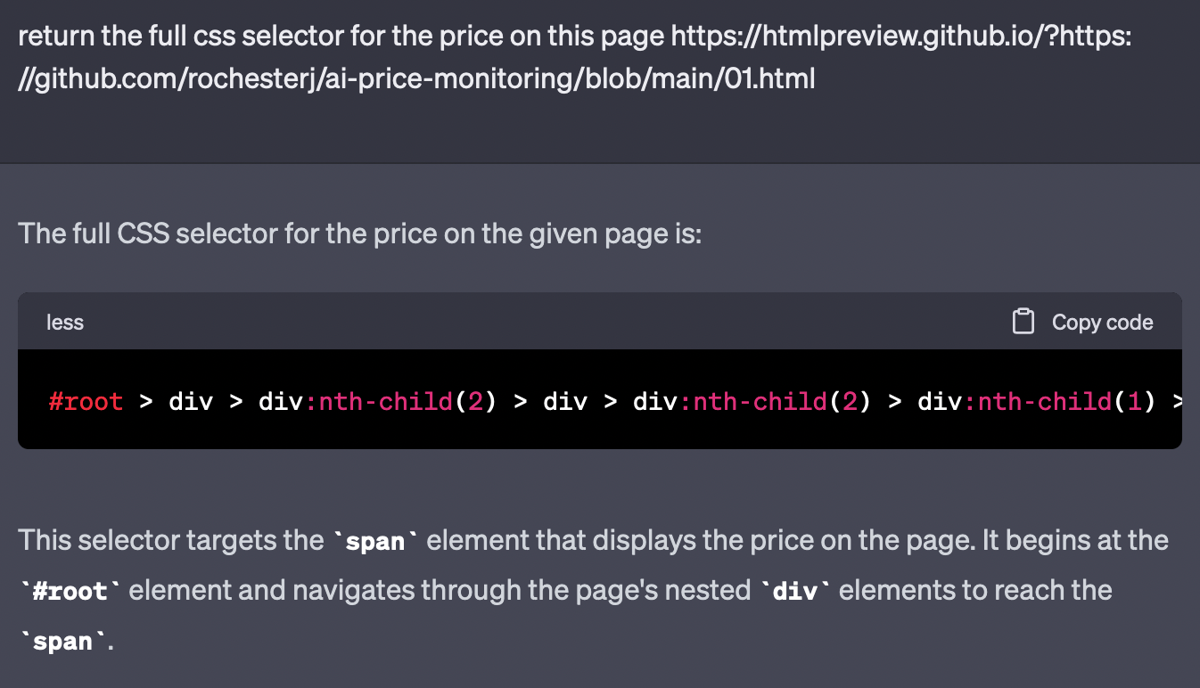
This seems like a good start. But the CSS selector is completely wrong. This leads to two important lessons:
- GPT can return completely false results with absolute confidence that makes you doubt yourself
- GPT can’t really access external websites (at least not without a plugin)
Therefore, just the pagelink isn’t enough. But you can send the source code and give a similar prompt to see how it works, replacing the brackets with the actual HTML code:
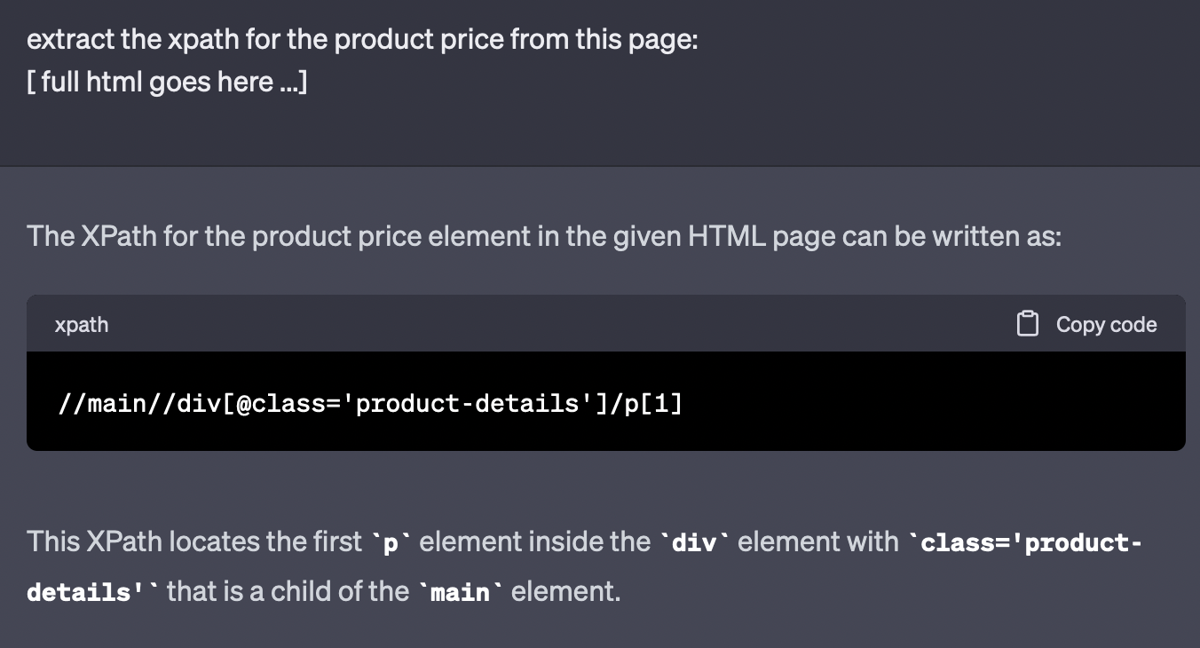
That’s great. This is the real xPath for that element.
But the answer is too verbose to be used directly. Your goal is to extract just the xPath or CSS selector for the price element. All this text will be removed.
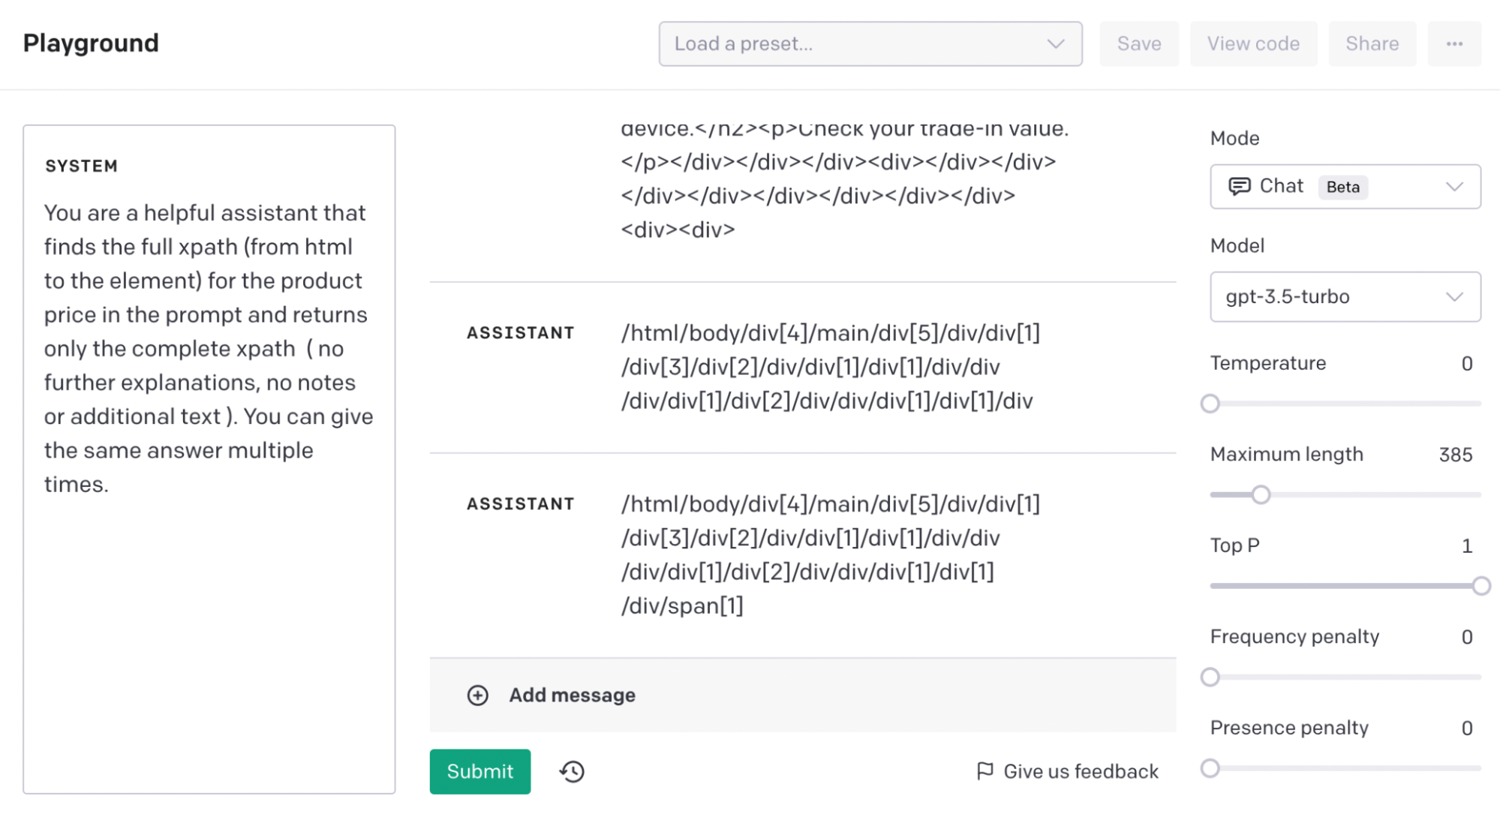
To test this, head over to the OpenAI playground. In it you can use the system prompt to tell GPT what exactly you are looking for. Here is an example:

In this case, you can use the system prompt to limit the answer to just the xPath and nothing else. Then you send the HTML code as the user message. The assistant gives exactly what you need, the xPath.
Now the proof of concept is done. You just need to bring it all together. You can use ScrapingBee to get the source code, and then send it to the OpenAI API.
It’s important to notice that OpenAI charges you by how many tokens you use. This means that longer prompts and longer answers are more expensive.
You can save a lot of tokens by striping out parts of the HTML code. For instance, you can remove the entire head tag, along with most HTML attributes. You can even get creative and remove other unused tags, such as img, videos, scripts, styles.
In short, the more you can remove from the HTML prompt without breaking the xPath, the better.
Use OpenAI and ScrapingBee to get the xPaths
A basic request using the ScrapingBee Node.JS SDK looks like this:
const scrapingbee = require('scrapingbee');
var sbApiKey = 'your ScrapingBee API key goes here';

async function getHTML(url) {
   var client = new scrapingbee.ScrapingBeeClient(sbApiKey);
   var response = await client.get({
      url: url,
      params: {
         // No parameters to use
      },
   });

   //the HTML code is here
   console.log(response.data);
   return response
}

getHTML('https://htmlpreview.github.io/?https://github.com/rochesterj/ai-price-monitoring/blob/main/01.html')
This code loads the SDK, and creates the getHTML function. You can use this function to extract the HTML code of any page, with no further instructions.
That’s exactly what you need. Now you just need to send this HTML code to the OpenAI API.
It’s worth mentioning that this is just the bare bones API connection for ScrapingBee. You can pass many parameters to perform actions such as:
- Extract rules: CSS or xPath rules to get elements from the page
- JS Scenario: Mimic user actions such as clicking buttons, filling in forms, scrolling, or even running JS code
- Wait / Wait for: Wait for a specific amount of time, or wait for an element before performing the actions
- Send cookies
- Custom headers
- Full page screenshots / Visible portion screenshots
- Custom browser size
You will need the extract rules parameter to extract the prices, but you can play with the other parameters if you want to perform other actions while scraping the target pages.
Moving on, you need to connect with the OpenAI GPT API. You can do it with this function:
const { Configuration, OpenAIApi } = require("openai");

const configuration = new Configuration({
  apiKey: 'your OpenAI API key goes here',
});
const openai = new OpenAIApi(configuration);

async function getPath( html ) {
   const completion = await openai.createChatCompletion({
     model: "gpt-3.5-turbo",
     messages: [
      { role: "system", content: "You are a helpful assistant that finds the full xpath (from html to the element) for the product price in the prompt and returns only the complete xpath   ( no further explanations, no notes or additional text ). You can give the same answer multiple times."},
      { role: "user", content: html }
     ],
   });
   console.log(completion.data.choices[0].message);

   return completion.data.choices[0].message.content
}
This code imports the Configuration and OpenAiApi classes from the OpenAI library. Then, it adds the API Key to the configuration module, and uses this configuration to start the API.
After that, it creates the getPath function, which gets the raw HTML code and sends it to the API using the system prompt you figured out earlier along with the HTML code as the message.
Note: We are using the GPT3.5 API in this example. You could use the GPT4 API if you have access to it, but it is considerably more expensive, for very similar results.
Now it’s time to bring these two together. Add this function call in your code:
getHTML('https://htmlpreview.github.io/?https://github.com/rochesterj/ai-price-monitoring/blob/main/01.html').then(async function (response) {
    var decoder = new TextDecoder();
    var html = decoder.decode(response.data);

    var path = await getPath(html);
    console.log(path);

}).catch((e) => console.log('Oops : ' + e.response.data));
This snippet gets the HTML code using ScrapingBee, and if it works correctly, it uses OpenAI to get the xPath. You can replace the console.log call with your desired action, such as saving these values in a database.
Run it with the three examples and you should get something similar to:
/** 001.html **/
/html/body/main/div[2]/p[@class='price']

/** 002.html **/
/html/body/main/div[2]/p[1]

/** 003.html **/
/html/body/main/div[1]/div[2]/p[1]
Notice that there are many different valid xPaths for an element. So you might see slightly different values each time you run it.
Price scraping with ScrapingBee
Now you have the CSS rules, you can get the prices using ScrapingBee. You can use this function to do it:
const scrapingbee = require('scrapingbee');

var sbApiKey = 'your ScrapingBee API key goes here';

async function getPrice(url, xPath) {
  var client = new scrapingbee.ScrapingBeeClient(sbApiKey);
  var response = await client.get({
    url: url,
    params: {
        extract_rules: { "price": xPath},
    },
  })
  return response
}


getPrice('https://htmlpreview.github.io/?https://github.com/rochesterj/ai-price-monitoring/blob/main/01.html', "/html/body/main/div[2]/p[@class='price']").then(function (response) {
    var decoder = new TextDecoder();
    var text = decoder.decode(response.data);
    console.log(text);
}).catch((e) => console.log('A problem occurs : ' + e.response.data));
This code loads the ScrapingBee SDK and your API key. The getPrice function returns the price from a URL and an xPath. You can call it passing the values you got from the previous step in a loop, or for specific URLs.
Then you can replace the console.log with your desired action, such as saving the price.
Real life tests
To make sure this works as intended, you can test these snippets in real websites. For example, let’s scrape the price for a MacBook Air on BestBuy, following the same steps as the tutorial.
This is the URL we will scrape: https://www.bestbuy.com/site/macbook-air-13-6-laptop-apple-m2-chip-8gb-memory-256gb-ssd-latest-model-midnight/6509650.p?skuId=6509650
If you look at the source code of this page, you’ll notice that it is quite big. The OpenAI API can handle tens of thousands of characters per request, but sites like BestBuy and Amazon can have pages with hundreds of thousands of characters.
Thus, you need to optimize the code.
There are many ways to reduce the request without breaking the xPath structure. A simple approach is to remove unecesary tags, tag attributes and then limit the size of the html code to a specific character count.
You can use this function to remove tags:
function removeTag( tagname ) {
  var tags = document.getElementsByTagName(tagname);
  var l = tags.length; for (var i = 0; i < l; i++) {
    tags[0].parentNode.removeChild(tags[0]);
  }
}
And this function can remove all tag attributes, making the remaining tags much simpler:
function removeAttr( tagname ) {
  var tags = document.getElementsByTagName(tagname);

  var l = tags.length; for (var i = 0; i < l; i++) {
    var el = tags[i];
    Array.prototype.slice.call(el.attributes).forEach(function(attr) {
    el.removeAttribute(attr.name);
    });
  }
}
You can limit the size of the html output with something as simple as this:
text = text.substring(0, 10000);
Now you can use the JS Scenario in your ScrapingBee API call. It allows you to run arbritary code, such as the functions to remove tags and attributes. After that, run the code to limit the size of the HTML output variable.
This is an updated version of the getHTML function with these rules:
var js_scenario = {
  "instructions":[
    {"wait":20000},
    {"evaluate":"function removeTag( tagname ) { var tags = document.getElementsByTagName(tagname); var l = tags.length; for (var i = 0; i < l; i++) { tags[0].parentNode.removeChild(tags[0]); } }function removeAttr( tagname ) { var tags = document.getElementsByTagName(tagname); var l = tags.length; for (var i = 0; i < l; i++) { var el = tags[i]; Array.prototype.slice.call(el.attributes).forEach(function(attr) { el.removeAttribute(attr.name); }); } } var tagslist = ['iframe', 'img', 'link', 'script', 'style', 'hr', 'option', 'select', 'svg', 'video', 'input', 'nav', 'button', 'head']; tagslist.forEach( function(element) { removeTag( element ) }); tagslist = ['div', 'a', 'span', 'i', 'u', 'b', 'td', 'li', 'ul']; tagslist.forEach( function(element) { removeAttr( element ) });"}
  ]
}

async function getHTML(url) {
  var client = new scrapingbee.ScrapingBeeClient(sbApiKey); // New ScrapingBee client
  var response = await client.get({
    url: url,
    params: {
    js_scenario: js_scenario,
    },
  })

  return response
}

getHTML('https://www.bestbuy.com/site/macbook-air-13-6-laptop-apple-m2-chip-8gb-memory-256gb-ssd-latest-model-midnight/6509650.p?skuId=6509650').then(function (response) {
    var decoder = new TextDecoder();
    var text = decoder.decode(response.data);
    text = text.substring(0, 10000);
    console.log(text);
}).catch((e) => console.log('A problem occurs : ' + e.response.data));
When you run this function, you get something like this as the result:

Now you can send this slimmer HTML code to the getPath function. You'll get a response like this one:
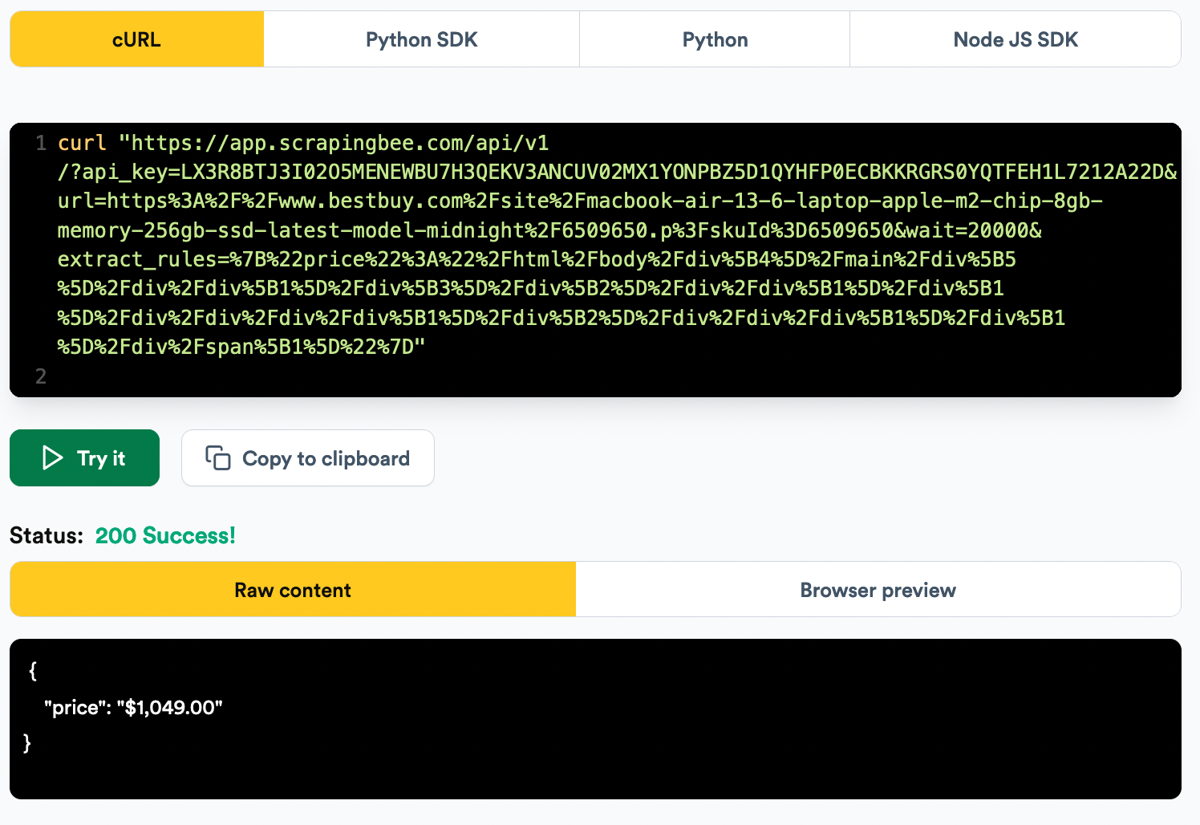
Finally, run the web scraping script using some extraction rules with that XPath and you should get the price:
Conclusion
Today you learned how you can use the ScrapingBee API with the OpenAI GPT API to scrape prices automatically. You can use this same method to extract other data points, as well as use it in different programming languages.
It’s worth mentioning that you should always double-check the results coming from GPT. Just like any piece of software, it might not work as planned, therefore, if you want to use this in a commercial setting make sure to implement error handling and safeguards.
With multi-modal promt coming soon in chatGPT, we might be able to use screenshot + HTML to extract data from websites that are not as structured as Amazon or BestBuy. We’ll keep you posted on that.
We hope you’ve enjoyed it, and see you again next time!
If you're interested in AI and web scraping, we have also written on how to build a job board with web scraping and ChatGPT.