Screen Scraping with ScrapingBee
Screen scraping is a popular form of data extraction that involves extracting visual data from the screen. It's typically done by taking a screenshot and then, optionally, processing it via OCR or a similar technology. Screen scraping is useful for various purposes ranging from detecting visual changes in a website to extracting data from an ancient user interface without a proper API.
In this tutorial, you'll see how to do screen scraping with ScrapingBee, a screen scraping and web scraping solution. You'll be taking different types of screenshots of a website: full-page screenshots, visible-area screenshots, and custom-area screenshots using CSS selectors.
Setting Up the Prerequisites
Since you'll use ScrapingBee, you need to sign up for a free account and set it up.
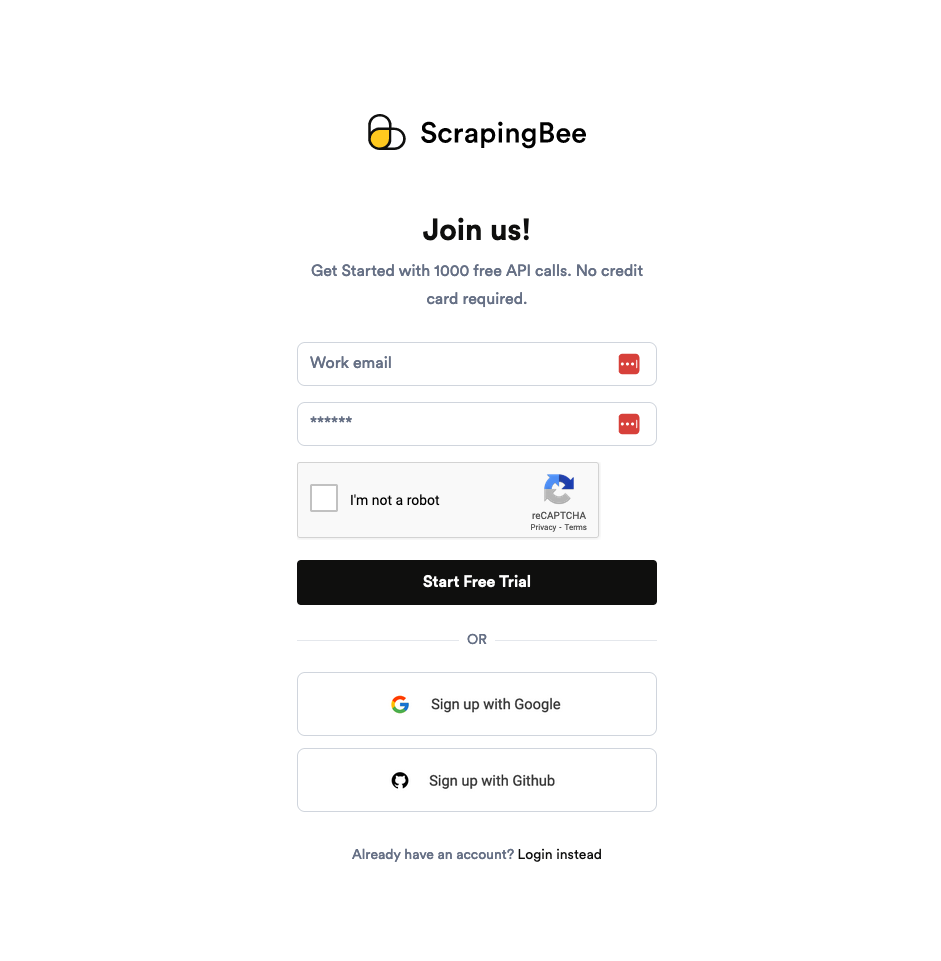
Create an Account on ScrapingBee
Navigate to ScrapingBee's sign-up page and complete the account registration details. You can also sign up using your Google or GitHub account:
After signing up, you'll receive an email to confirm your account.
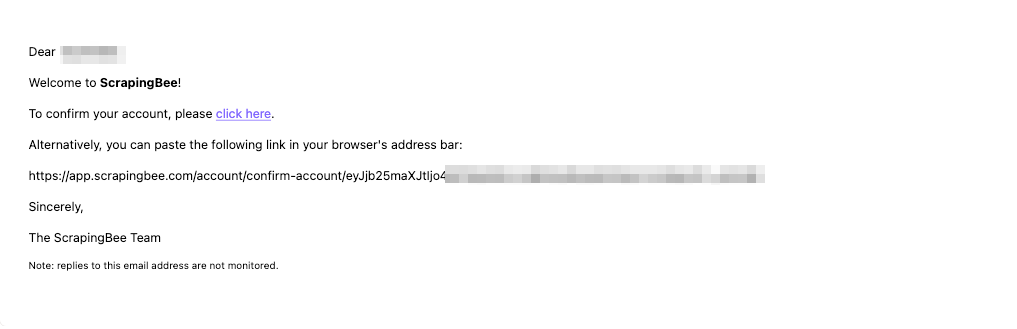
Click on the click here link, which should take you to your ScrapingBee dashboard:
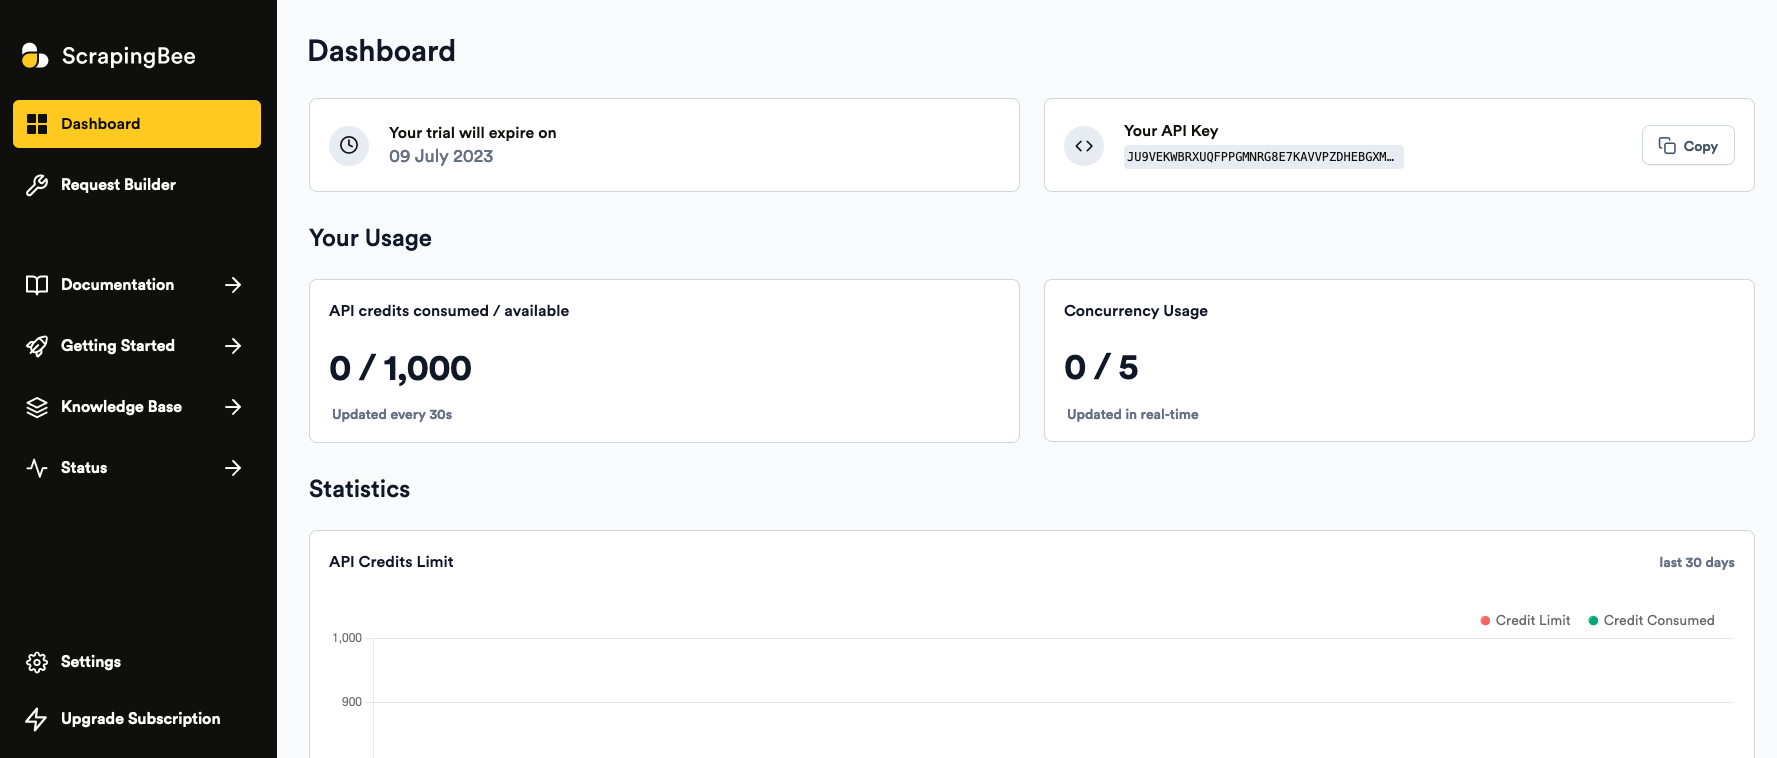
Here you can see your API Key, your trial expiration date, and the number of API credits you have remaining.
As you can see, you receive a thousand free credits when you sign up.
Copy your API key as you will need it later in the tutorial.
Pick a Programming Language
ScrapingBee supports multiple programming languages for you to choose from.
For simplicity, you will make use of the platform via Python for this tutorial, specifically Python version 3.10.0. The code examples should also work for versions 3.7 and up.
You can check your Python version by opening up the terminal and running the following:
python --version
Set Up ScrapingBee's Python SDK
Open your terminal and create a new folder with a new app.py file within it to store all of the code for this tutorial:
$ mkdir screen_scraping
$ cd screen_scraping
$ touch app.py
Next, install ScrapingBee's Python SDK. You can do so using pip:
$ pip install scrapingbee
To make sure everything is set up correctly, fire up the Python REPL and type in the following code:
from scrapingbee import ScrapingBeeClient
If there are no errors, everything works correctly and you can move on to the next step.
Taking Screenshots Using ScrapingBee
ScrapingBee supports three different ways of taking web page screenshots:
- Taking a screenshot of the visible section of the page
- Taking a screenshot of the whole page
- Taking a screenshot of a particular CSS selector
In this tutorial, you will learn how to do all three.
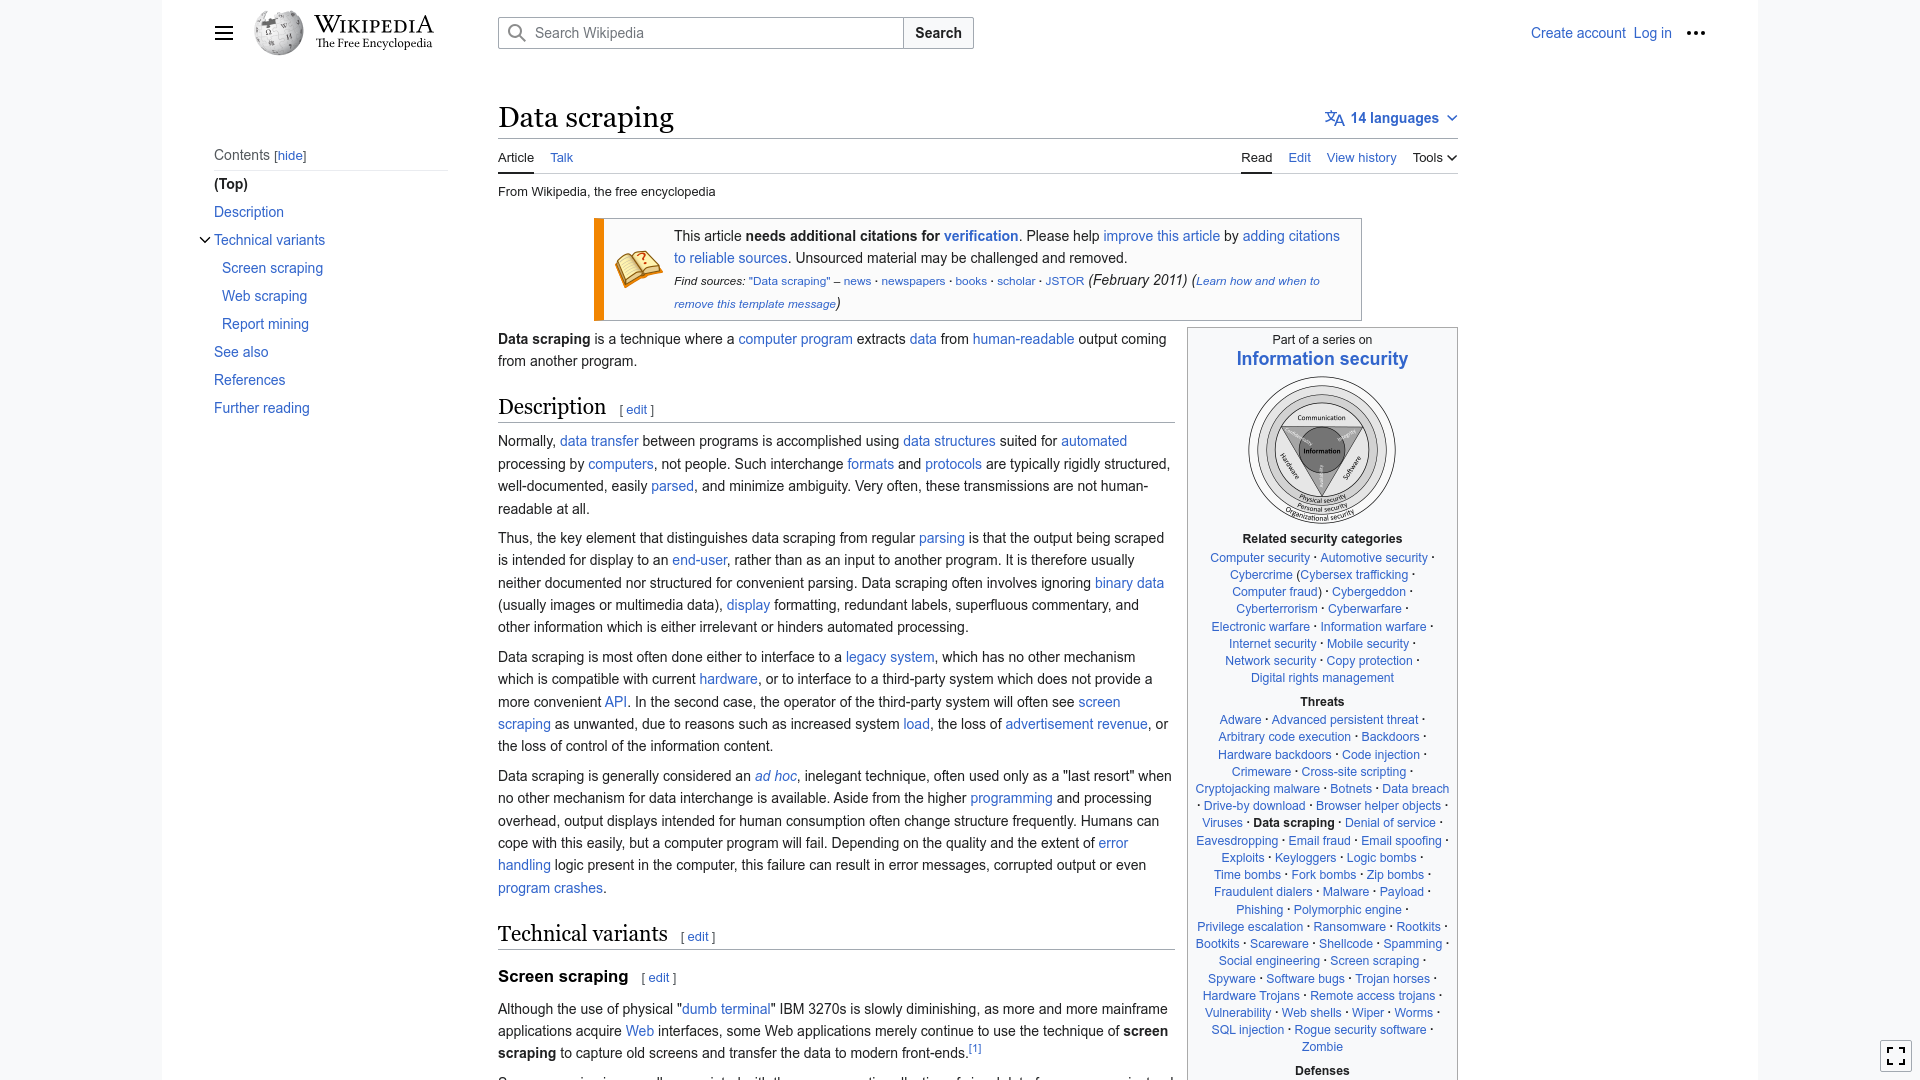
This tutorial uses the Wikipedia page on data scraping, but you can easily adapt these steps to take screenshots of any website of your choice.
Taking Screenshots of the Visible Section of a Page
If you don't pass in any explicit screenshot instructions, ScrapingBee will default to taking screenshots of the visible section of a webpage.
To try out this mode, open the app.py file and paste in the following code:
from scrapingbee import ScrapingBeeClient

client = ScrapingBeeClient(api_key='YOUR-API-KEY')

response = client.get(
	'https://en.wikipedia.org/wiki/Data_scraping',
	params={
    	'screenshot': True,
	}
)

if response.ok:
	with open("./screenshot.png", "wb") as f:
    	f.write(response.content)
    	print("Successfully saved the screenshot!")
Note: Make sure you replace YOUR-API-KEY with the API key you copied from your ScrapingBee dashboard.
This code creates a new ScrapingBeeClient object using your API key and then asks ScrapingBee to screenshot the Wikipedia page by passing in the 'screenshot': True parameter. If the response is successful, it creates a new screenshot.png file and writes the content of the response to it.
Save the app.py file with the updated code and run it from the terminal like this:
$ python app.py
If everything works correctly, you should see this output:
Successfully saved the screenshot!
It should also have created a new screenshot.png file in the screen_scraping folder, which should resemble this:
The size of this screenshot matches the default viewport of ScrapingBee's browser. You can change the dimensions of the default viewport while sending a request to ScrapingBee like this:
from scrapingbee import ScrapingBeeClient

client = ScrapingBeeClient(api_key='YOUR-API-KEY')

response = client.get(
	'https://en.wikipedia.org/wiki/Data_scraping',
	params={
    	'screenshot': True,
    	'window_width': '700',
    	'window_height': '1000',
	}
)

if response.ok:
	with open("./screenshot.png", "wb") as f:
    	f.write(response.content)
    	print("Successfully saved the screenshot!")
This code should output an image of 700 × 1,000 pixels as the viewport size is set to these dimensions.
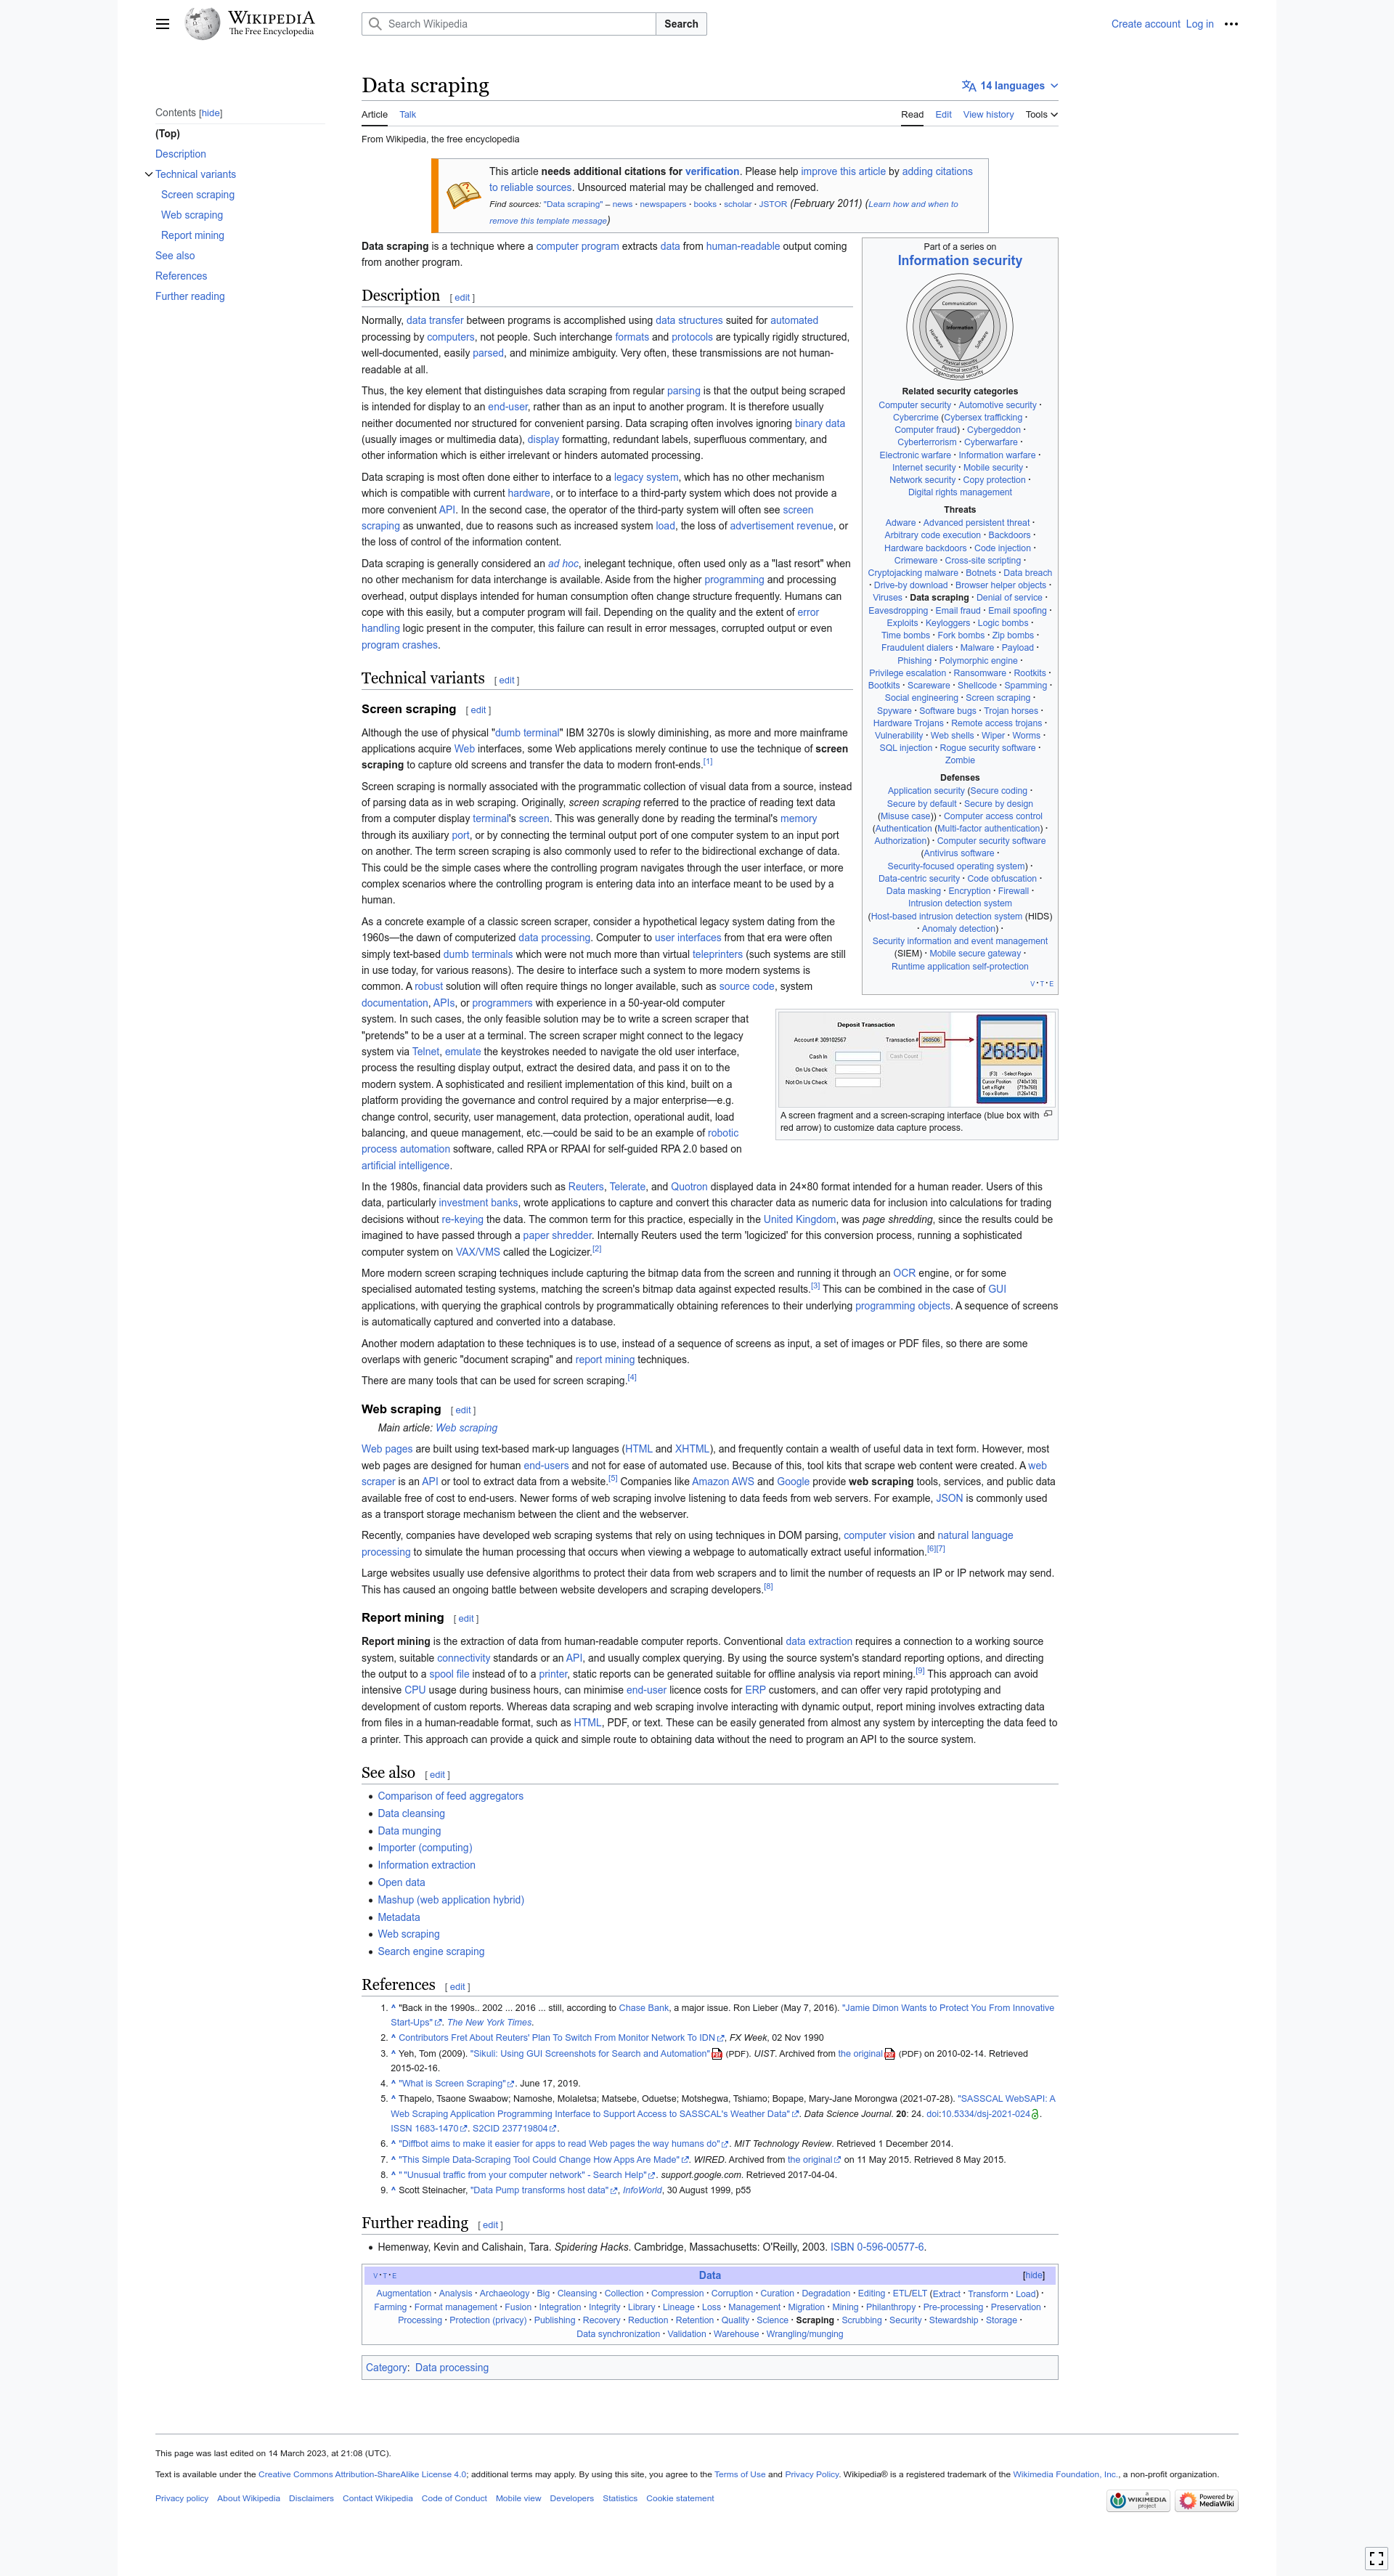
Taking a Screenshot of the Whole Page
You can take a screenshot of the full page by only slightly modifying your code. Edit the app.py file and replace the client.get method call with this:
response = client.get(
	'https://en.wikipedia.org/wiki/Data_scraping',
	params={
    	'screenshot': True,
    	'screenshot_full_page': True,
	}
)
In this modified code, you are sending an additional 'screenshot_full_page': True parameter to ScrapingBee.
Run the app.py file again and you should see a new PNG file in the screen_scraping folder containing the full Wikipedia page:
You can again modify the viewport size as part of the client.get method call for a full-page screenshot. It's particularly useful in cases such as when you want to mimic a mobile browser's viewport.
Taking a Screenshot of a Particular CSS Selector
Your third option is to take a screenshot of a particular section of the page using CSS selectors.
This method requires a little knowledge of CSS selectors and how they work. CSS selectors can uniquely identify almost any section on a page, and ScrapingBee makes extensive use of CSS. You can learn more about them in this in-depth tutorial.
ScrapingBee allows you to pass in a CSS selector via the screenshot_selector parameter to screenshot only that part of the page that matches this selector.
Let's suppose you want to screenshot the sidebar from the Wikipedia page. To find out which CSS selector to use, open the page in your browser of choice (I am using Firefox). Right-click on the sidebar, and click on Inspect to open the developer tools window. From here, you can observe that the sidebar is encapsulated in a table tag and has classes sidebar nomobile nowraplinks hlist.
This is what it looks like in Firefox:
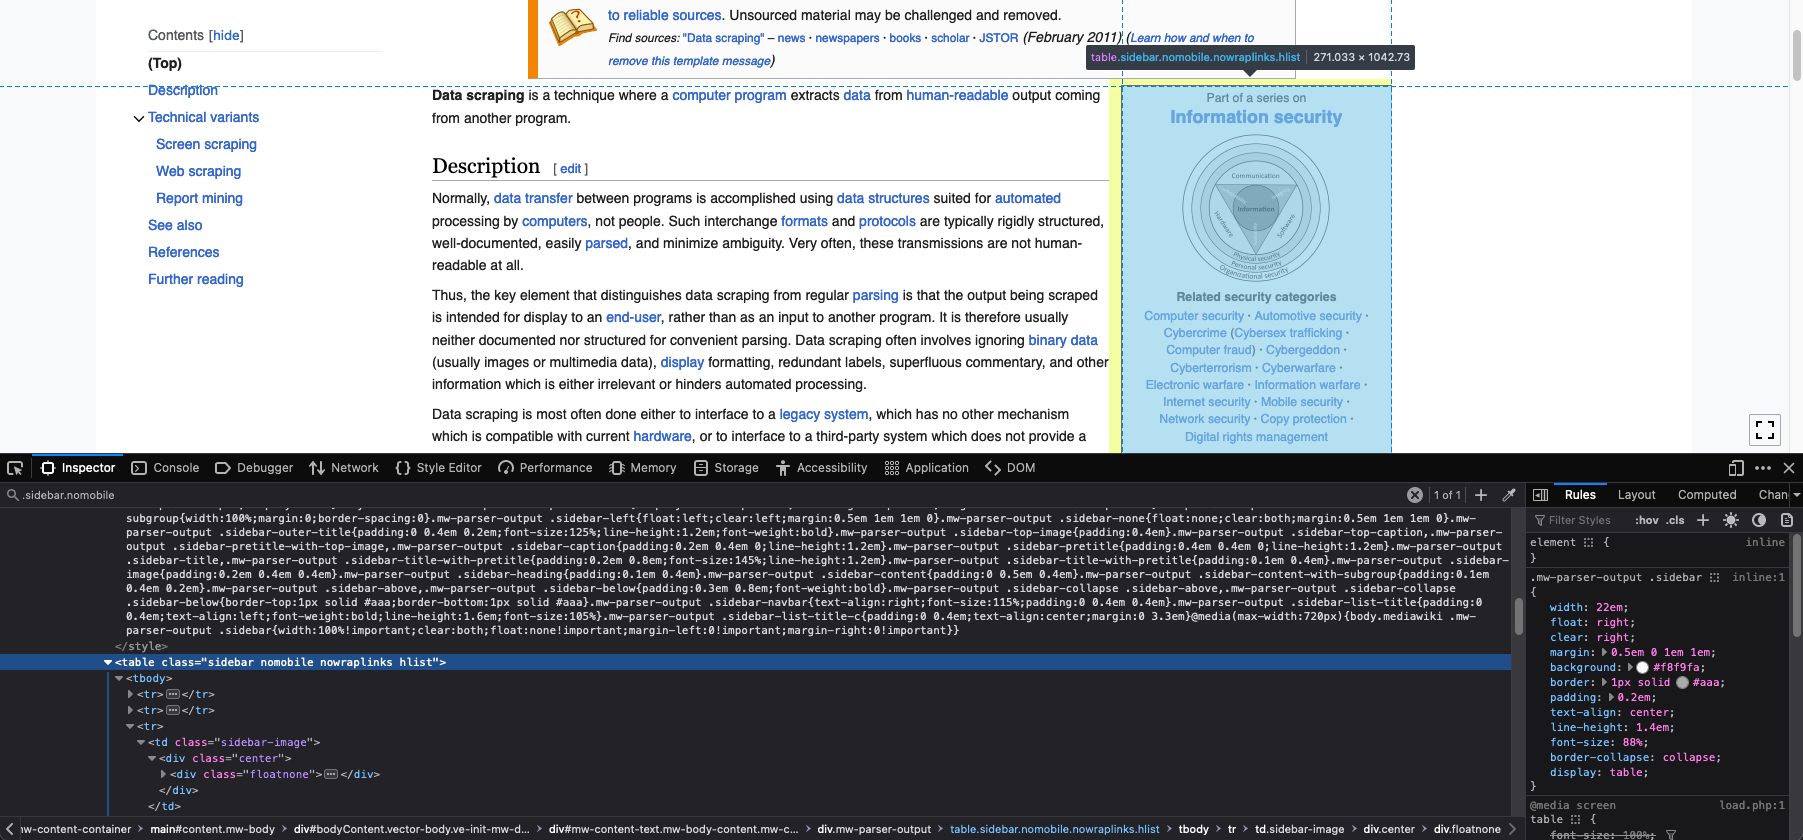
The CSS selector for the sidebar, in this case, will be table.sidebar.nomobile.nowraplinks.hlist. You can even omit the last two CSS classes and still uniquely identify this sidebar.
Go ahead and update the client.get method call in your app.py file like this:
response = client.get(
	'https://en.wikipedia.org/wiki/Data_scraping',
	params={
    	'screenshot': True,
    	'screenshot_selector': 'table.sidebar.nomobile',
	}
)
When you run the updated app.py file, you should see a new screenshot.png file in the screen_scraping folder with only the sidebar in it:
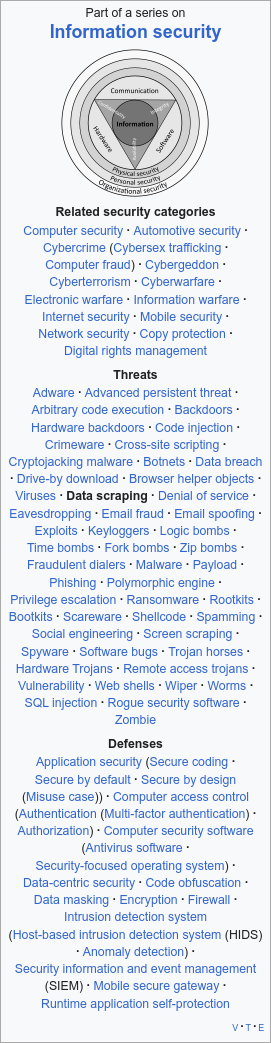
This is a very powerful technique to screenshot only those areas of the web page that you care about. It also saves a lot of post-processing time, where you would traditionally have to crop the image using an image editor.
Conclusion
In this tutorial, you learned how to use ScrapingBee to take screenshots of the visible section of a page and the full page as well as how to adjust the dimensions of the screenshot. You also learned how to use CSS selectors to take screenshots of a particular section of a web page. As you saw, switching between these three options is as easy as changing one line of code.
ScrapingBee shines when you have to do screen scraping on websites with strong anti-bot measures. ScrapingBee will make sure you only get charged for successful responses and that your requests do not get blocked.
So if you prefer not to have to deal with rate limits, proxies, user agents, and browser fingerprints, check out our no-code web scraping API. Your first 1,000 API credits are free!

Yasoob is a renowned author, blogger and a tech speaker. He has authored the Intermediate Python and Practical Python Projects books ad writes regularly. He is currently working on Azure at Microsoft.